Within the refinement section of this project, I was working on two resolved pieces of work. My installation would consist of my machine knitted work and my hand knitted ceramic objects all connected by long pieces of cotton yarn. My second piece of work would consist of 2 hand knitted cabled objects and a hand knitted ceramic cabled object, these being a way of comparing the similarities and differences of the materials and showing my refined process for the ceramic.
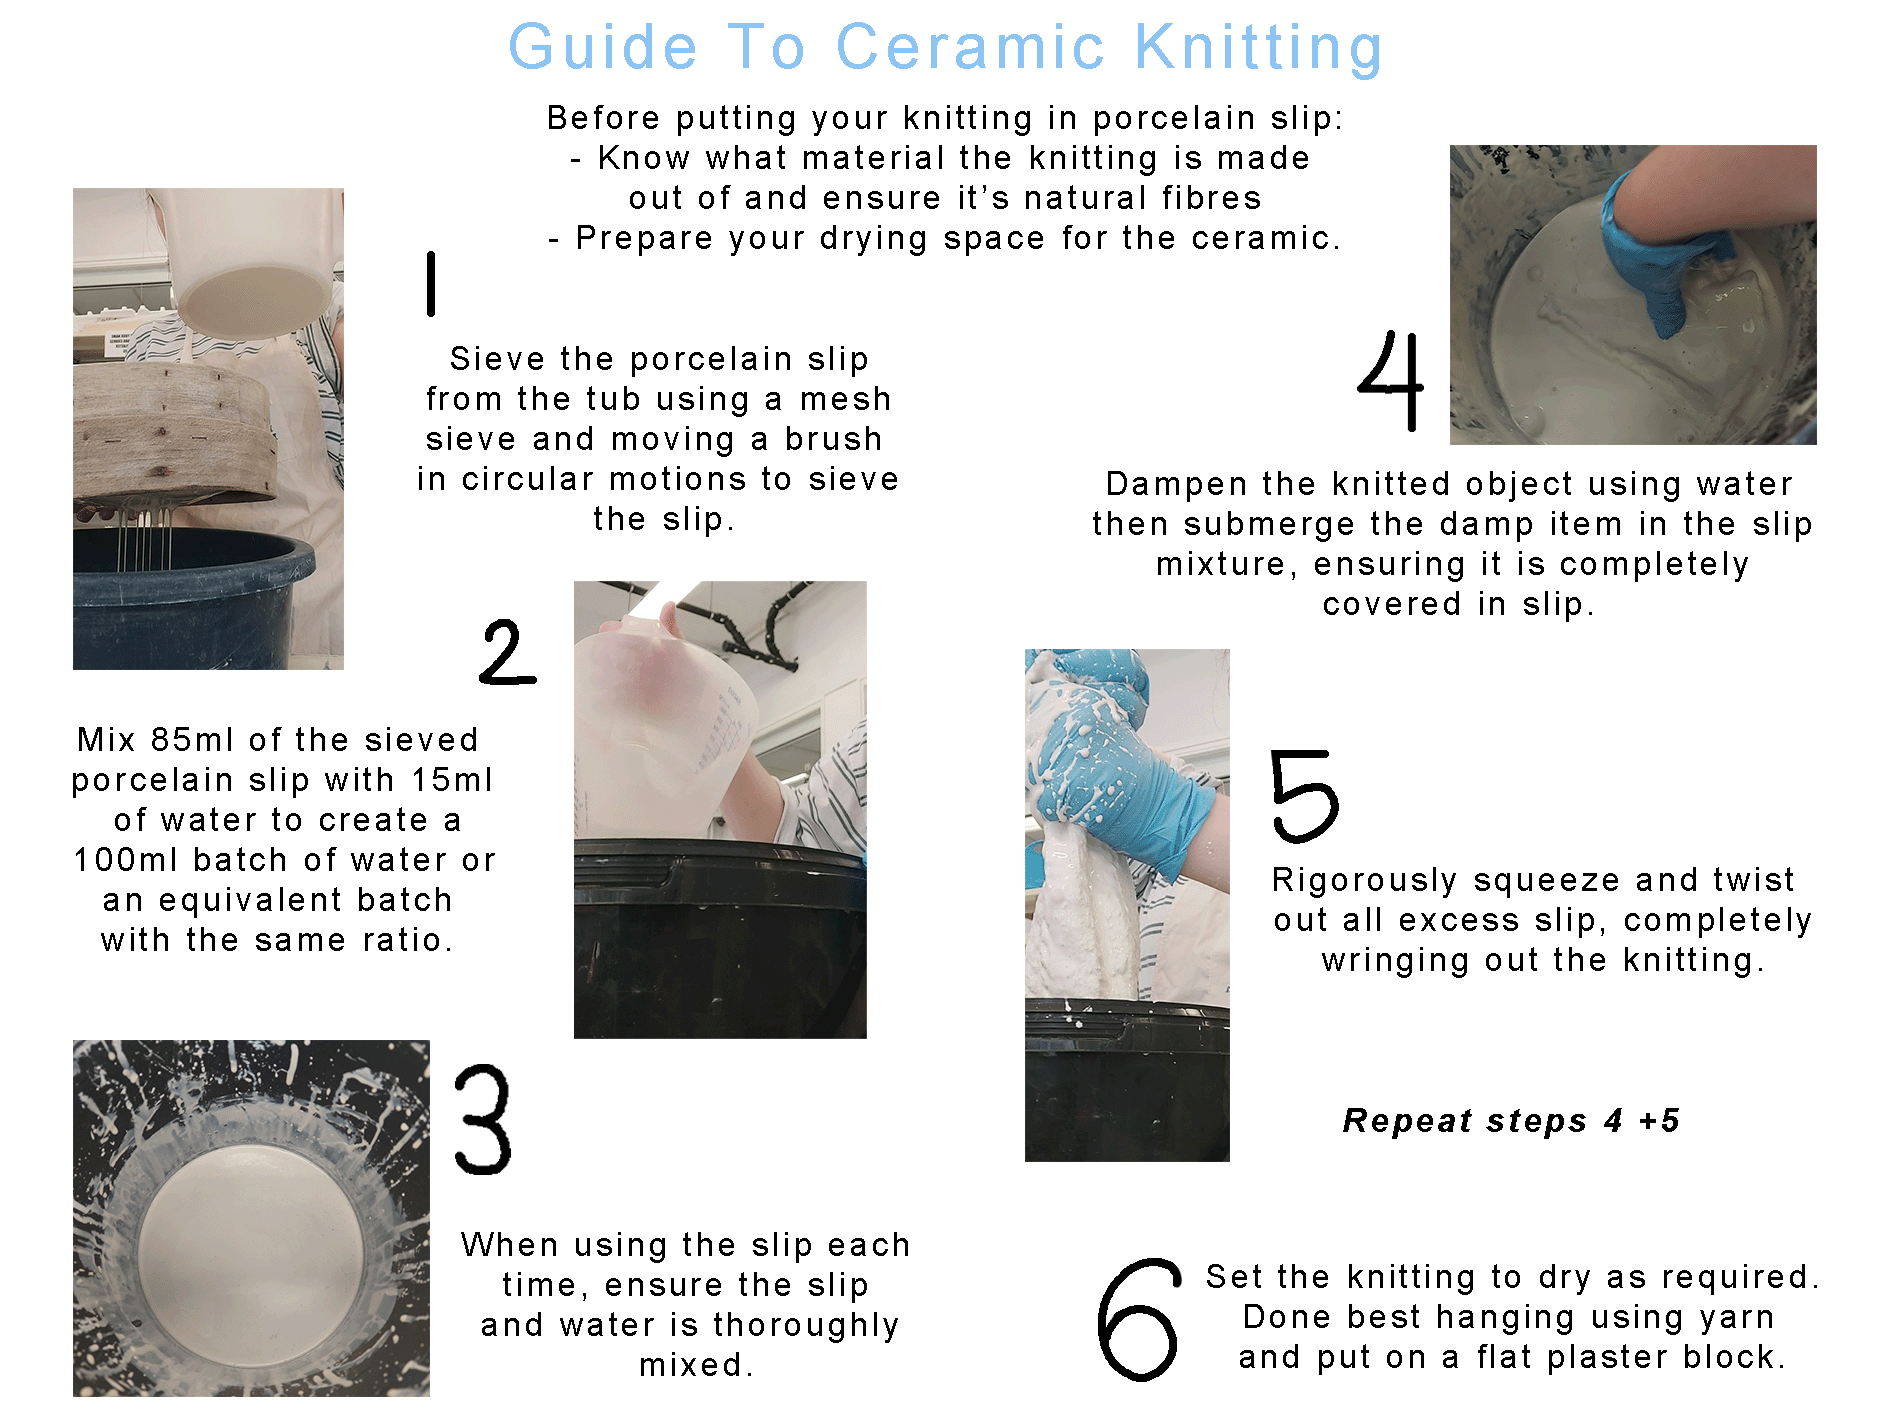
Creating a 100ml Batch of Porcelain Slip at 85:15 consistency
To create a 100ml batch of slip I first of all sieved the porcelain slip to ensure there were no lumps or flakes. I then collected 85ml of the sieved slip and added in 15ml of water, ensuring that both liquids were fully mixed. I then added this to a fully sealable tub, ensuring the lid is always clean and trying to ensure it is sealed whenever possible to slow the creation of bacteria within the slip.
This differs from the process that I had been using before as I hadn't sieved the slip or watered it down. I still wanted to ensure that throughout the rest of the process, I was sticking to what I had done before and to quickly get all excess slip out of the piece to ensure no thickening of the slip on the yarn.
Ceramic + Hand Knitting
1

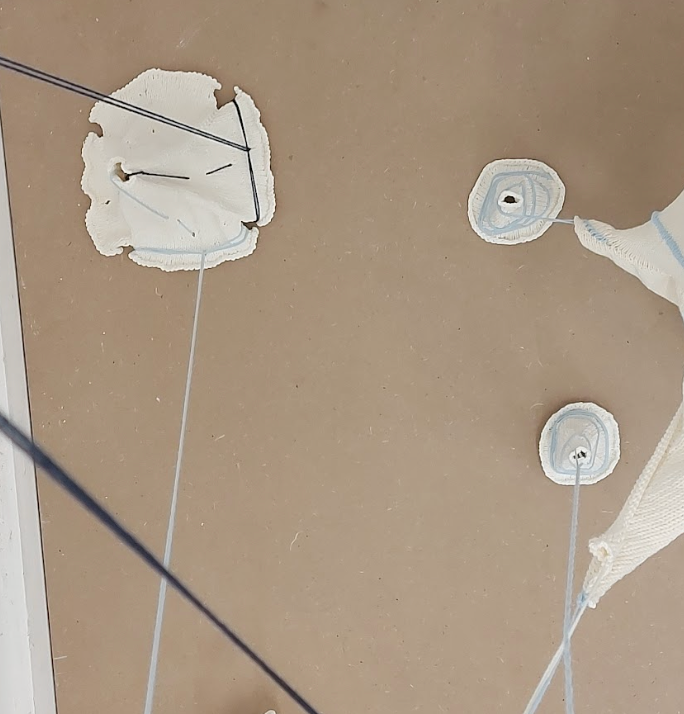
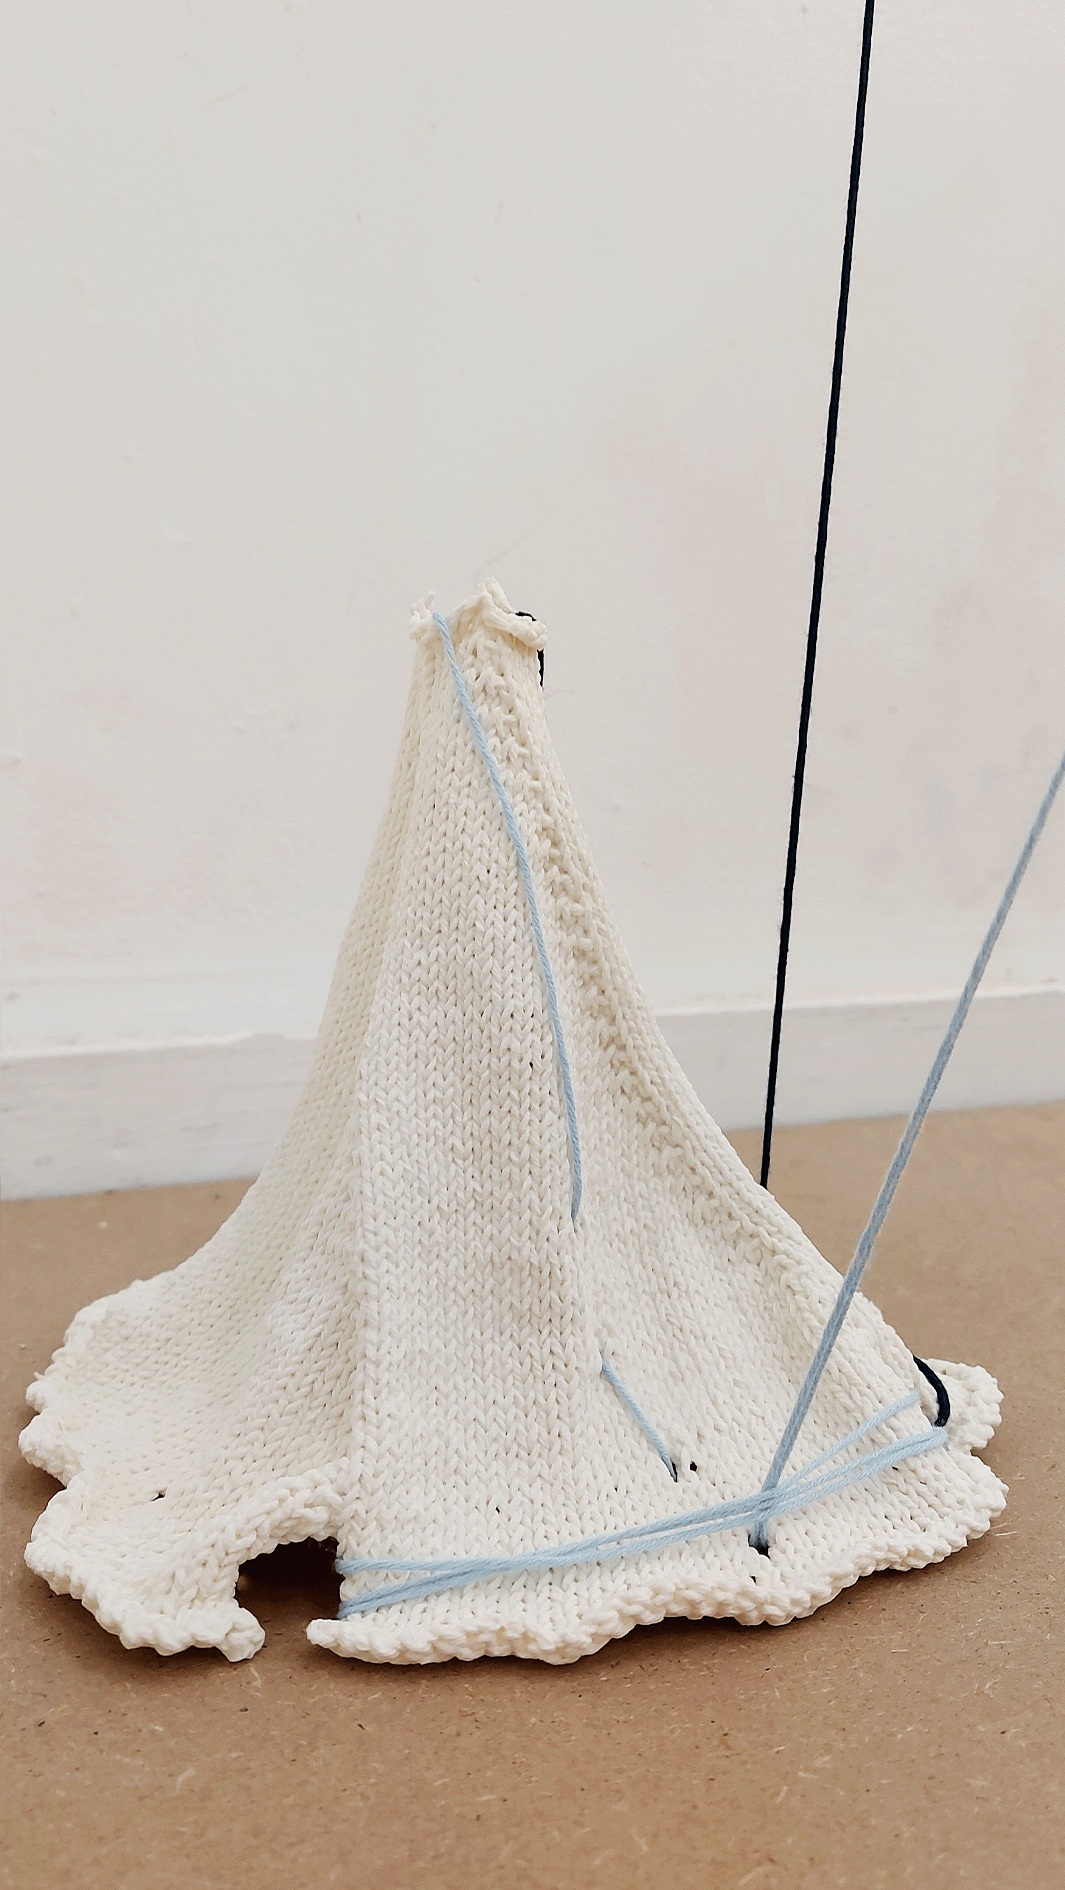
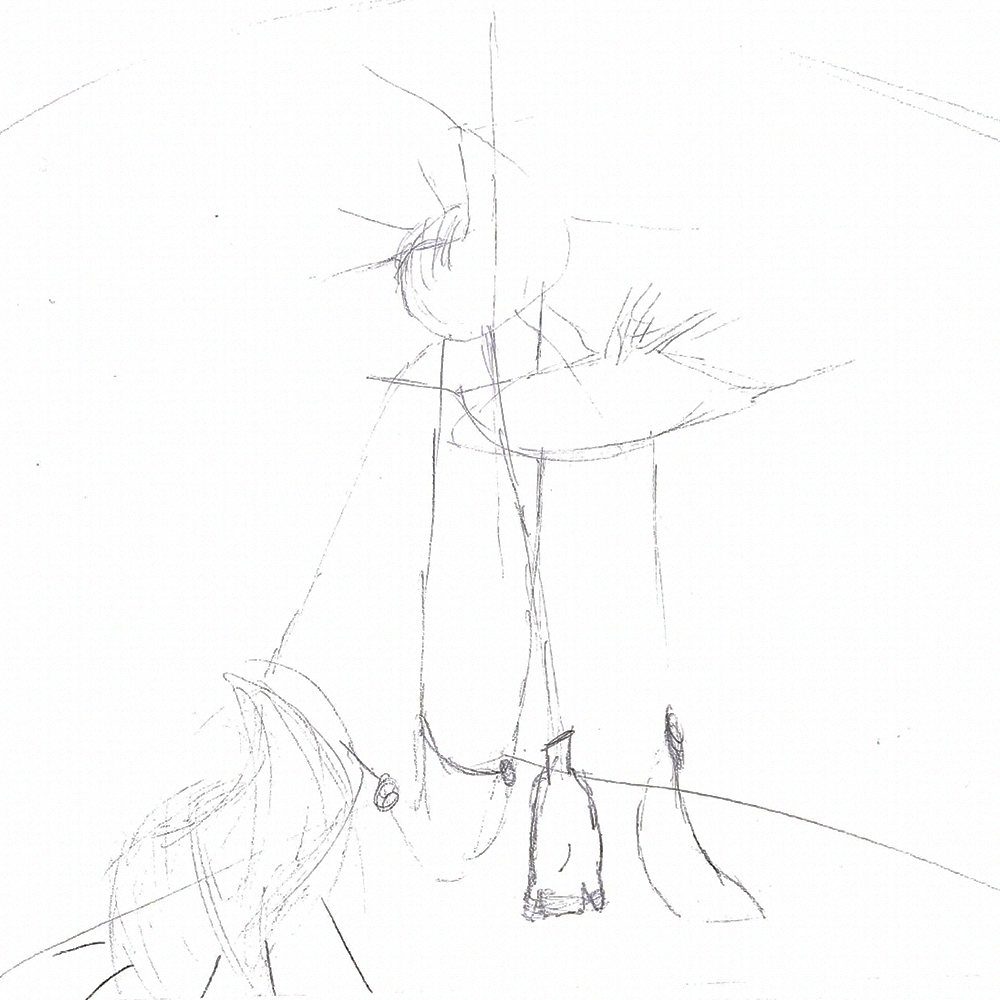
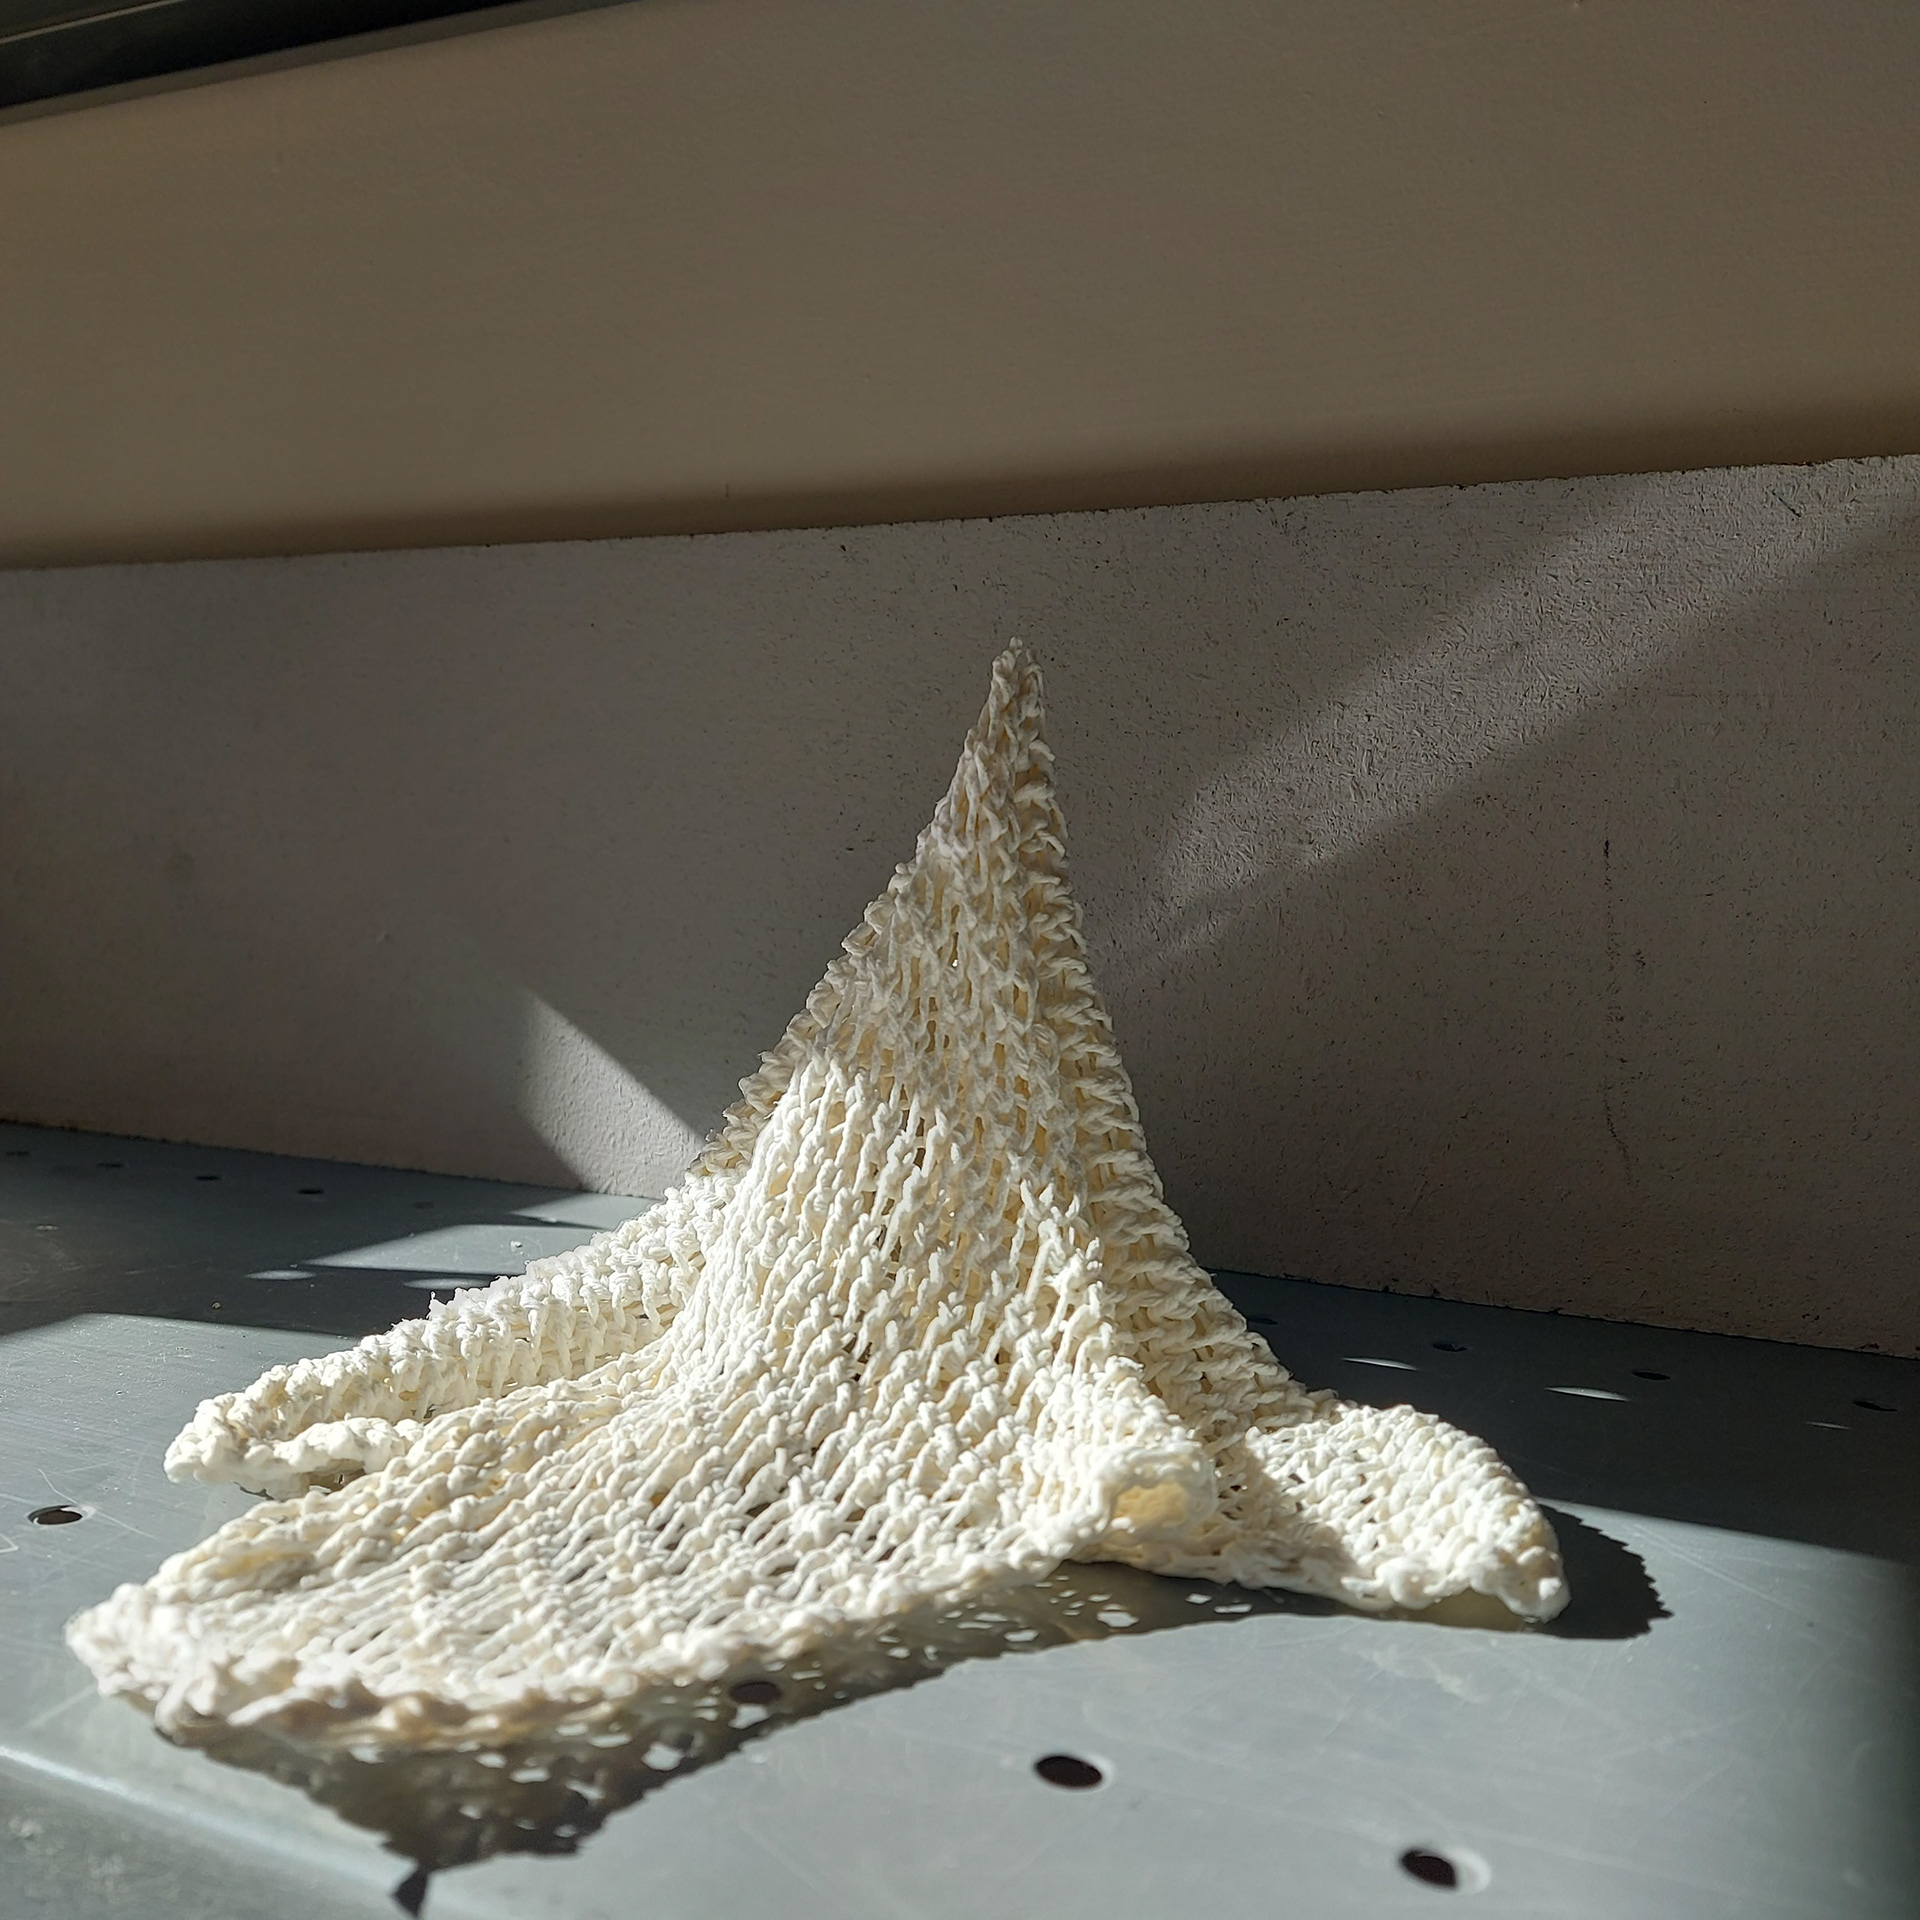
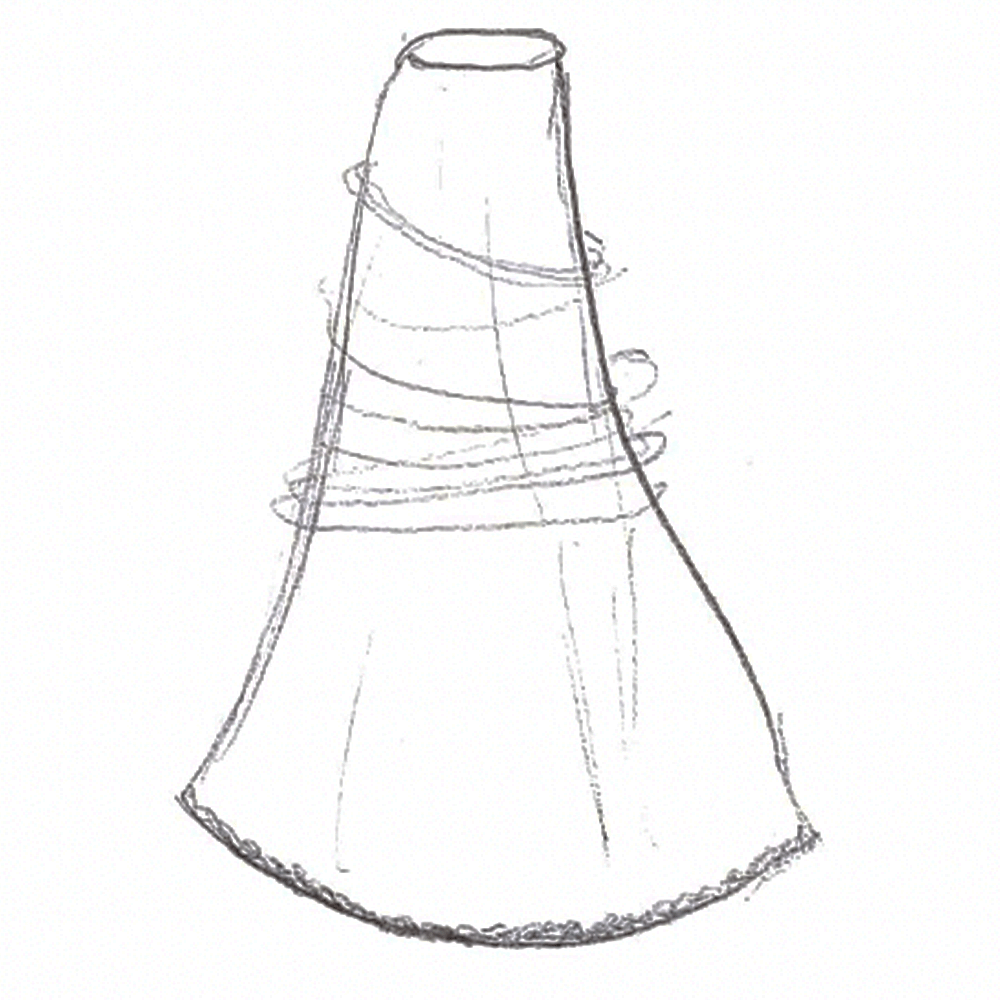
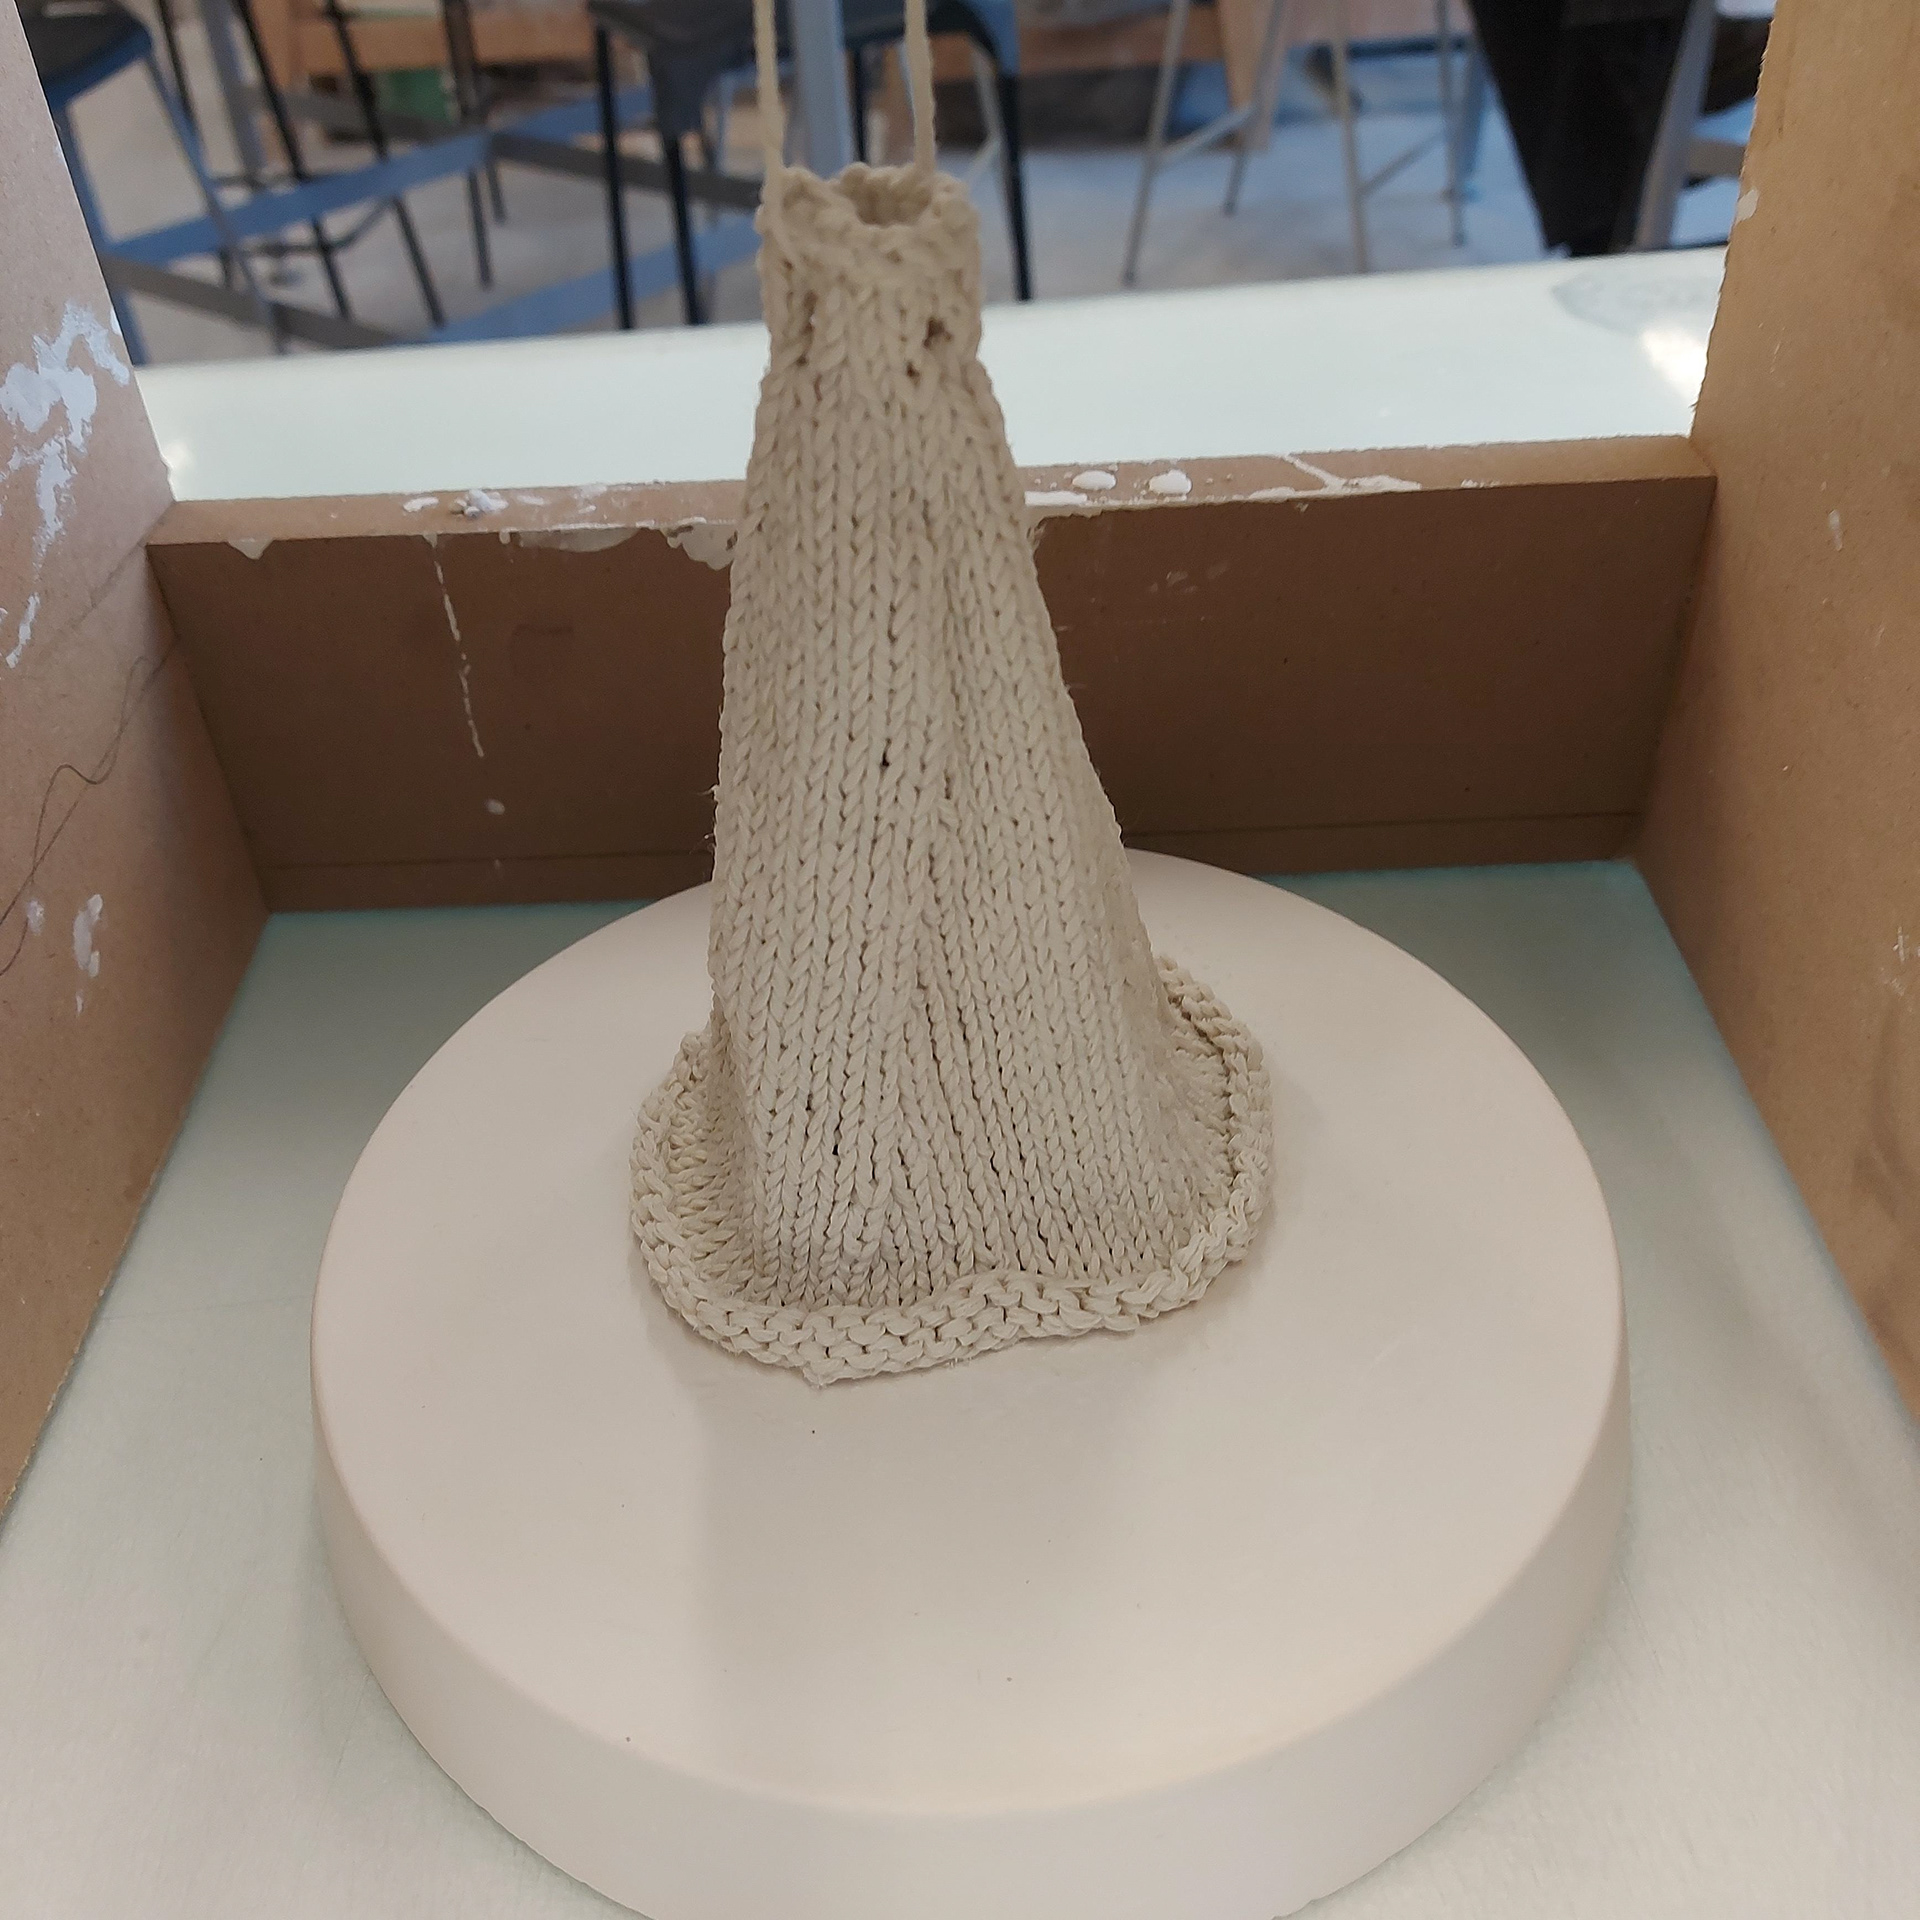
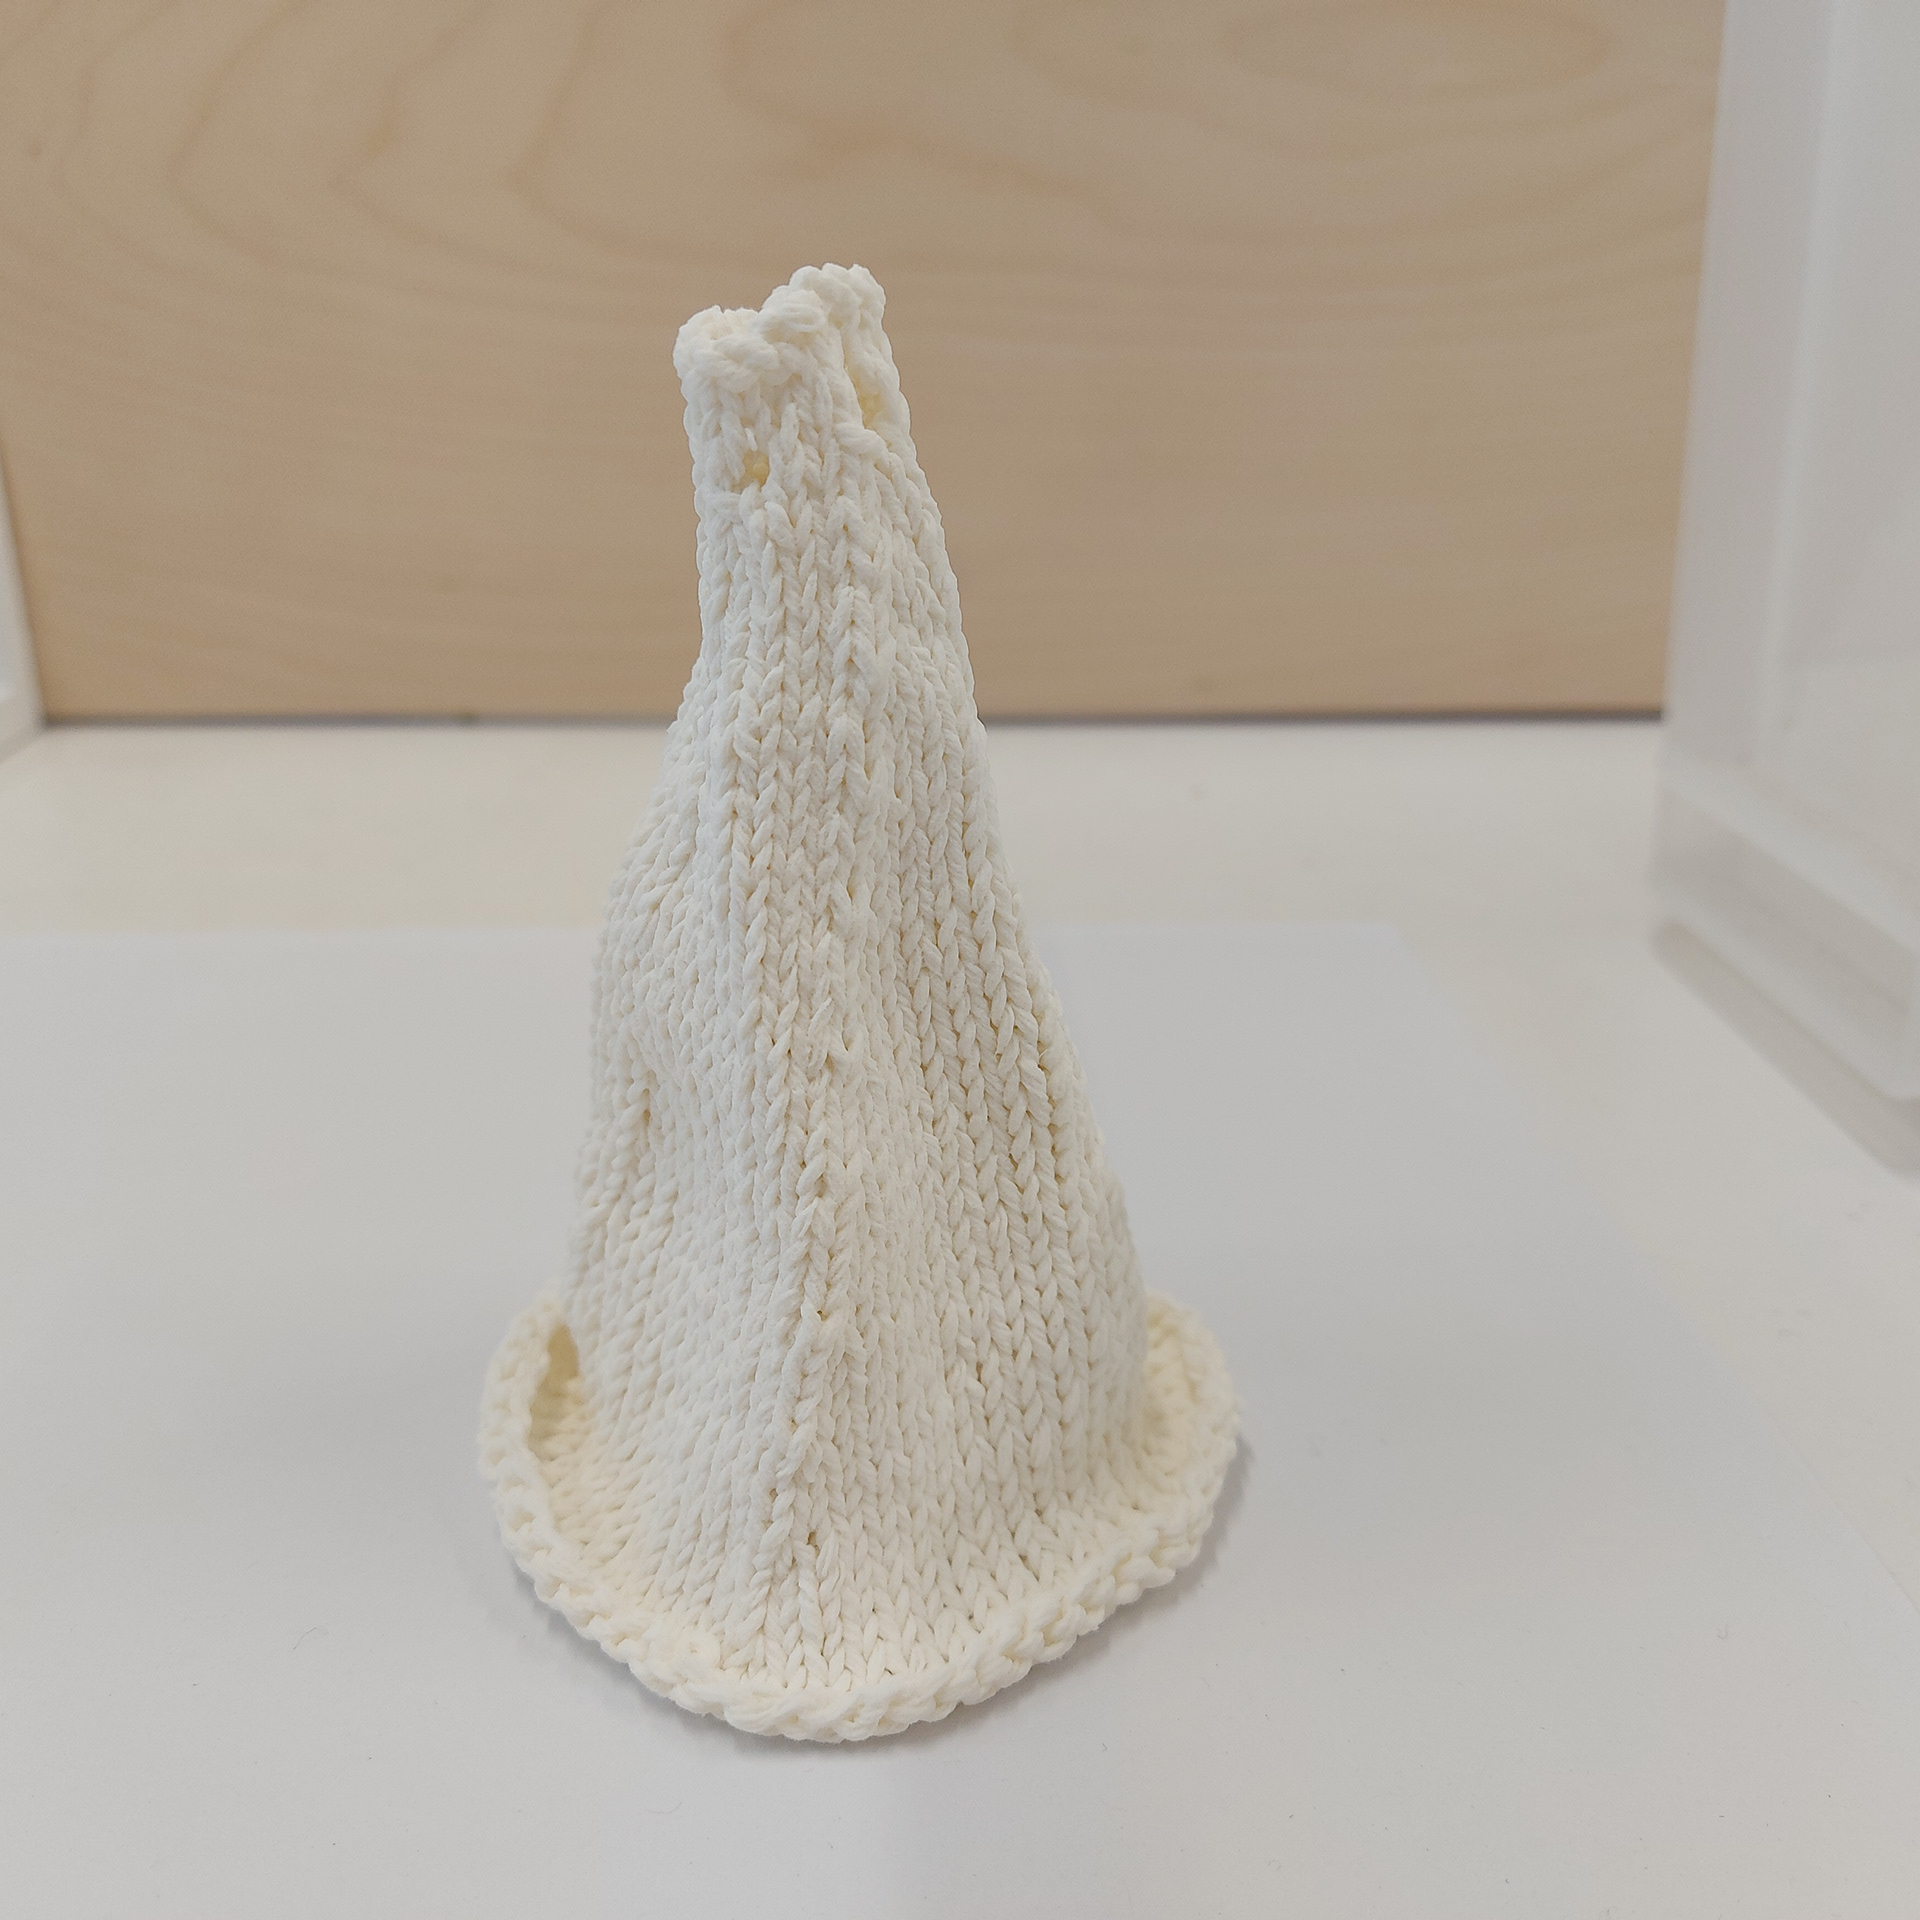
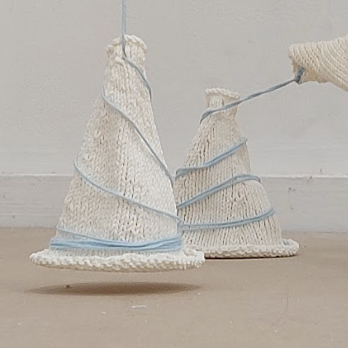
When knitting this shape, I knew I wanted a large cone like shape, putting some holes to weave the yarn in and out and places to weave the yarn around the bottom where the cone cuts off into smaller sections. Having a small hole at the top meant that yarn could be pulled through and attached from the inside of the cone as well. I started with a small amount of stitches and knitted in the round, creating a repetitive pattern of increases, using a base of 4 sections to create the shape and find placement for the 4 lace holes. While I was knitting the piece I was also spending time on the knitting machine where I was repeatedly using yarn cones and a yarn winder to wind the yarn on the cone. I believe that there was some influence from the conical shape used to hold the yarn while machine knitting, as well as the legs at the base of the cone inspired by my shapes that I made at the beginning of the unit when I was observing the change within firing temperatures in the 'observe' section of the project.
This was my first time using the thinned down slip for a larger object. I wanted the process to be quick, due to my previous experience dipping larger objects, I wanted to ensure that the slip was squeezed out as quickly as possible, doing the process twice to ensure that the entire piece was covered in slip as the piece was big and more likely to miss a spot. I used the circular plaster moulds to hold the bottom of the piece, a decision made due to the 4 seperate 'legs' of the cone which needed to be seperated. I also quickly tied the top of the cone to a hook within the wooden box so that it could drape down, instead of leaving it to sit, as the weight of the slip would sink the shape and not achieve the desired form that would accentuate the gradual increase stitches within the shape.
Within the kiln there was some movement of the porcelain, with the end result looking a little more sunken than when it was put in. I am happy with the size of the holes, even though there was some inevitable shrinkage of them, they are still big enough to weave the yarn through as I intend to do within the installation.
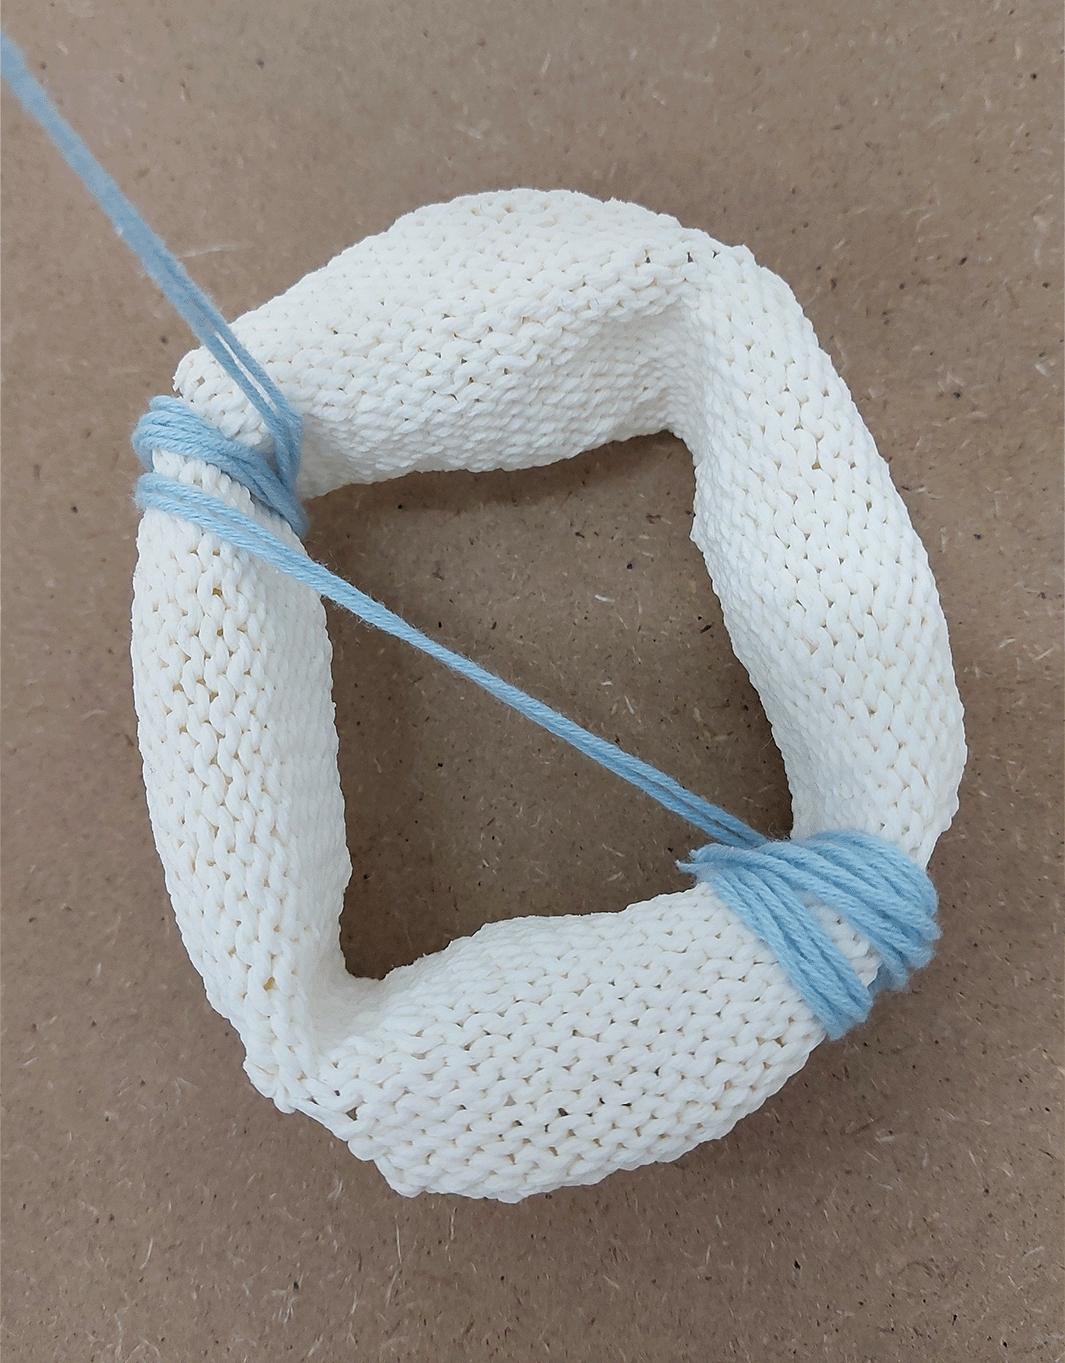
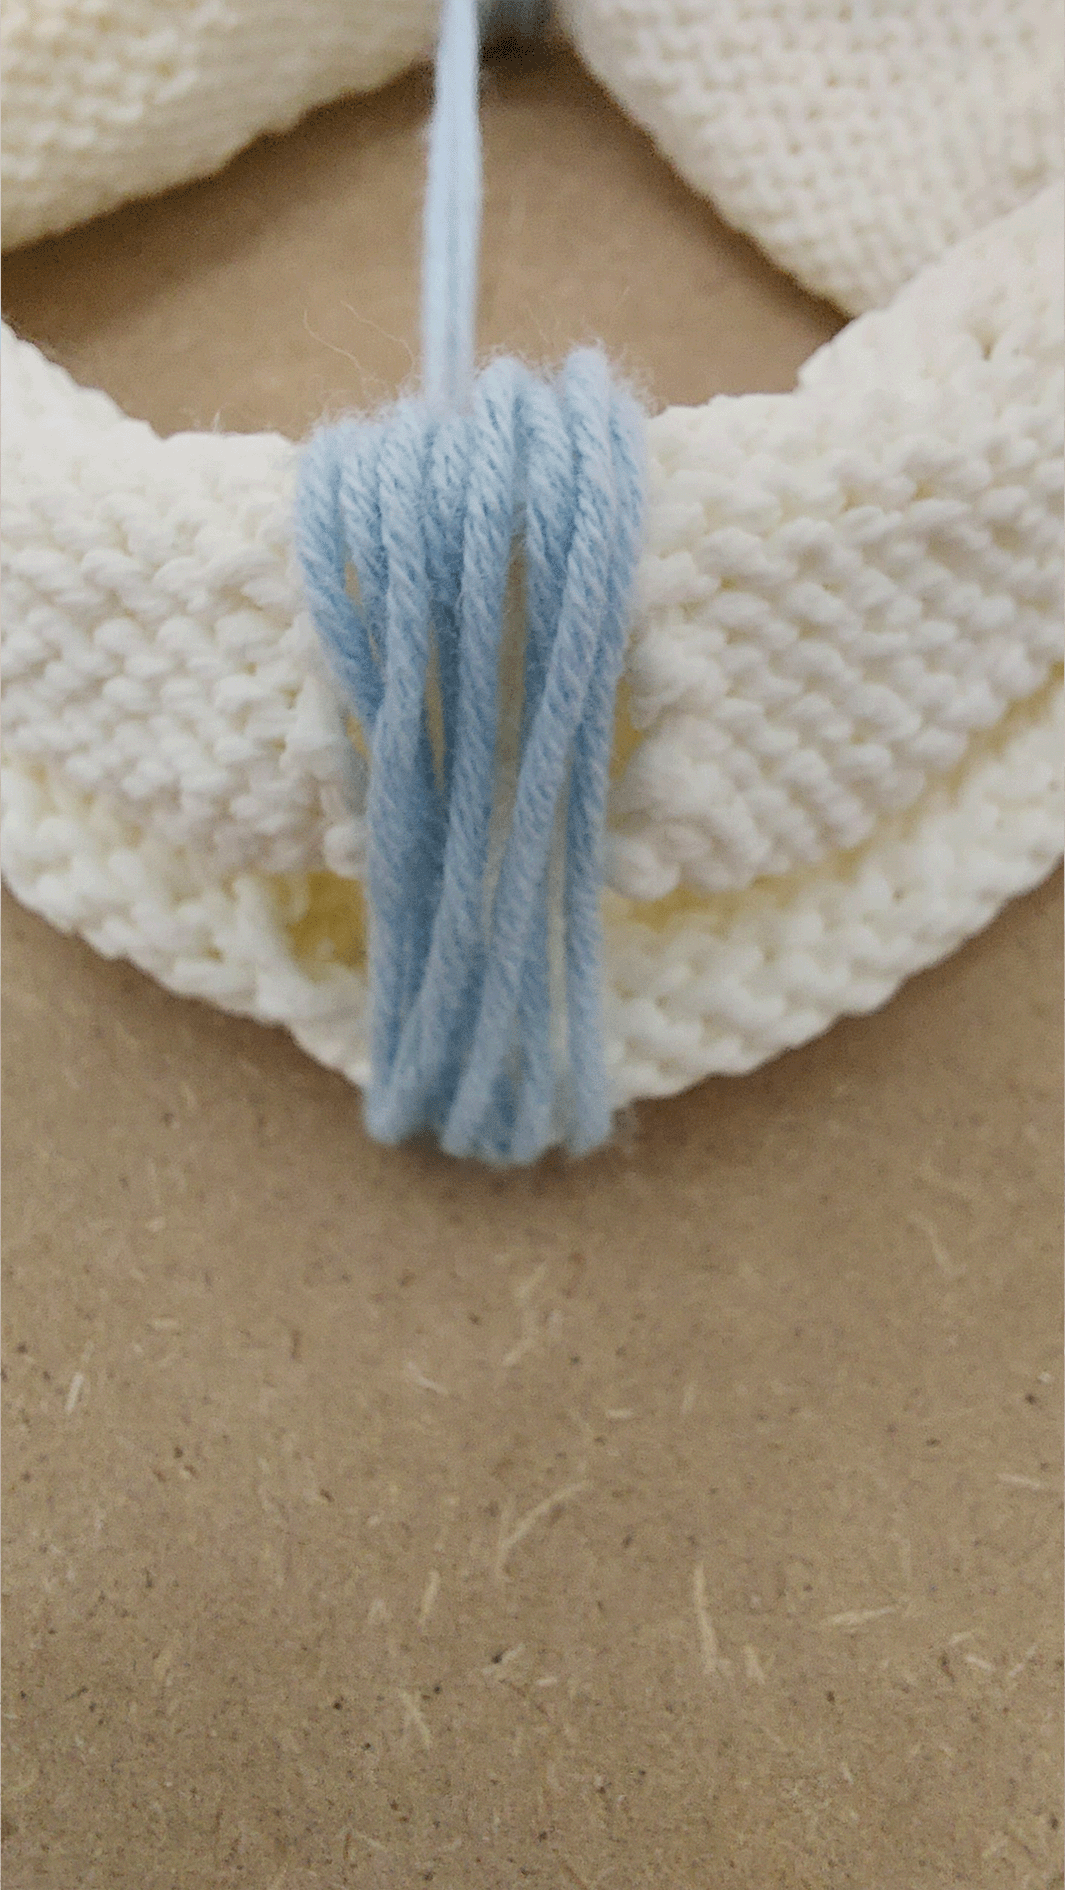
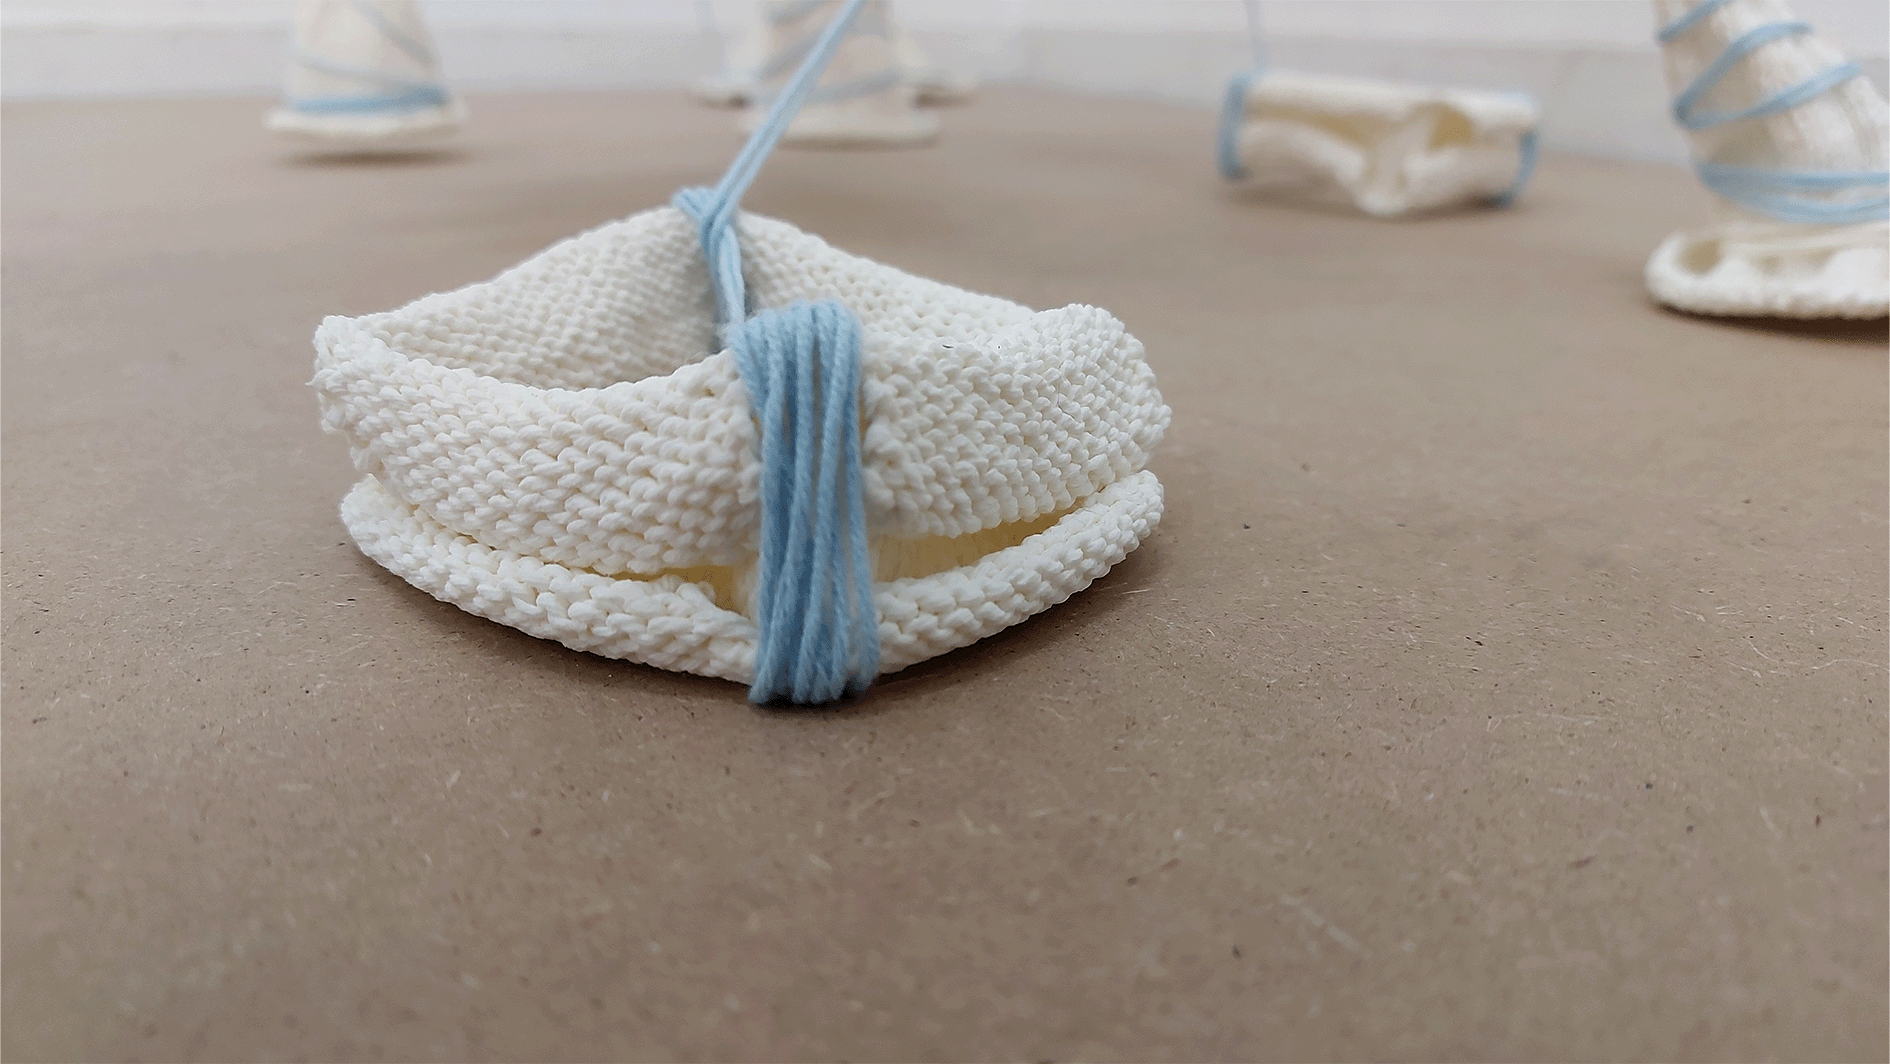
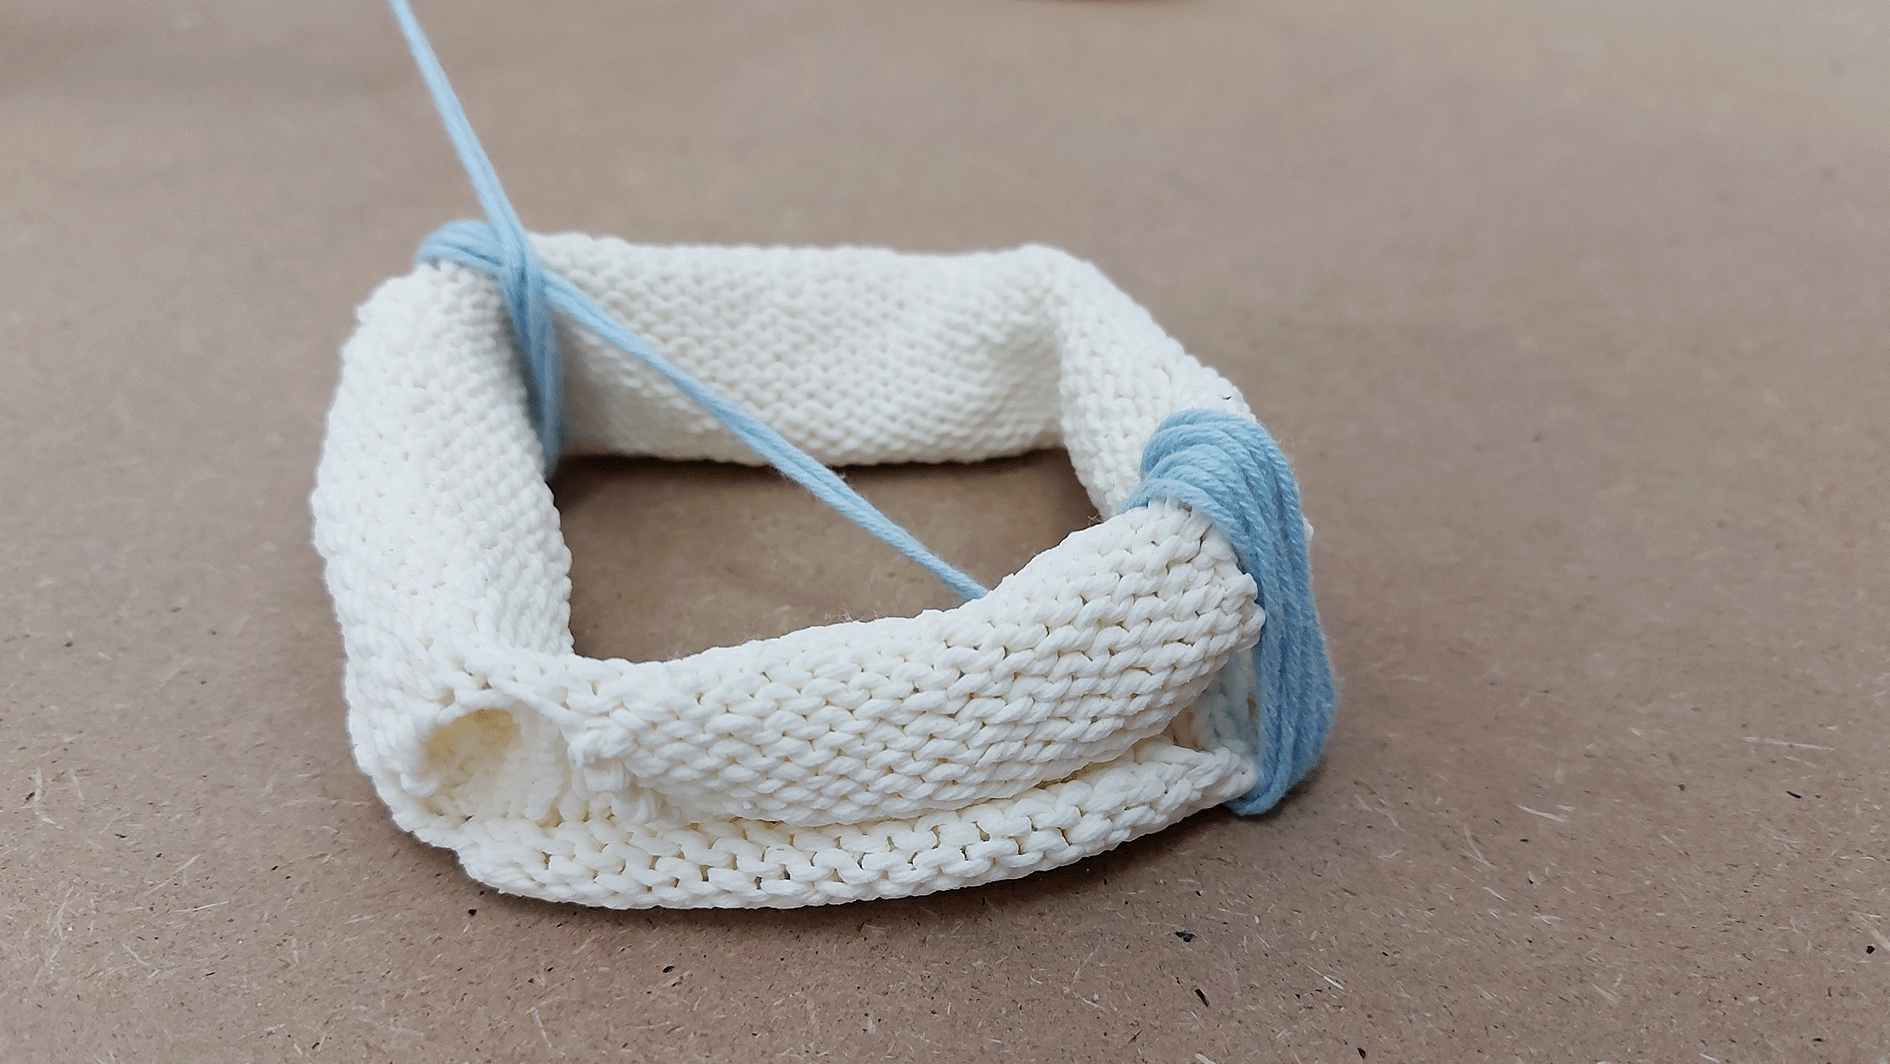
Overall, the shape worked well with the installation and allowed for two yarns to be attached to the piece. I placed it within the corner as I felt that it would be better placed for the two machine knitted shapes that sat higher instead of the lower shape. I was able to use an embroidery needle to put the yarn through the holes and was able to wrap the yarn around the 'legs' of the cone as I had intended to.
Tutorial with CJ - Week 10
Feedback about the above piece means that I can carry forward further ways to improve the next resolved objects, ensuring that I don't use any moulds that will leave dripped slip residue at the bottom of the ceramic and making sure that I continue to keep the same detail within each piece and being able to see each individual stitch.
I also wrote about my work and my personal experience with the different crafting processes and how they relate back to my work. This led to a conversation into how I could use this within other areas of my work e.g. within the piece or my context video. This writing is within the 'reflect' section of my portfolio.
2
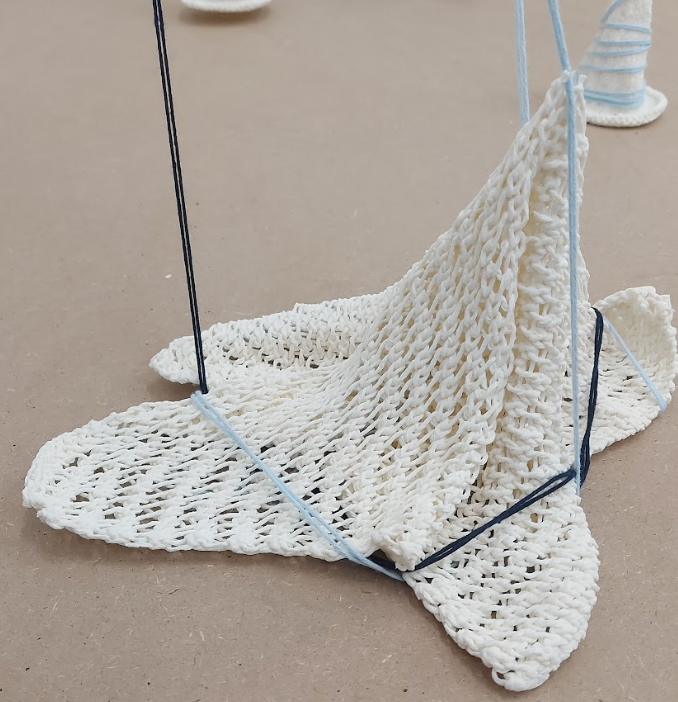
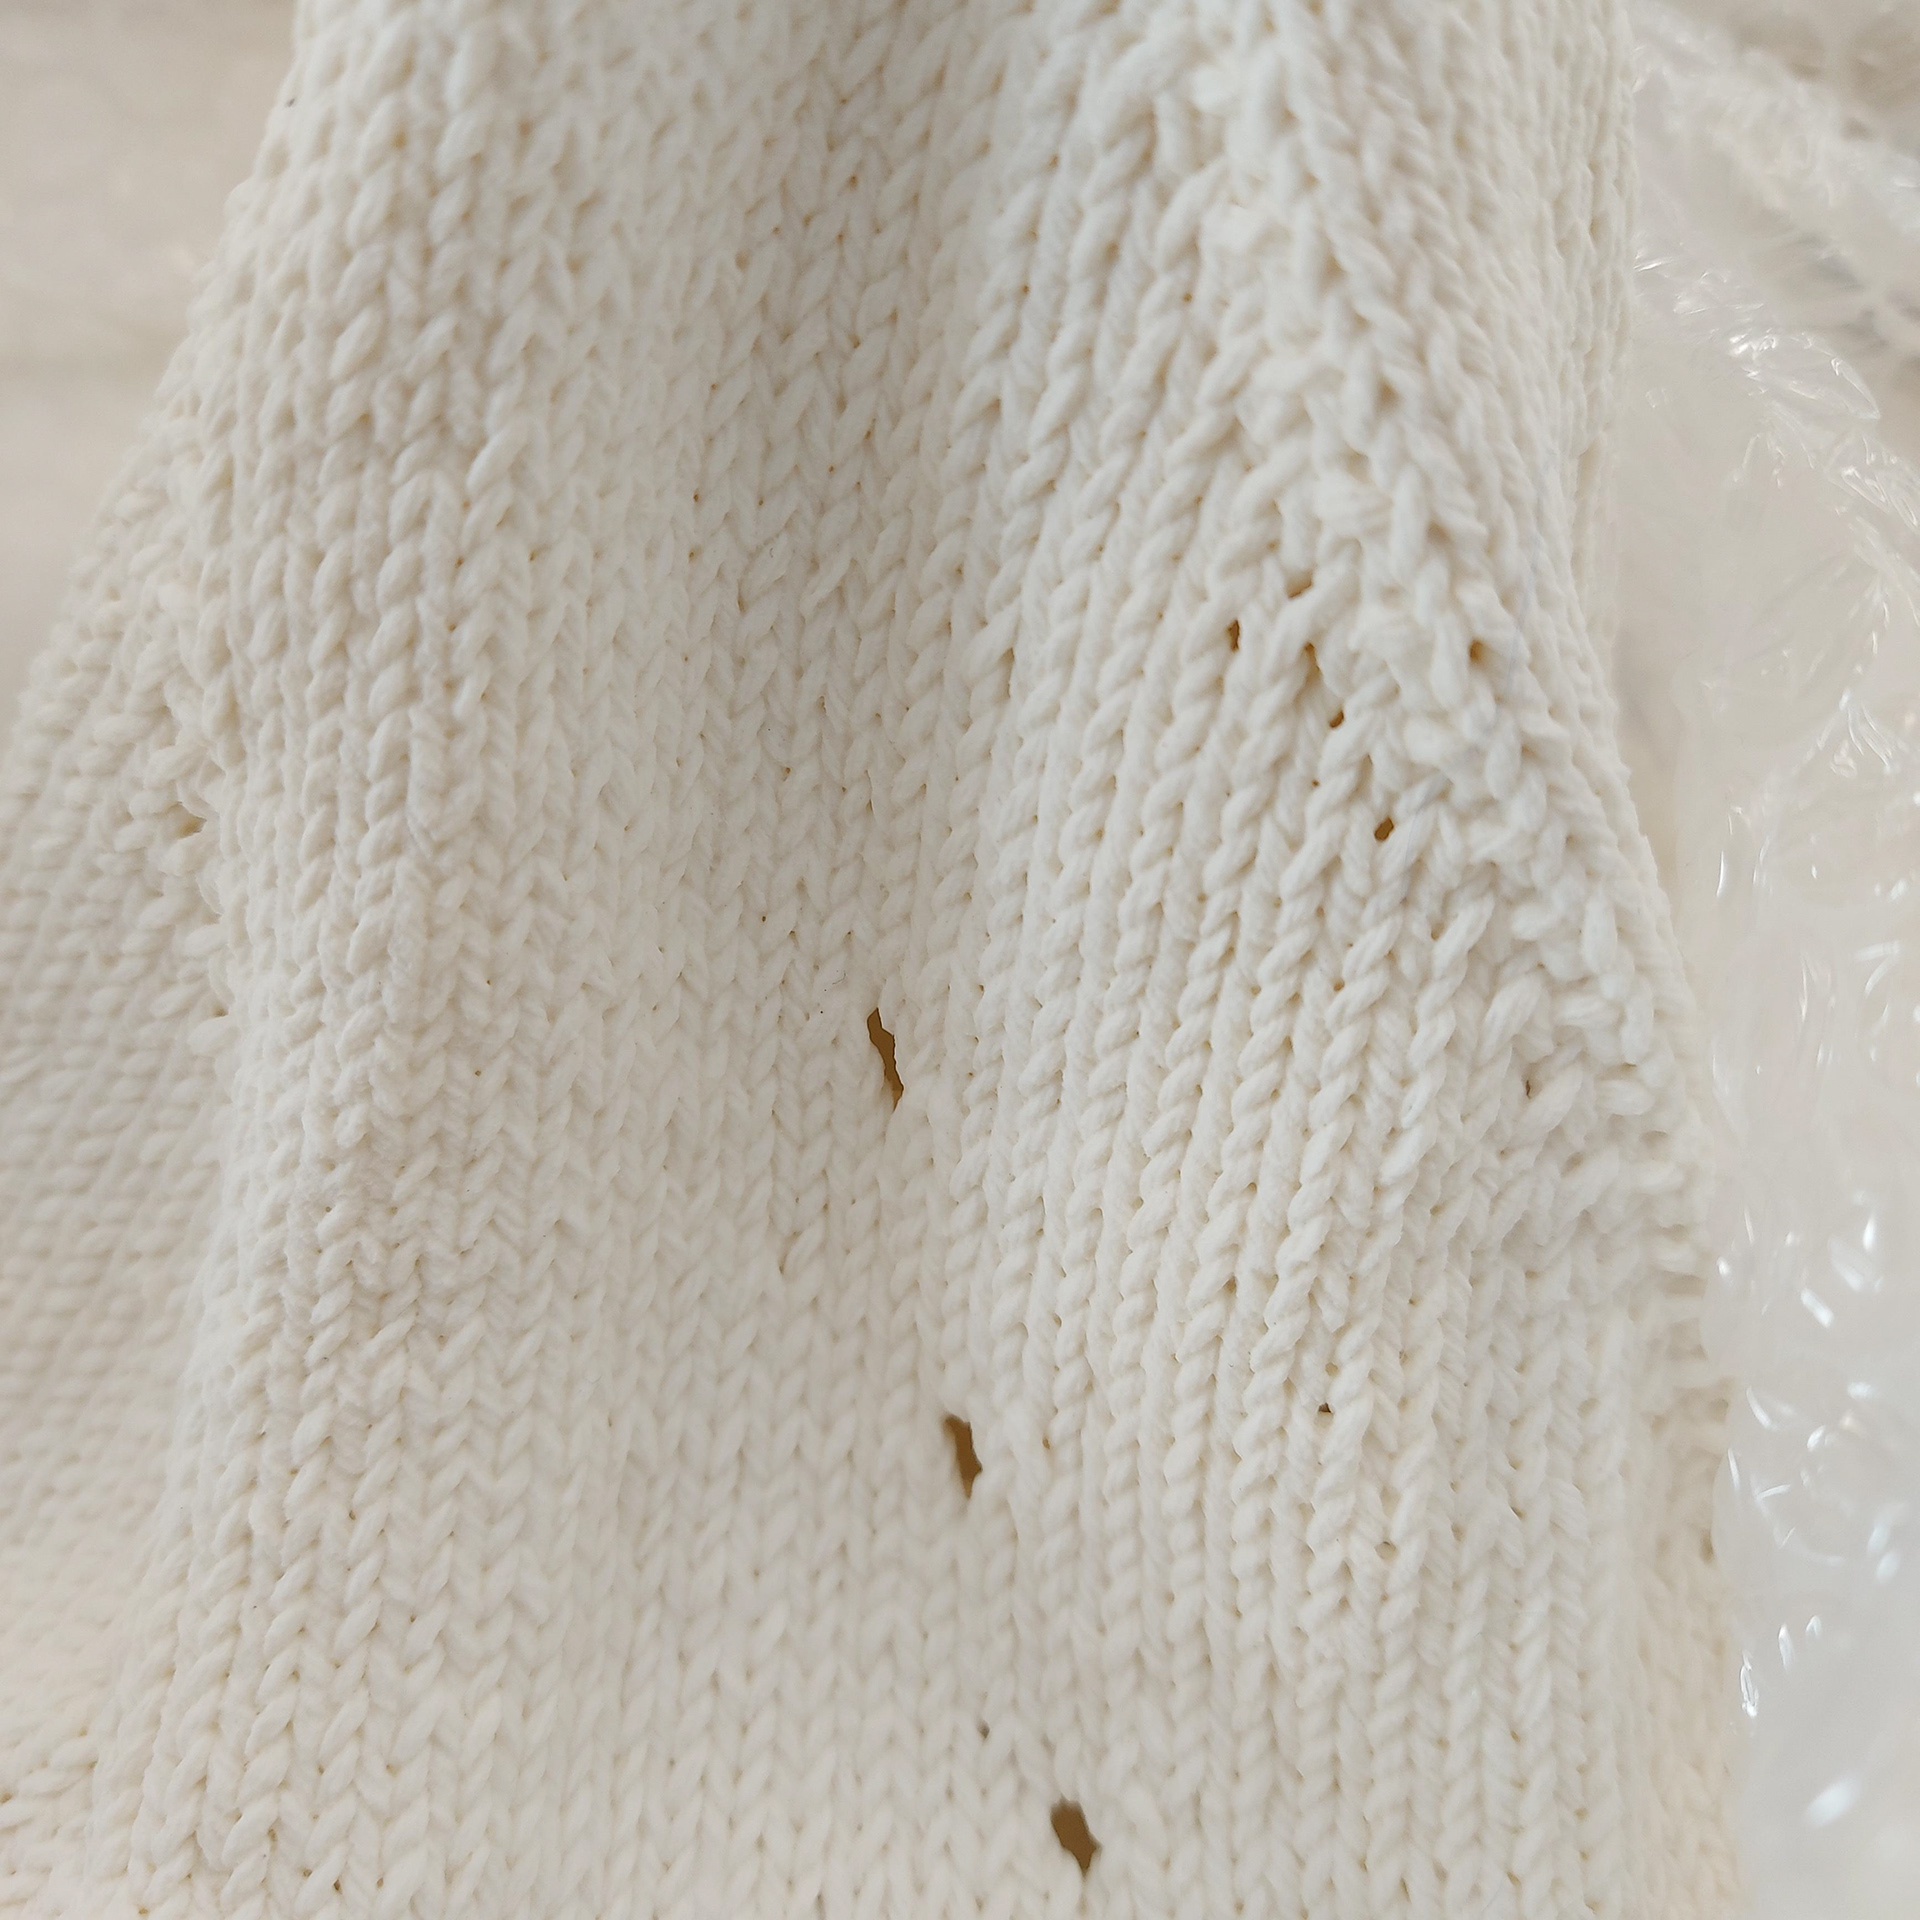
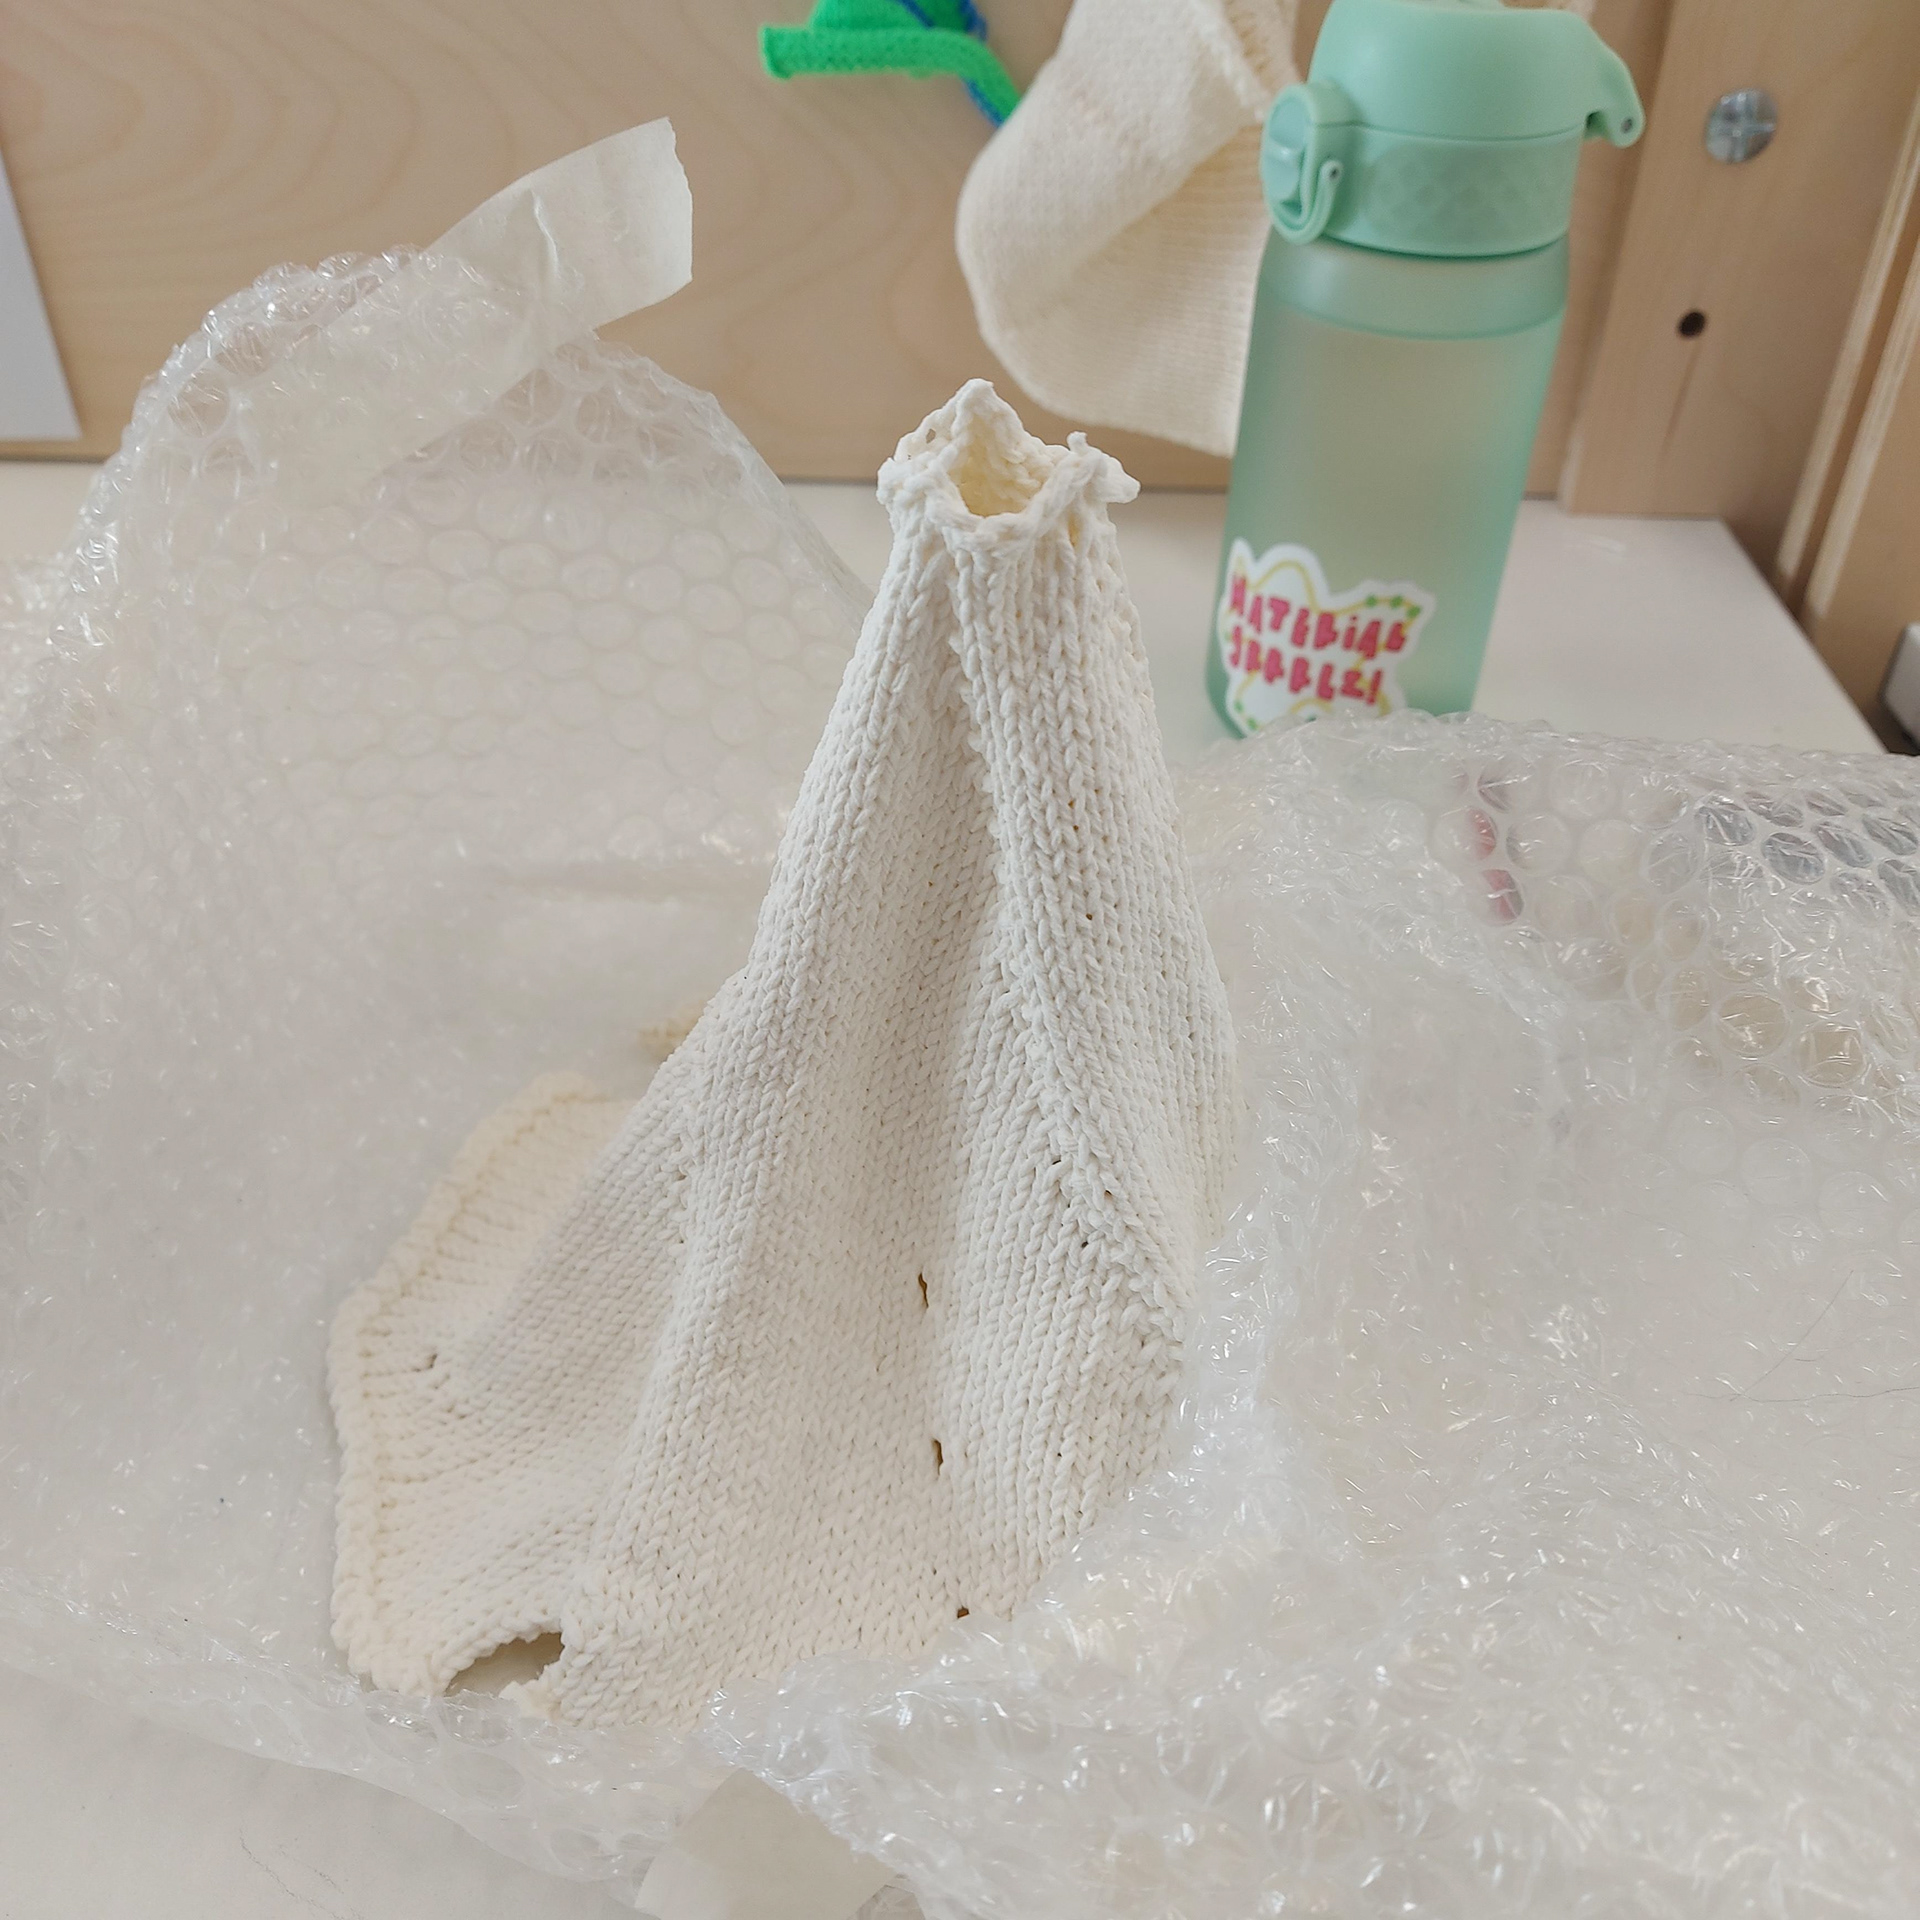
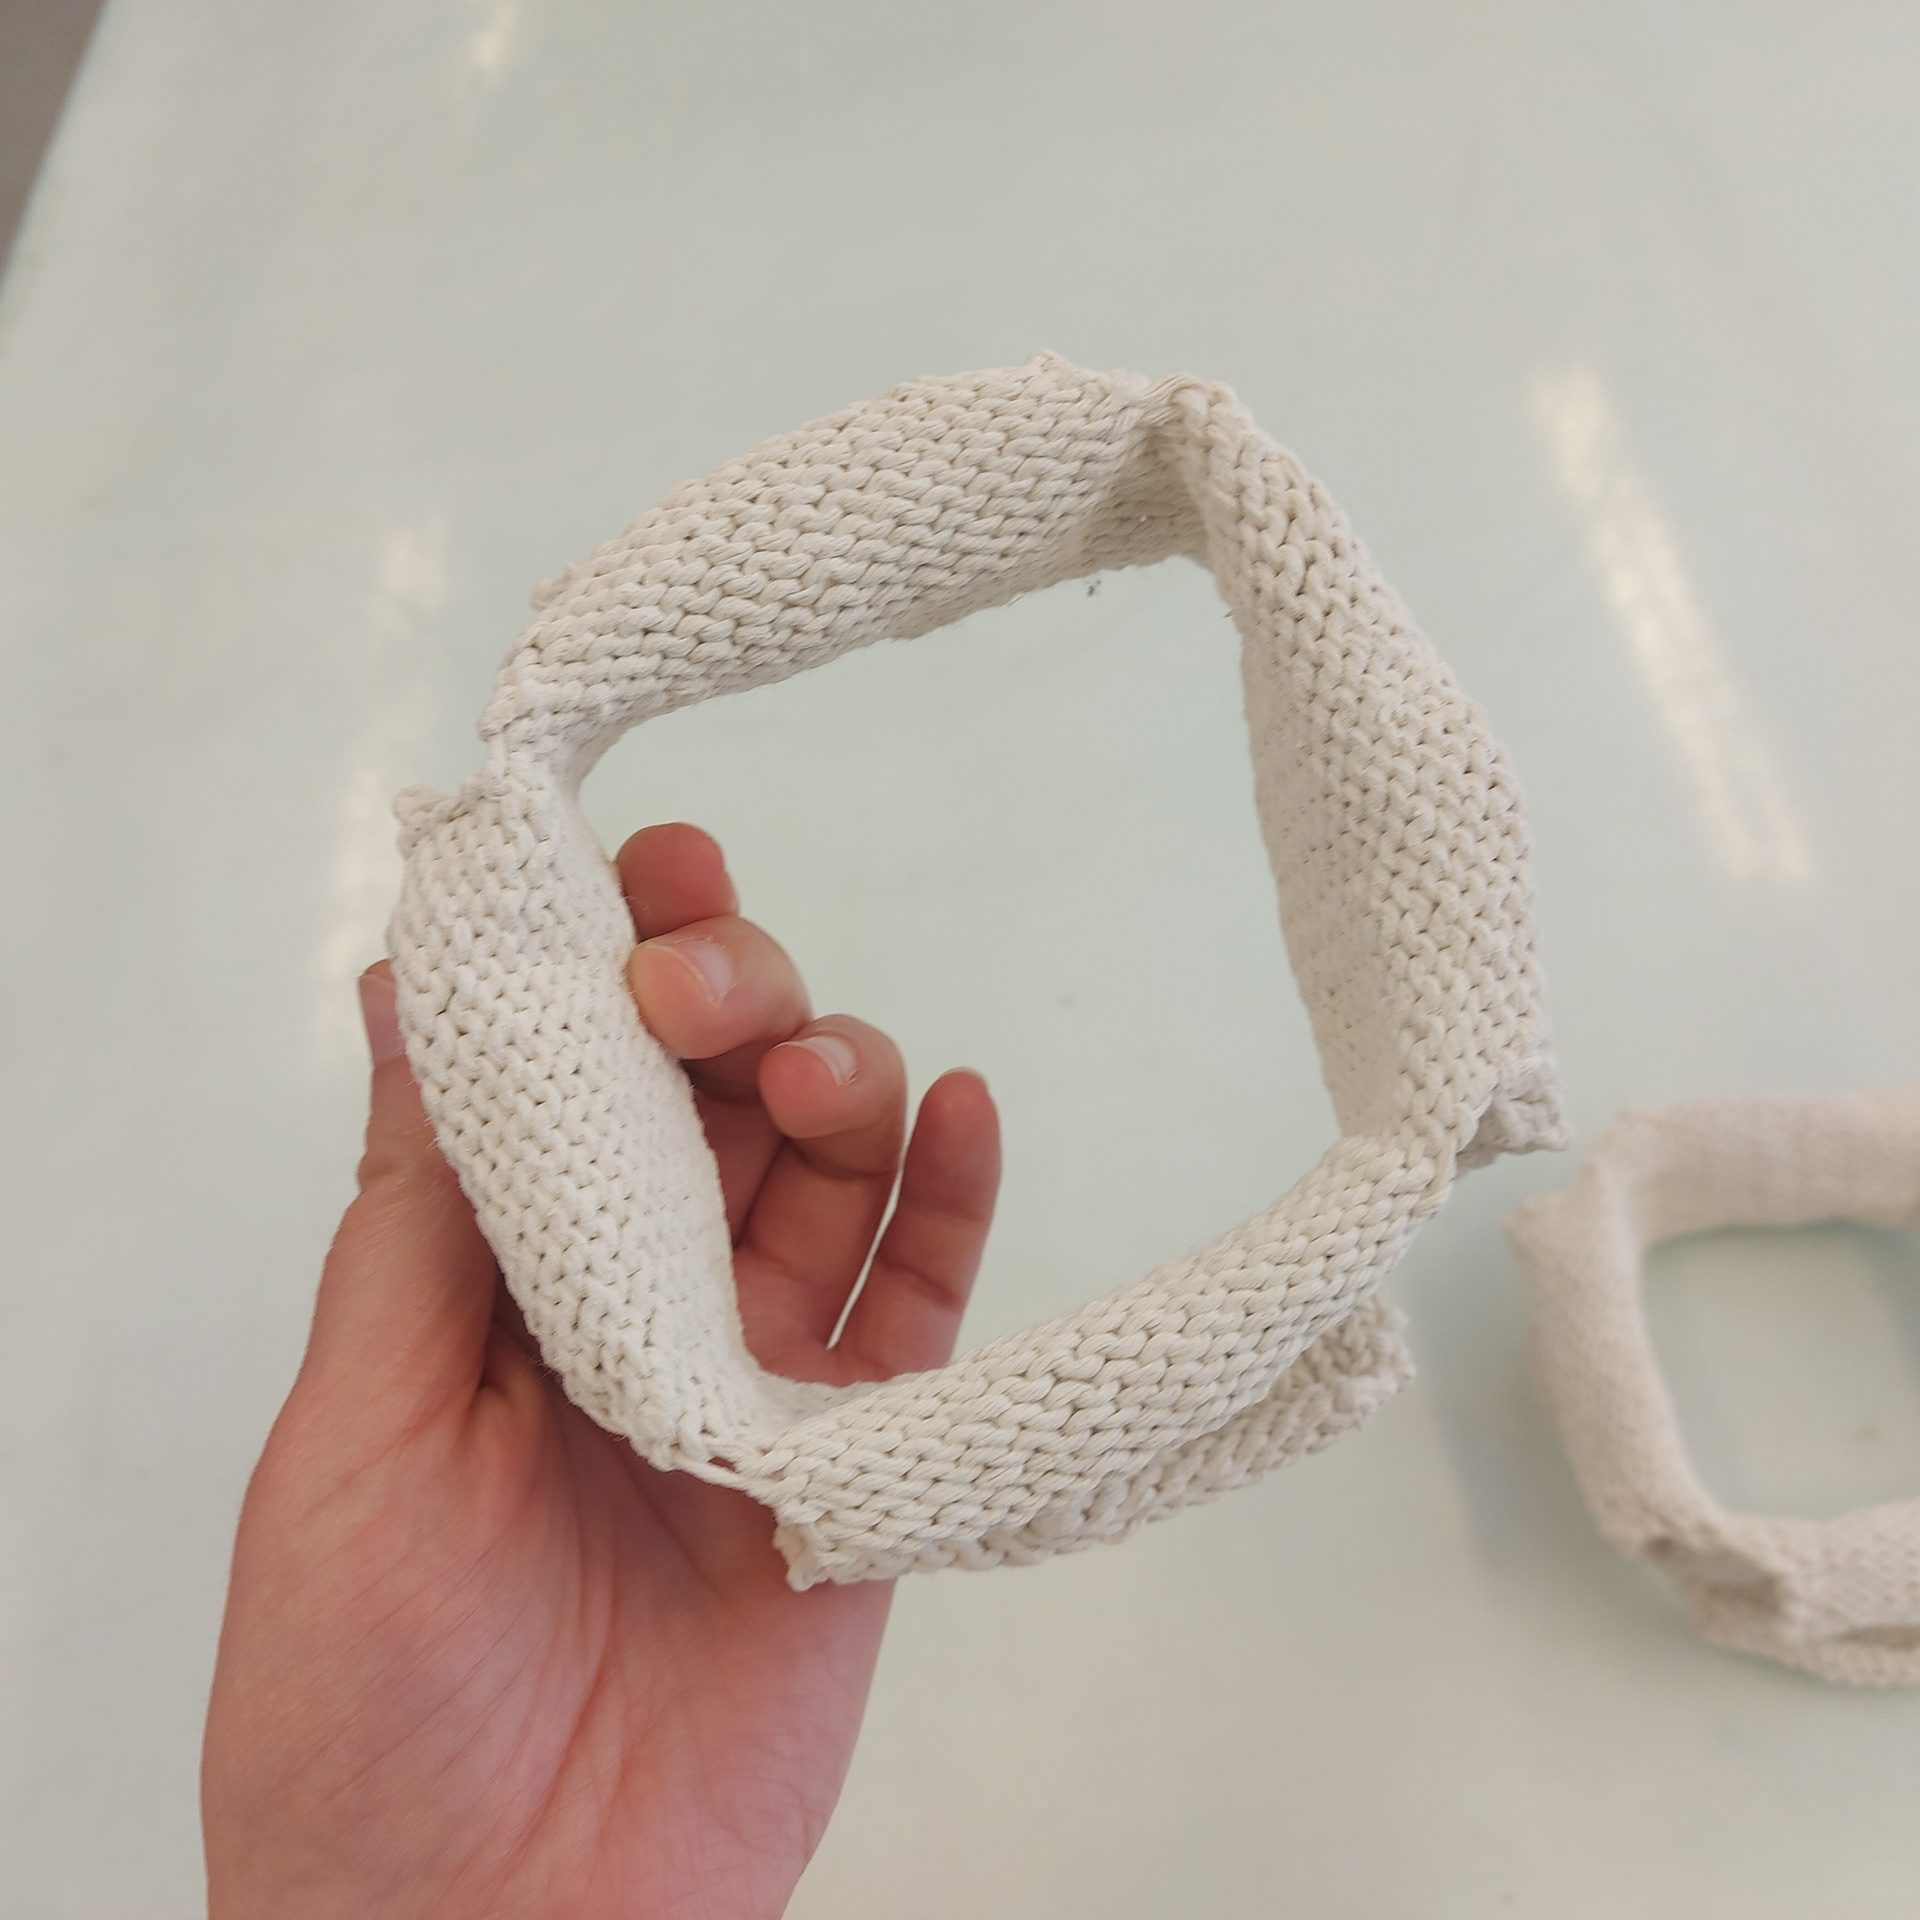
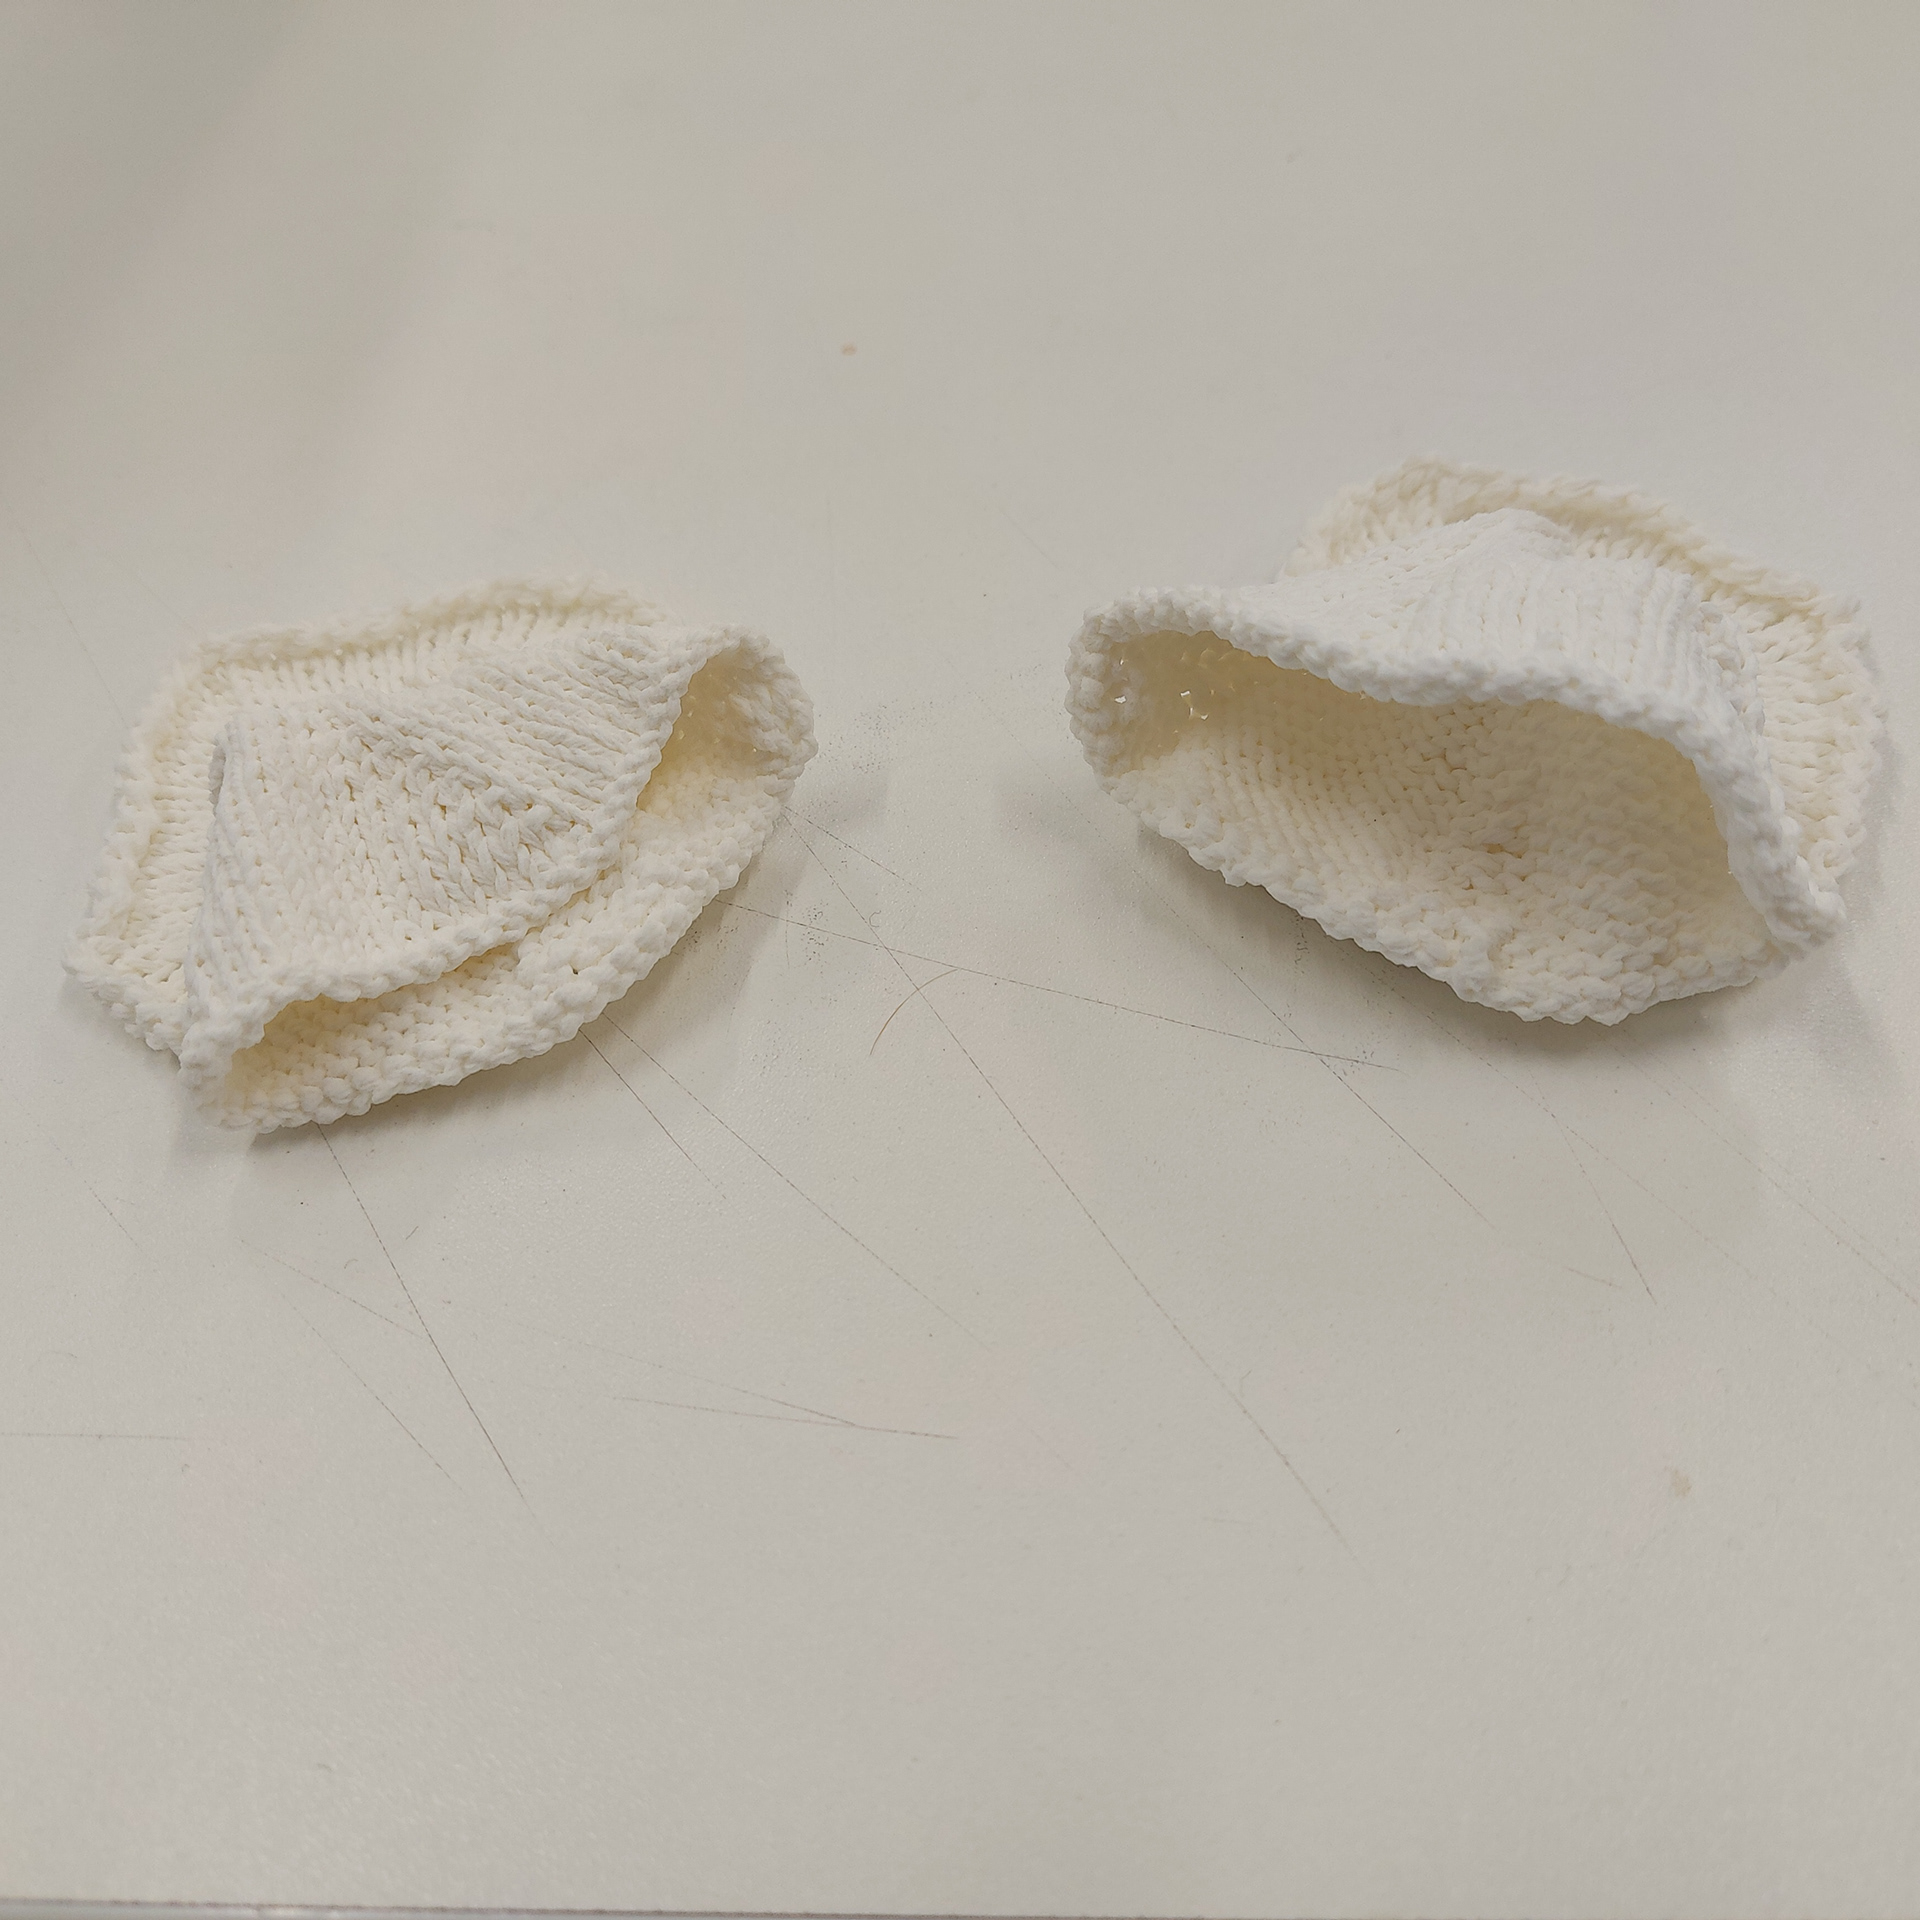
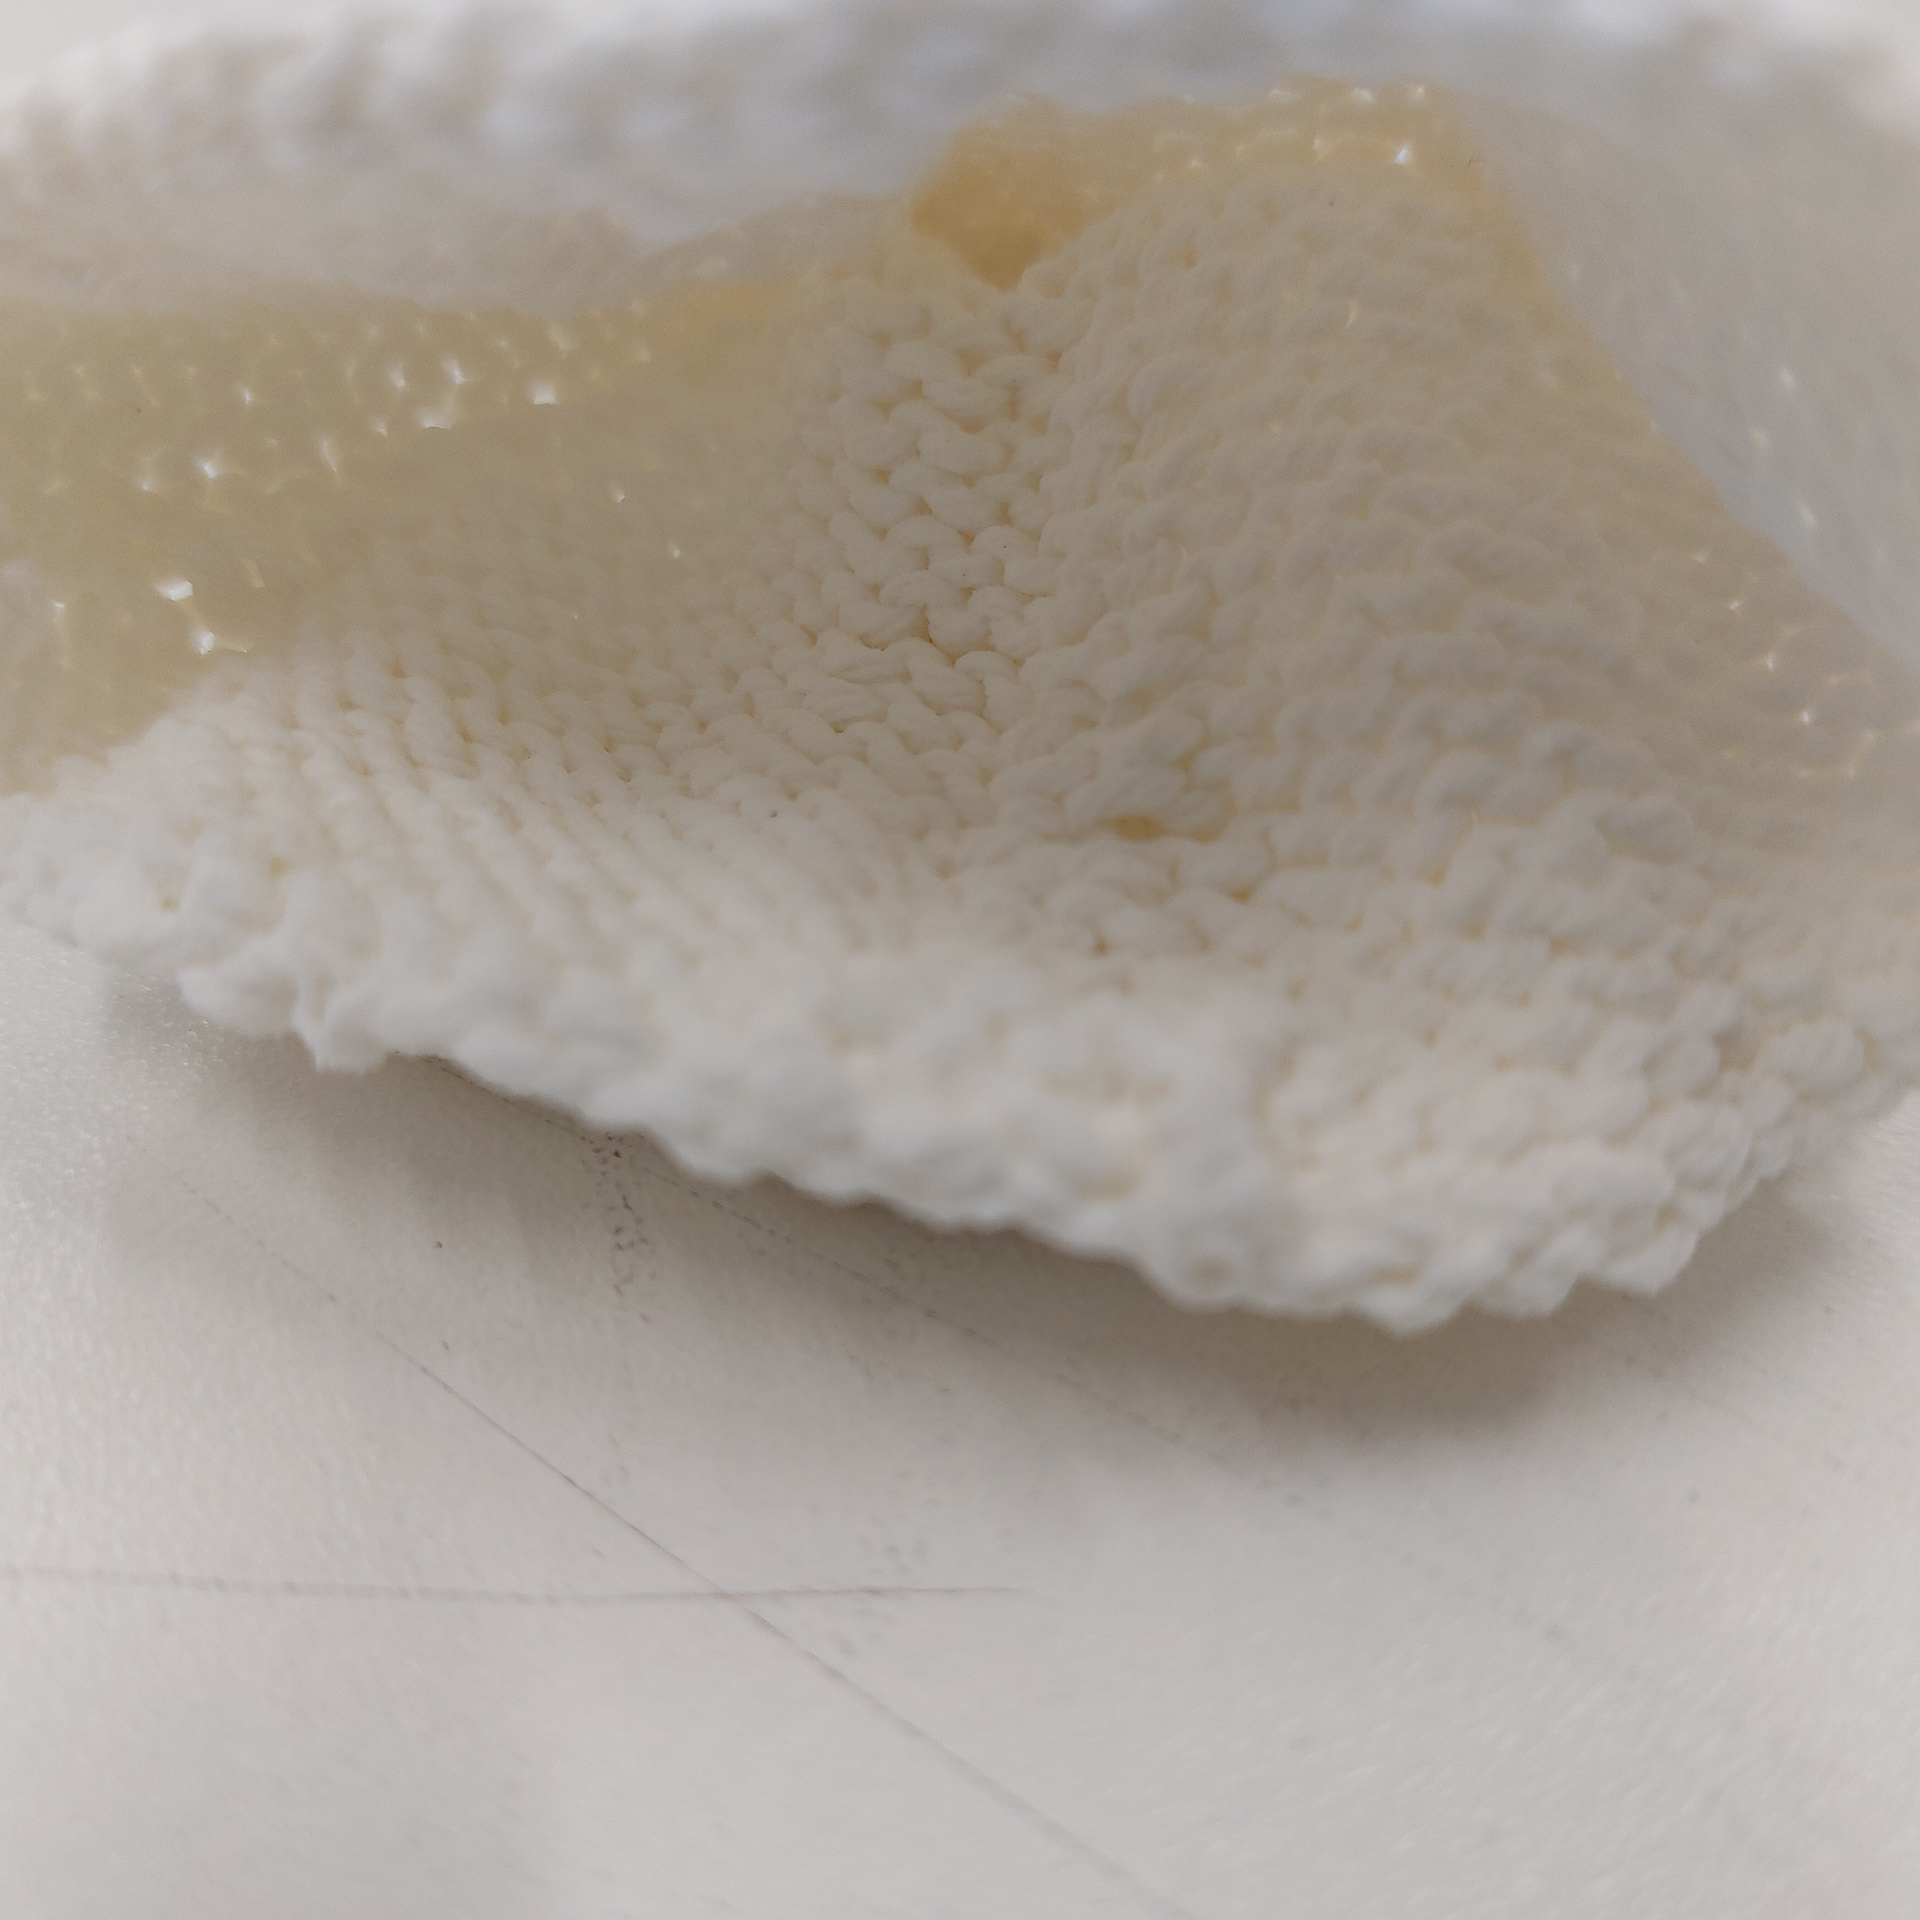
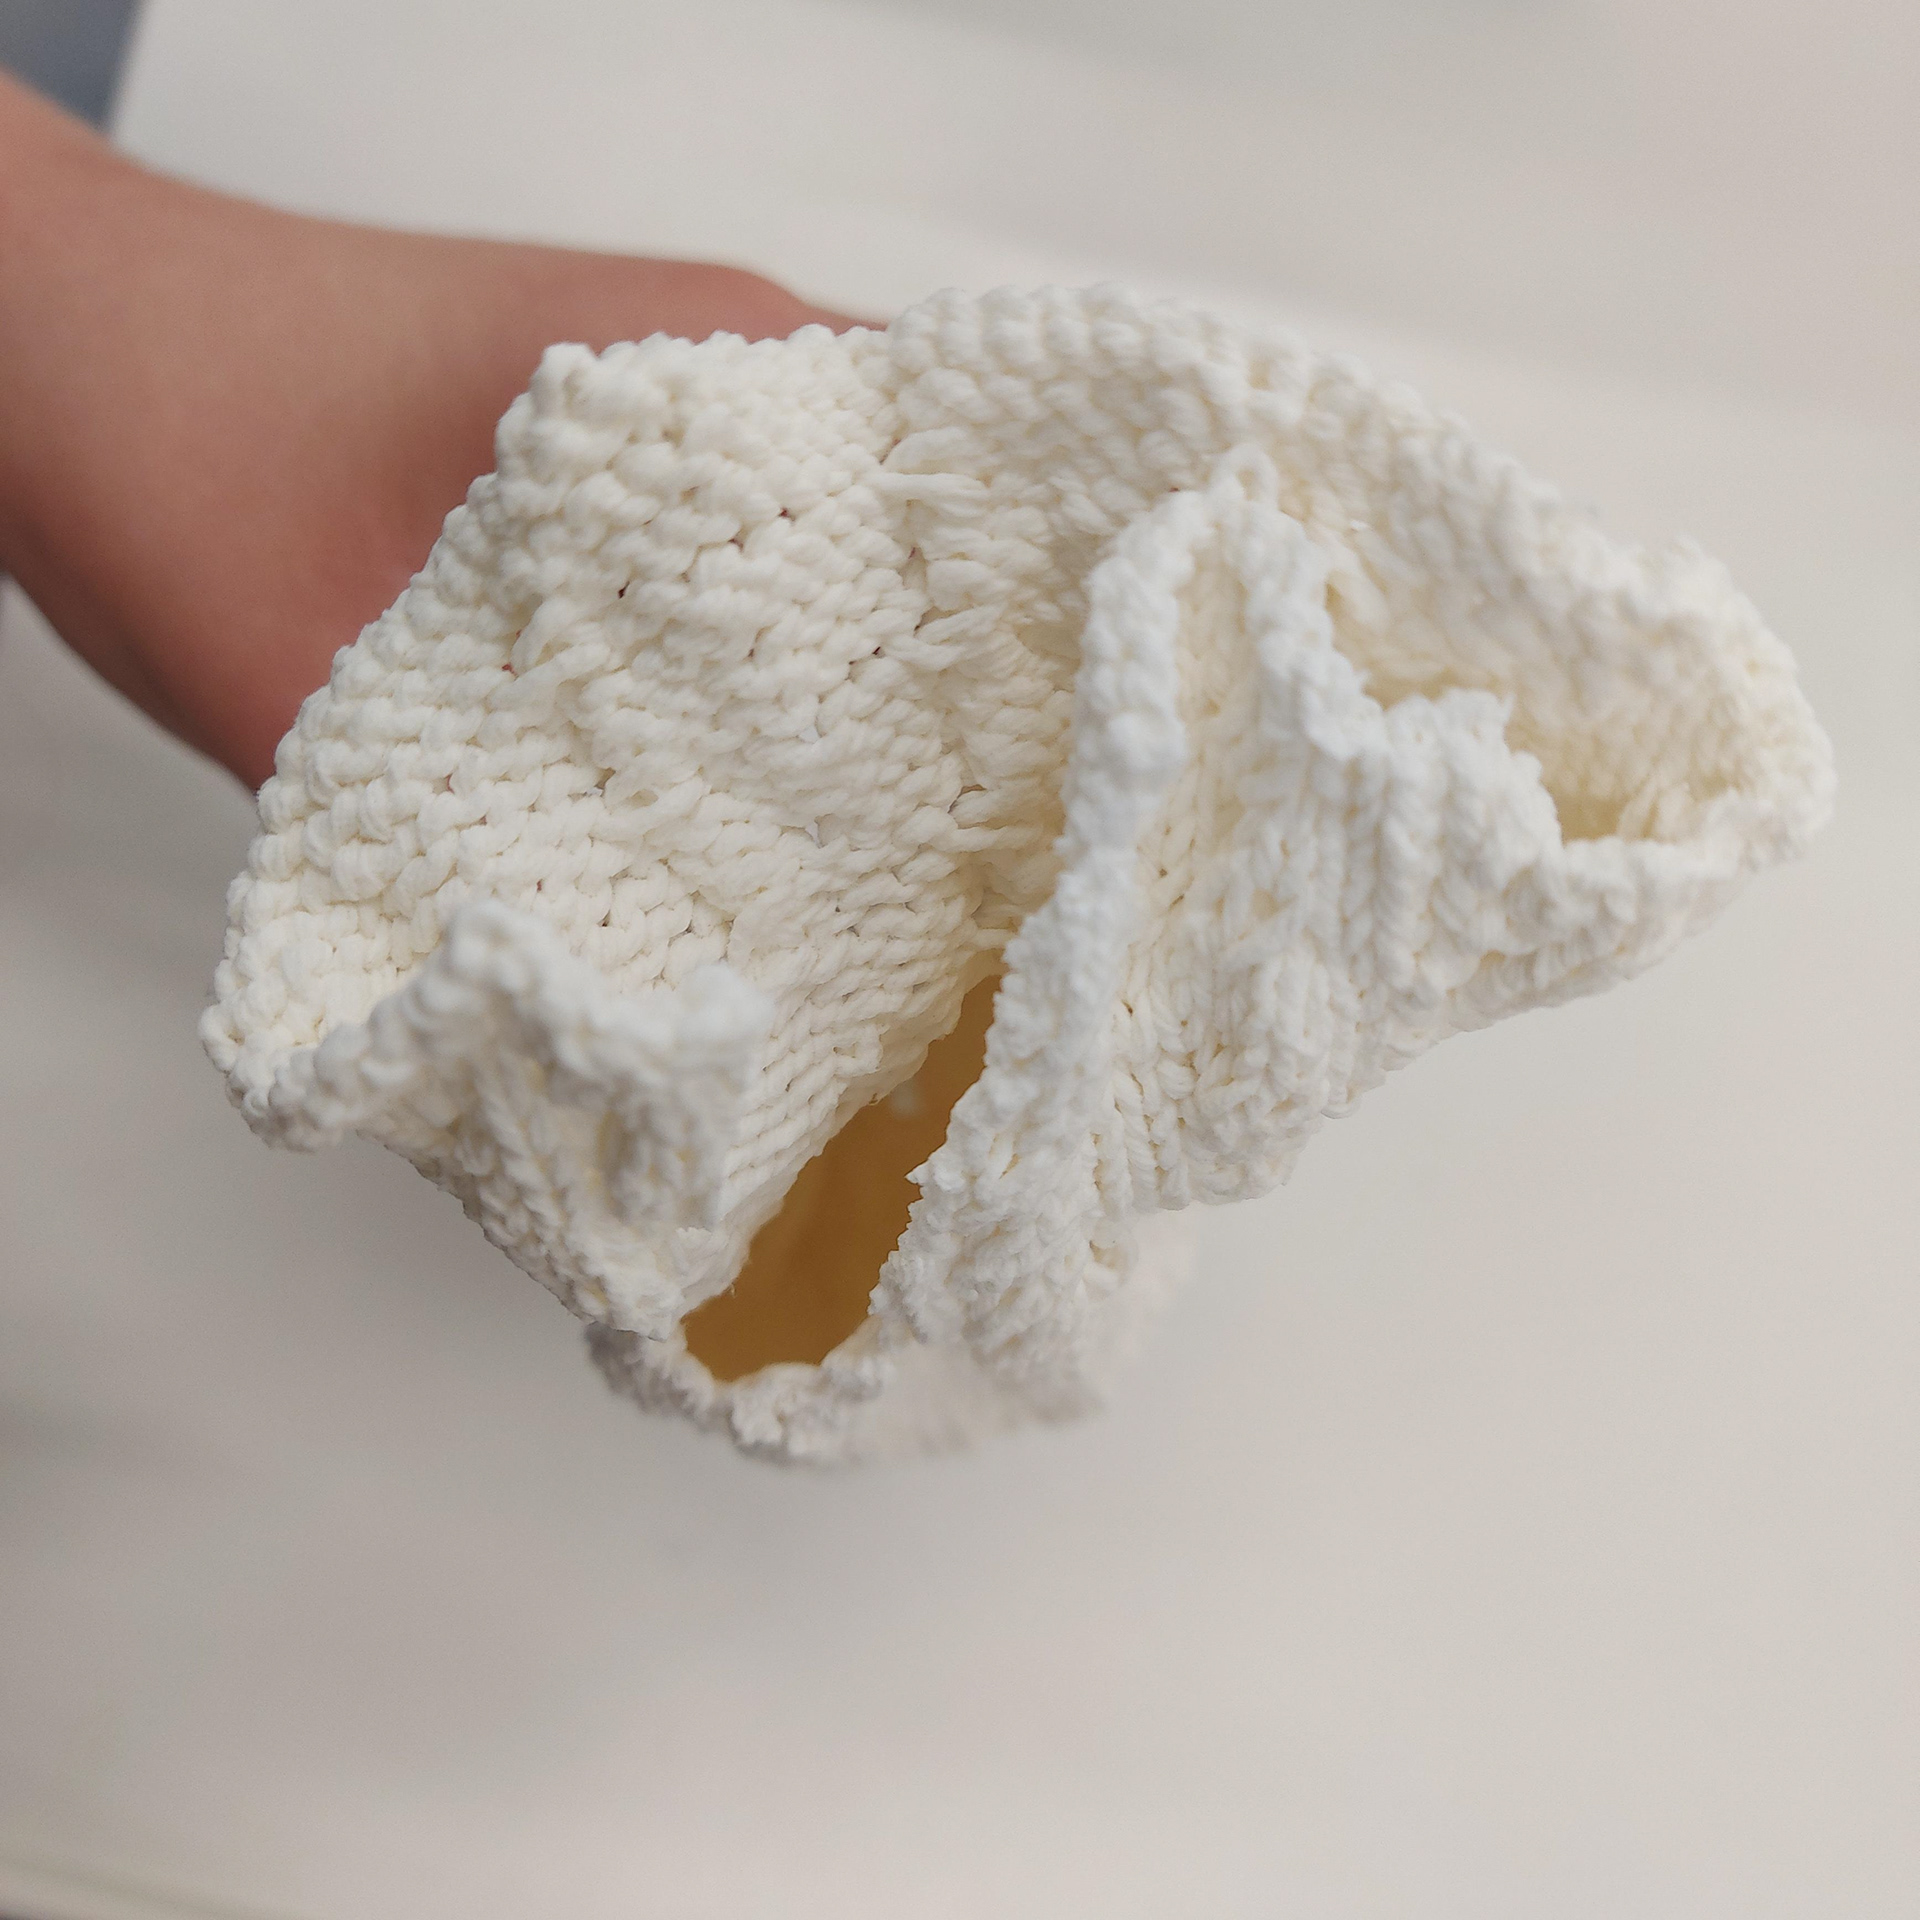
I used the Turkish stitch/Purse stitch for this ceramic object as another way to weave the yarn in and out of the holes. When knitting I created a square piece of knitted material measuring 30cm x 30cm, therefore no pattern was written as no increases or changes were made. This shape was also intended to have a less rigid structure than the first cone shape as this would look more like the knitted material the ceramic is mimicking and look more like the knitting is being picked up by the yarn. Looking at how the original material I had knitted sat, I used this to inspire how I let the material dry once covered in slip. I noticed that due to the stitch I used, the edges of the knitting were tense and curling at the sides, so I ensured that these curls of the material were kept.
When putting this material in slip, I also ensured that I dipped the knitting in the slip twice, however I had to use a slightly different technique to the cone when squeezing the slip out, placing my fingers in between the holes to ensure that the slip was not sticking the pieces of yarn together and that each stitch was defined. When I was laying the piece to dry, I ensured that the curls were kept the same as they were when dry by using small plaster blocks to weigh down the yarn that was keeping the knitting taut. I also hung the piece from the hook in the box again so that I could create that effect of the yarn holding up the knitted material. When dry, the ceramic hadn't pooled like the cone had as it had lied flat on the plaster. I took this method forward within my process when letting my future pieces dry in porcelain slip.
When I put the piece within the installation, I found that the holes had shrunk and were quite narrow due to the way that the yarn was sitting when fired. So I used the folds of the material to wind the yarn around which I believe works better especially as the ceramic is so fragile. I also got the desired effect of the yarn coming out of the top of the ceramic and creating that effect of the yarn pulling up the ceramic. This piece also held two yarns down from the machine knitted shapes, also contrasting with the navy and light blue yarn like the cone has. On reflection, although the piece was not used completely as intended, I think that it creates a different texture within the installation and due to the separated nature of the stitches, really shows the refinement of my ceramic process.
3
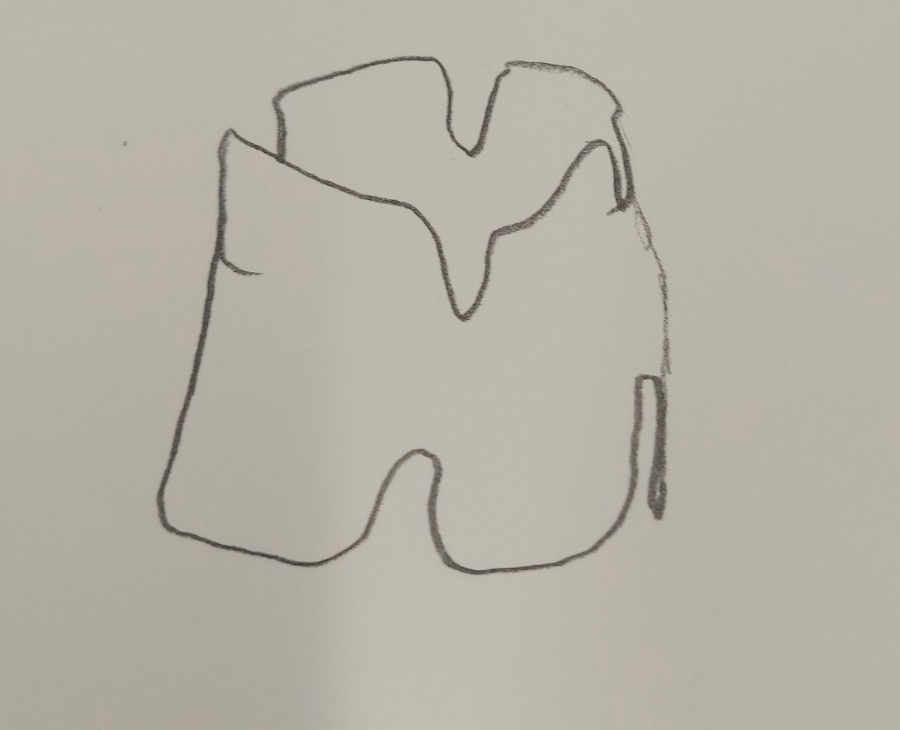
When designing this piece and creating the pattern for it, my intention was for the piece to stand up more like the sketch above. However, following the first finished knitted piece, I found that the knitting curled much more than I was expecting it to. I instead decided to focus more on the shape and the curves as these could hold pieces or yarn, as well as the corners of the square. When creating the pattern, I was partially inspired by the construction of the 'legs' of my big cone and how I created the 'legs' of previous models by individually knitting each section that comes out of the square.
When putting them in slip I practiced the same process that I had been doing, dipping the pieces twice in the slip. Due to the shape being smaller and having more moving parts, I ensured that the slip was in every corner. To dry the pieces I used pieces of yarn to hold the curls of the knitting up so that they didn't stick together. By holding the yarns taut underneath the plaster blocks, I was able to let the ceramics dry and the yarn didn't interfere with the drying of the slip and left no marks underneath the curls. When looking underneath the shape as well, I noticed that lying the material flat when drying had left no pooling on the underneath of this shape either.
Once fired I found that I was able to get a better picture of how much the porcelain shrunk when going to stoneware. Seeing how much smaller the piece was ensured that I was able to get a better idea when knitting my cabled pieces and how much smaller I would have to knit to ensure I got a similar size to the ceramic.
When placing these shapes within the installation I decided to use one of them as a hanging weight. and the other two as sitting weights. I wove the yarn through the corners, accentuating the square shape of the weights. I hung the first weight using two strings of yarn that was holding down the middle piece. Using a needle to place the yarn through the upper curl and winding it around the square, I liked that I could use the weight to create a loop for the two yarns to go through. Wrapping the yarn around the corners and through the middle of the two squares felt right as it emphasized the scrunched nature of the ceramic.
4
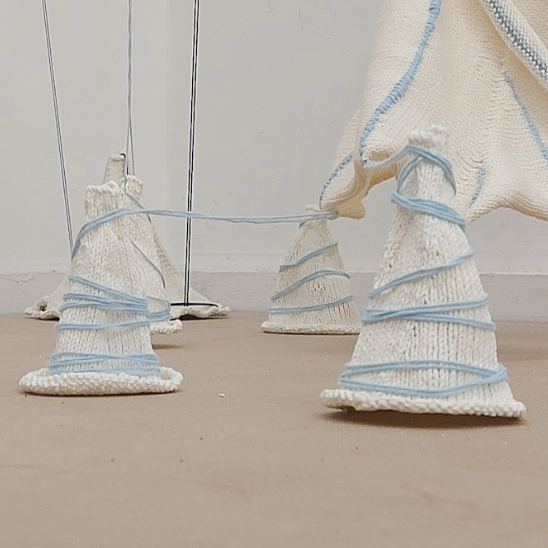
These small cone shapes main purpose was to wrap the yarn around the cone, inspired by the use of yarn cones when using the knitting machine. I also included holes in the tops of the cones so that I could thread yarn through the tops if necessary. When creating the pattern for the shape, I created a simple pattern in order to create the cones, ensuring that the gradient of the cone was equal throughout.
When dipping them in slip I ensured that the holes were visible, sometimes putting a darning needle through them when necessary to ensure that the holes were stretched out enough for shrinkage. I lay the cone flat on the plaster blocks, ensuring they were not only flat but kept a clean edge. I found that some of the cones reacted differently in the kiln than others, with a set of two leaning more than the other more uniform cones which only showed slight dips within the movement of the fabric due to the firing. I found that when I used one of the cones that leant to the side a considerable amount more, that I was able to use this within the installation as it looked like the yarn was pulling the cone towards that direction.
When putting these shapes within the installation, I primarily used them to hold down the bottom machine knitted shape, with the cones working well for holding the yarn at a close distance. The tension did mean that some ceramics were slightly off the ground, causing a slight shadow. This showed the tension within the piece and how the ceramics were being utilised. One of the cones were hanging, holding two knitted shapes down from above, for this I used the holes at the top and I wanted the cone to be hanging off the ground as I felt it created more tension.
5
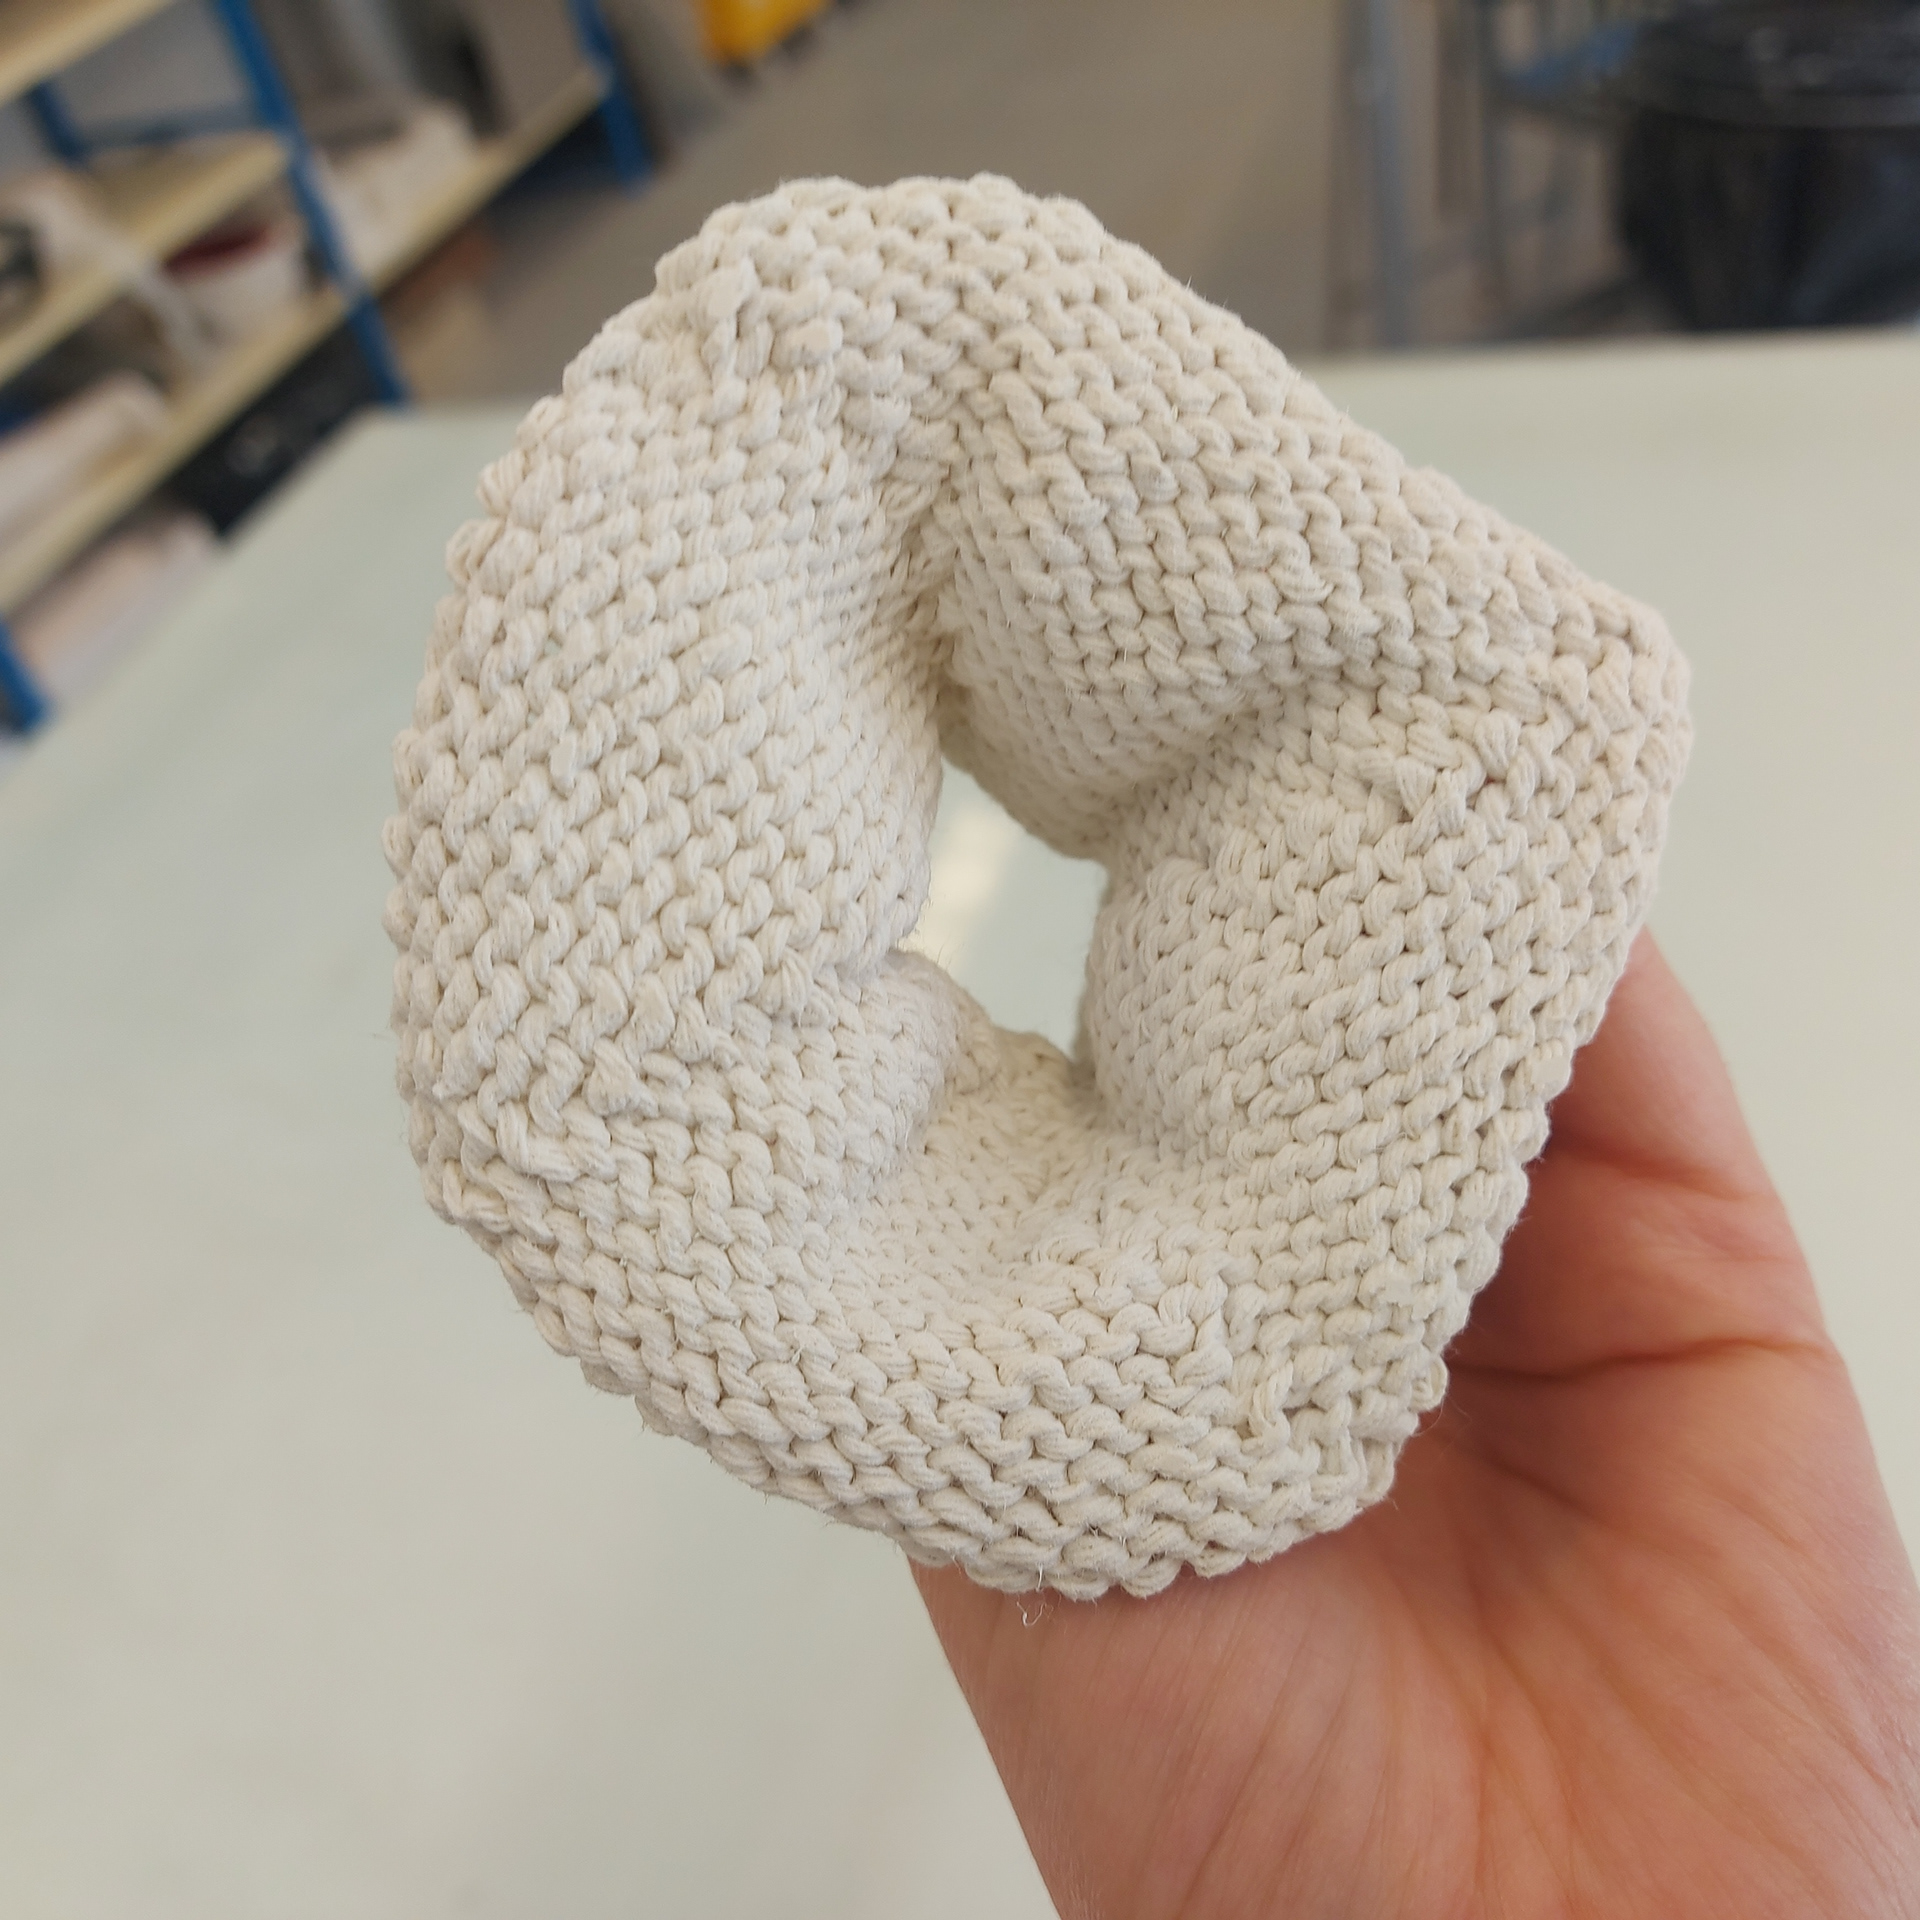
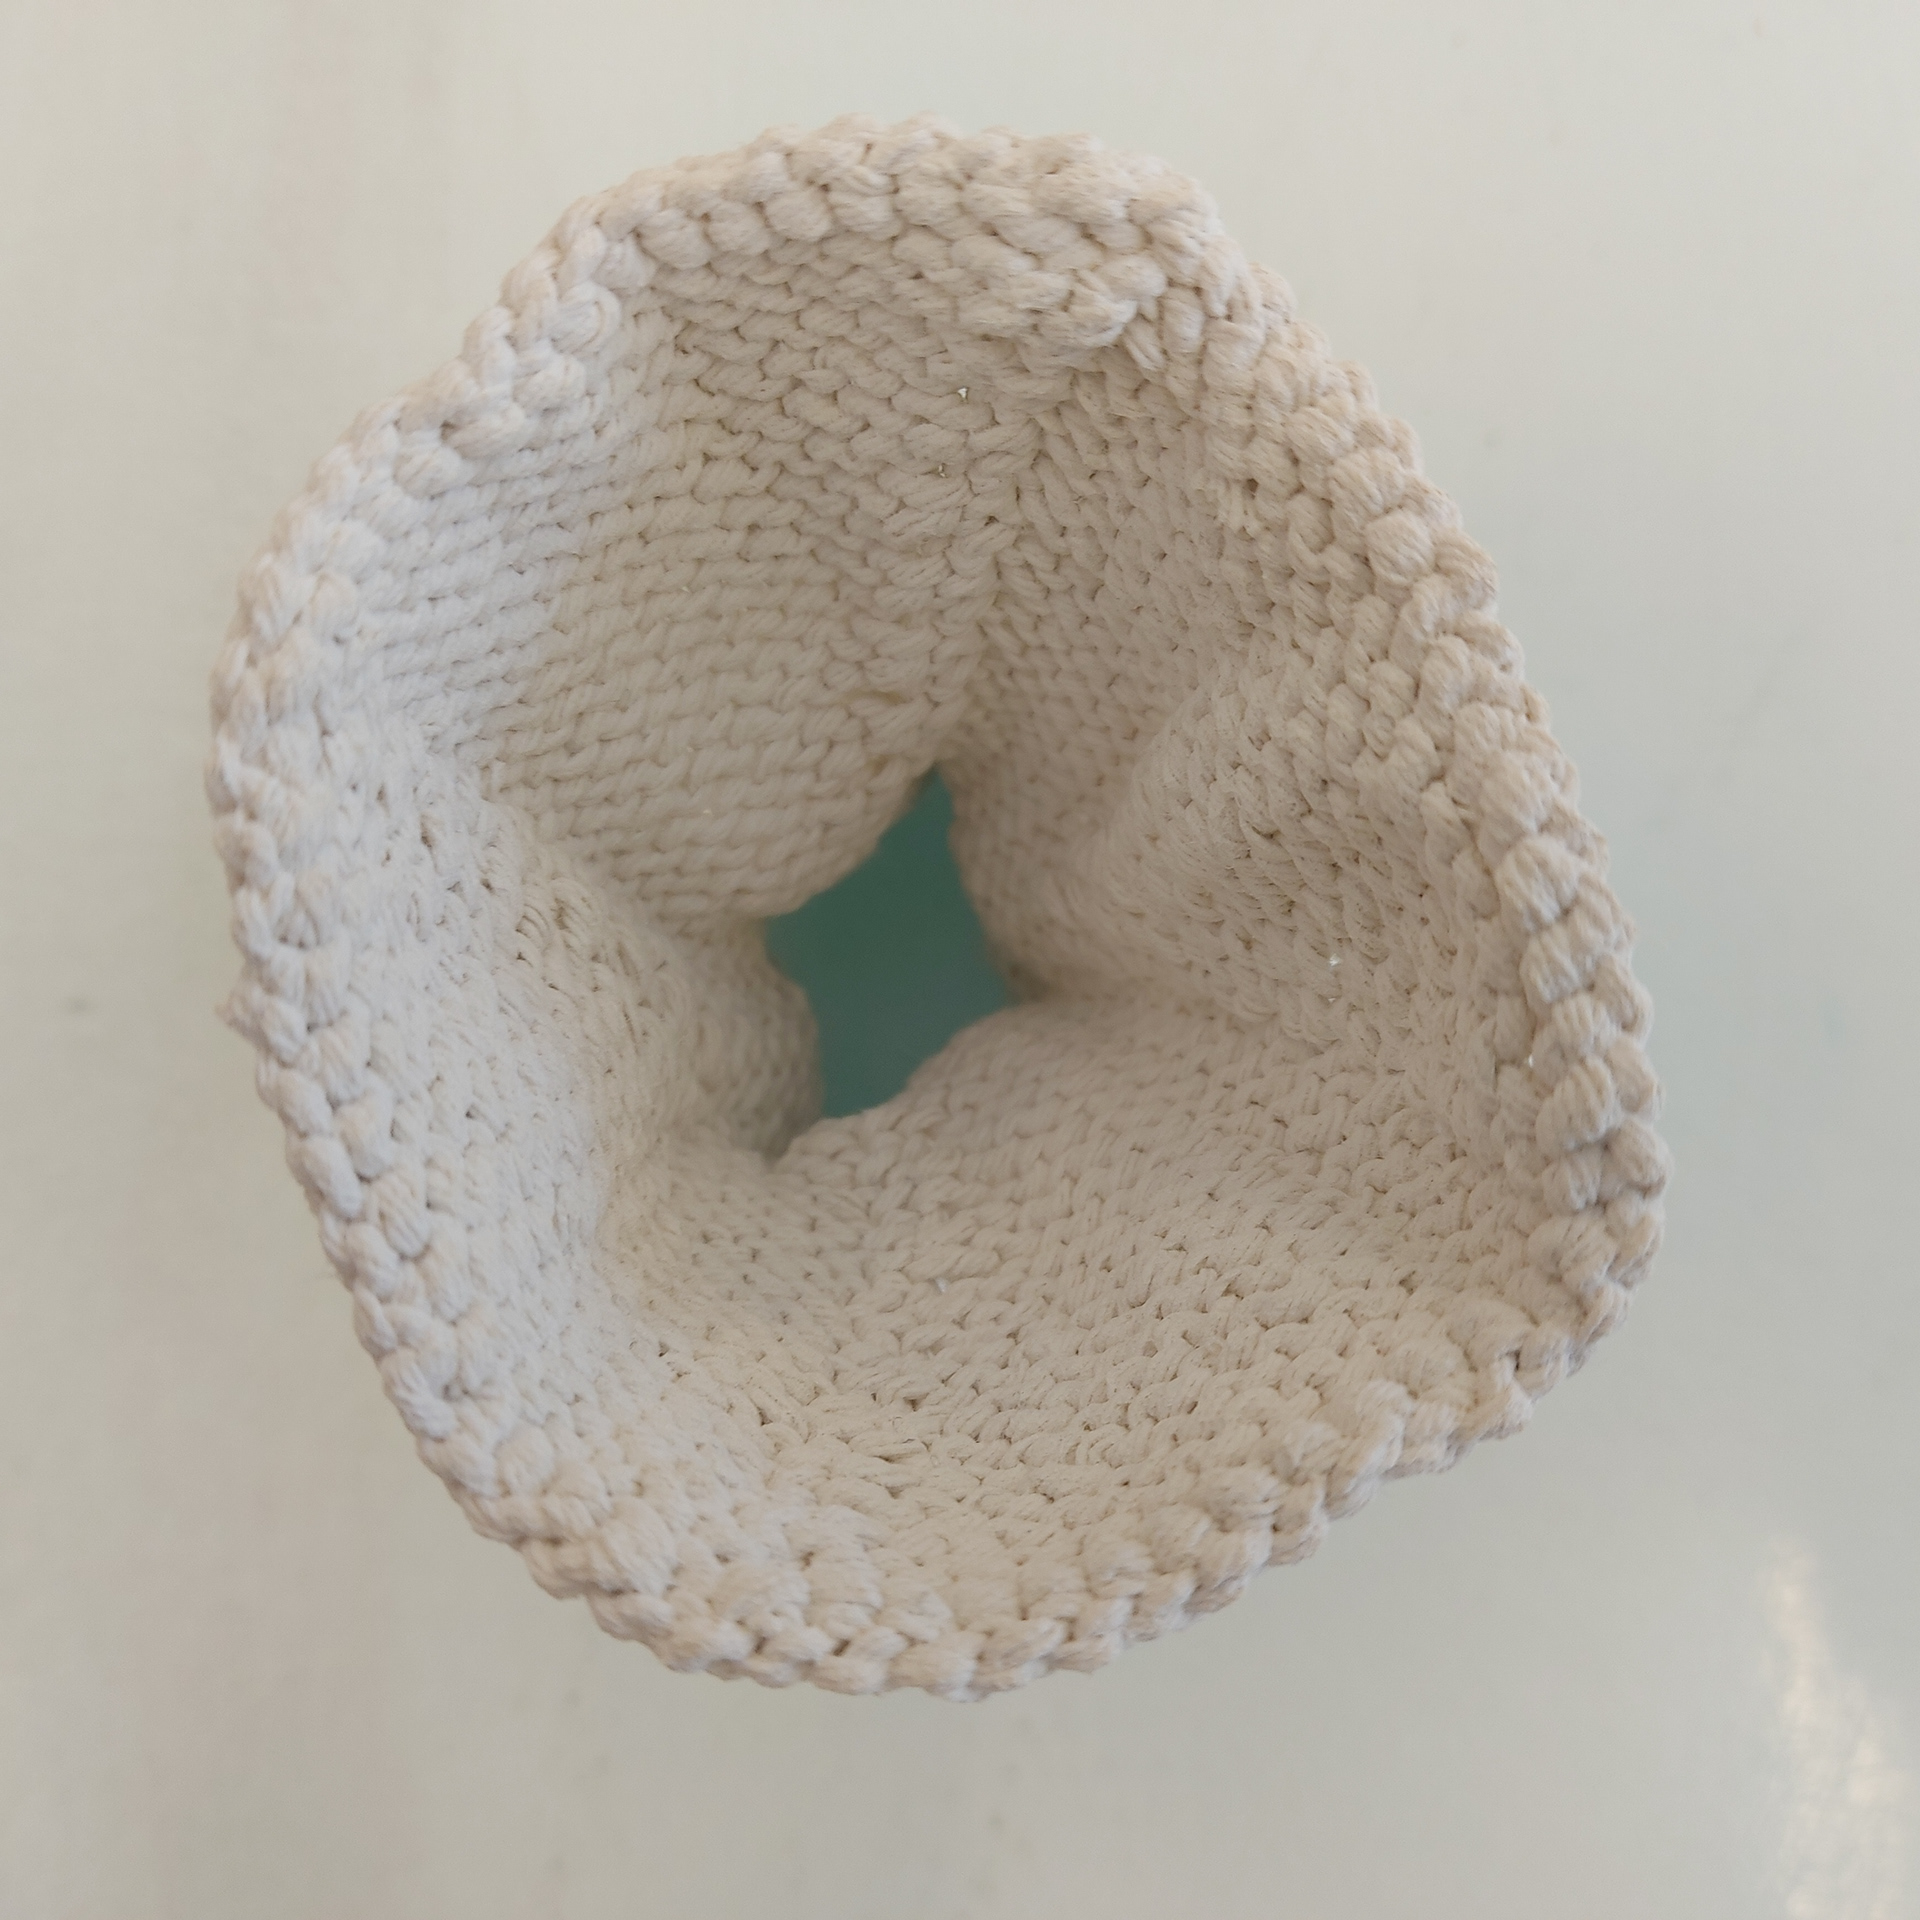
These double sided cupped shapes were designed to wind the yarn around the middle or to be put through the hole at the top of the shape. I used a similar method to the cone shape, creating an even gradient, however I found that the methods I used to increase and decrease the stitches made one side more rounder than the other. I did like how you could see the construction of the stitches and how either end merged into each other.
When putting the piece in the slip I used the same process that I had been using, submerging the piece in slip twice and then laying them flat on a plaster block to ensure no pooling of the slip. I found that I didn't need to lift these up and that they stand up on their own while drying.
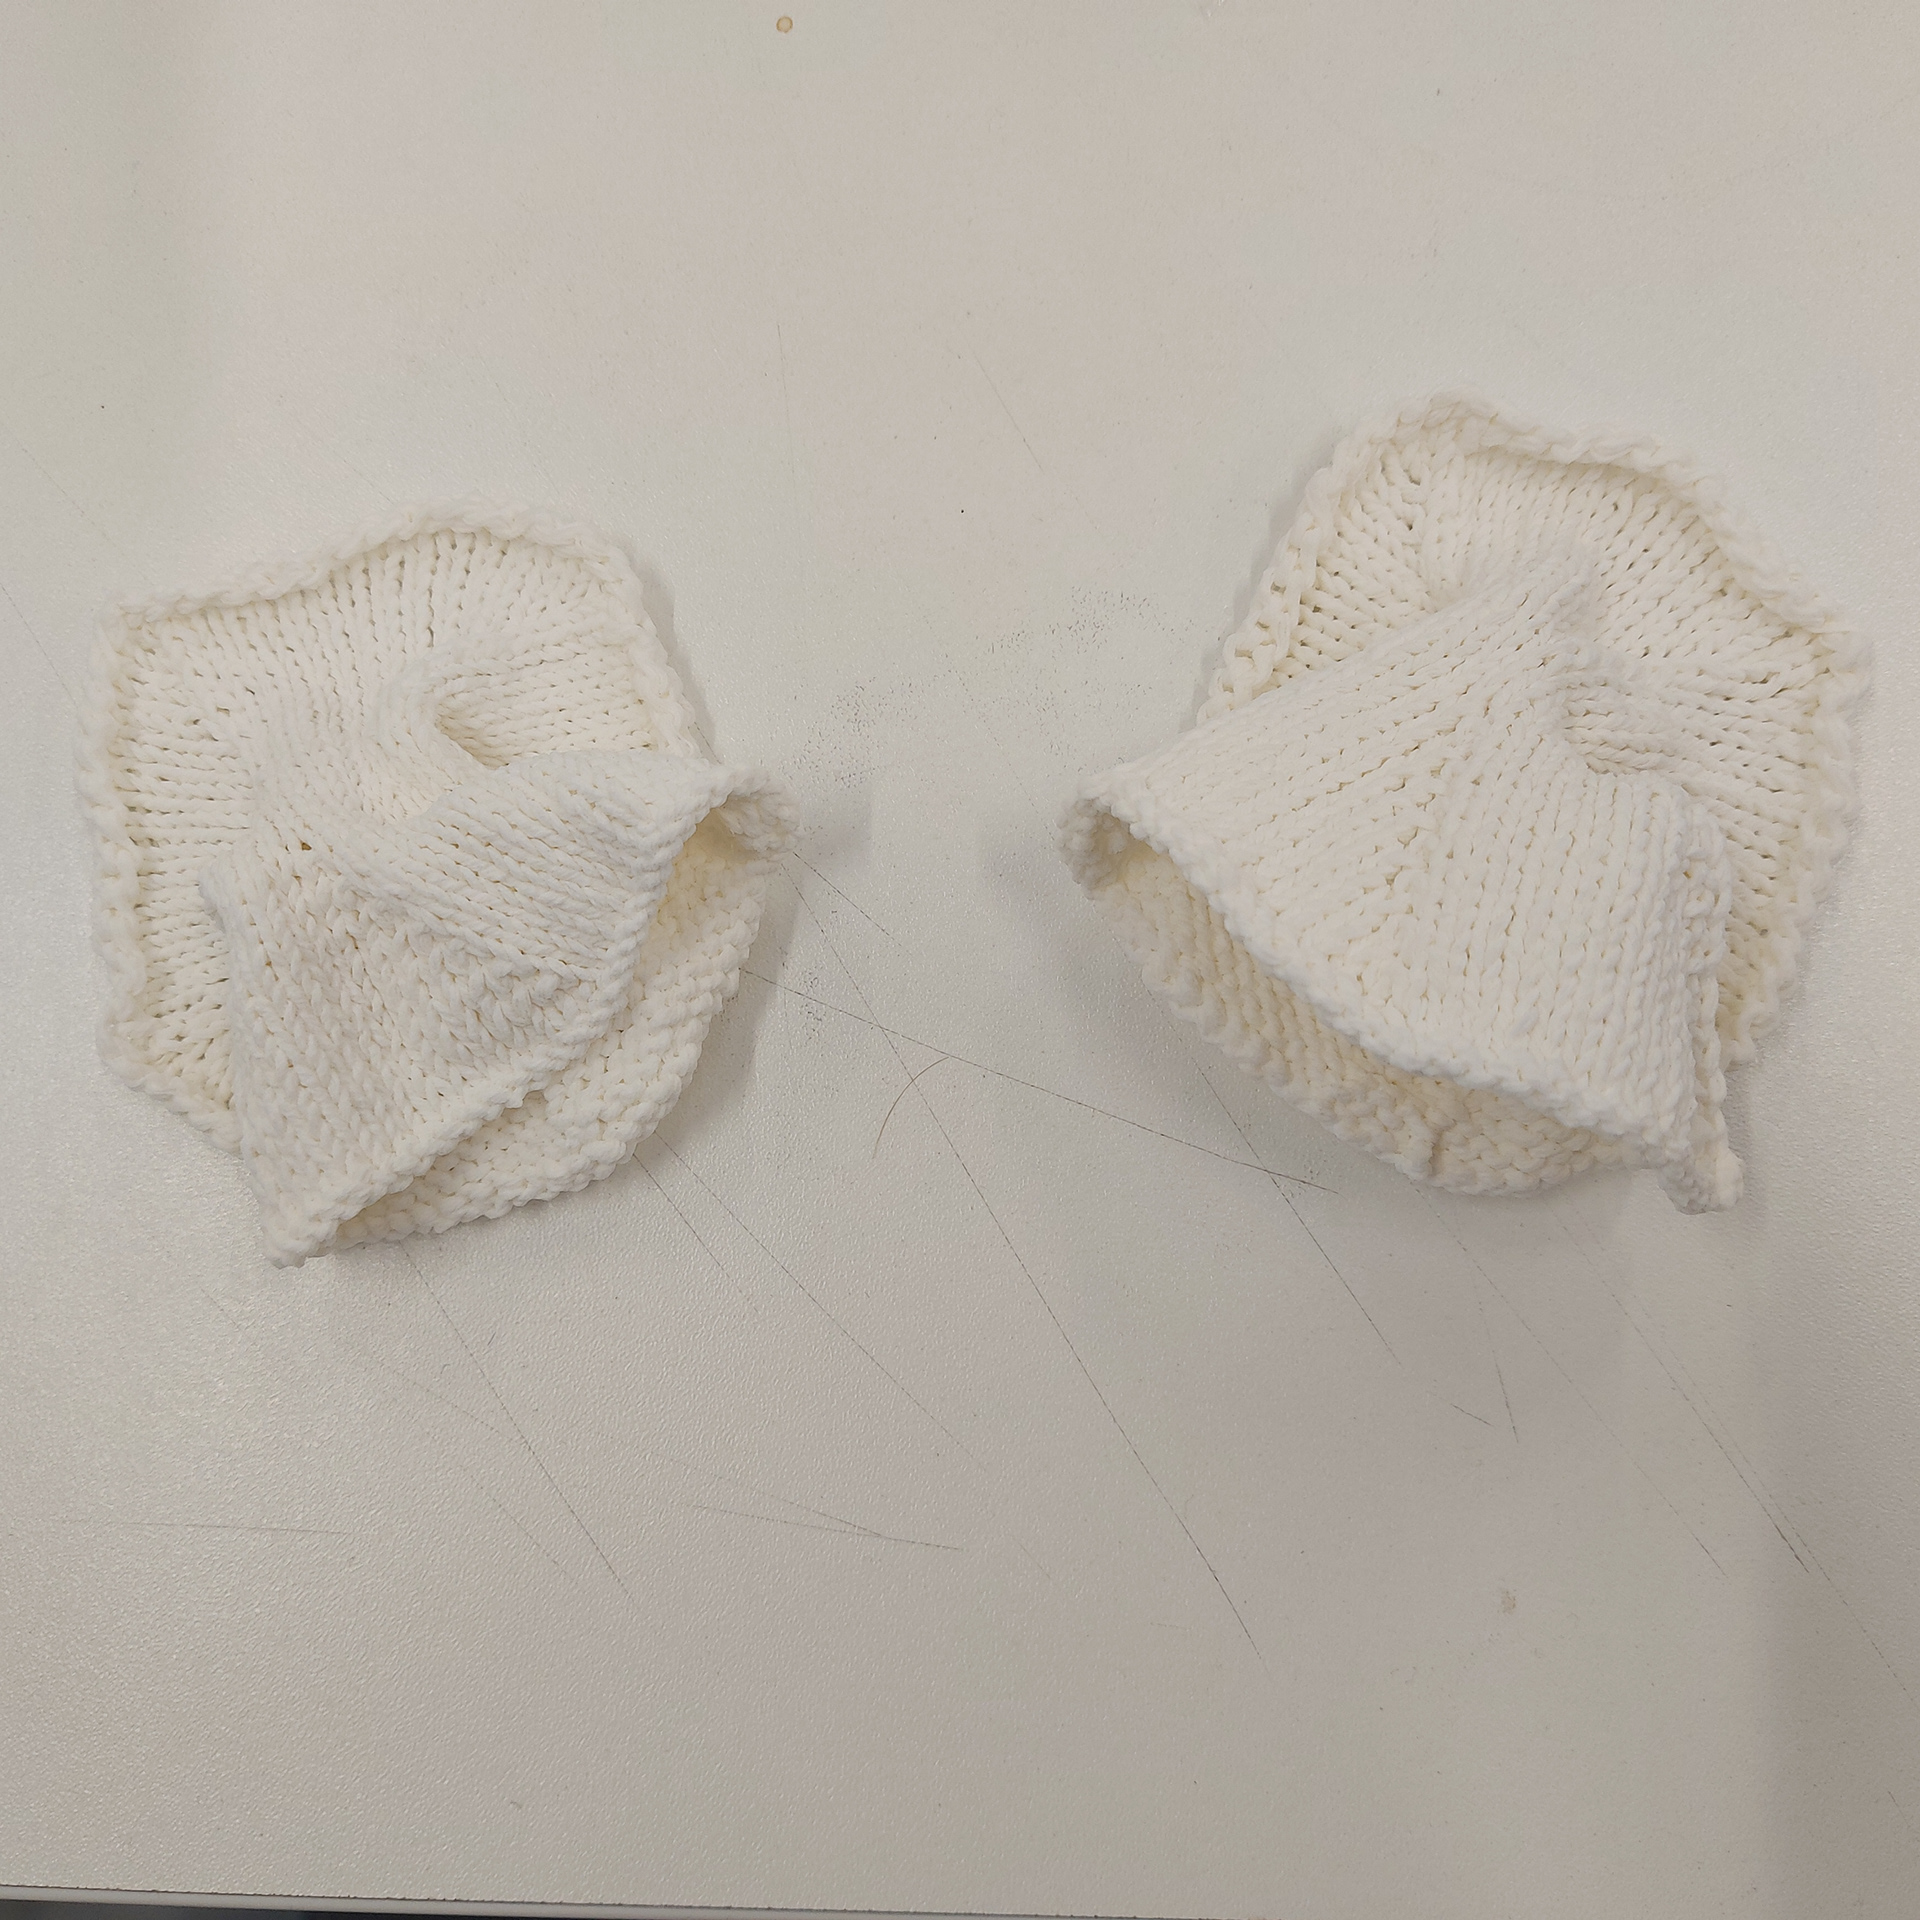
When coming out of the kiln the shapes folded in half, creating a flatter shape than I had expected which meant that I wouldn't of been able to use the ceramics as intended for the installation. Due to the delicate nature of the pieces and the definition of the stitches in the piece I see them as resolved objects but not part of either of my final pieces of work.
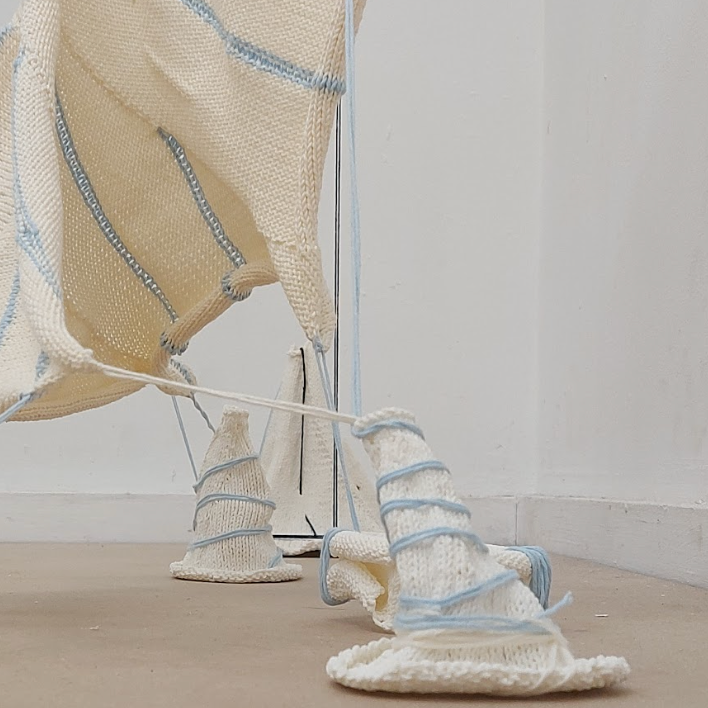
Machine Knitting
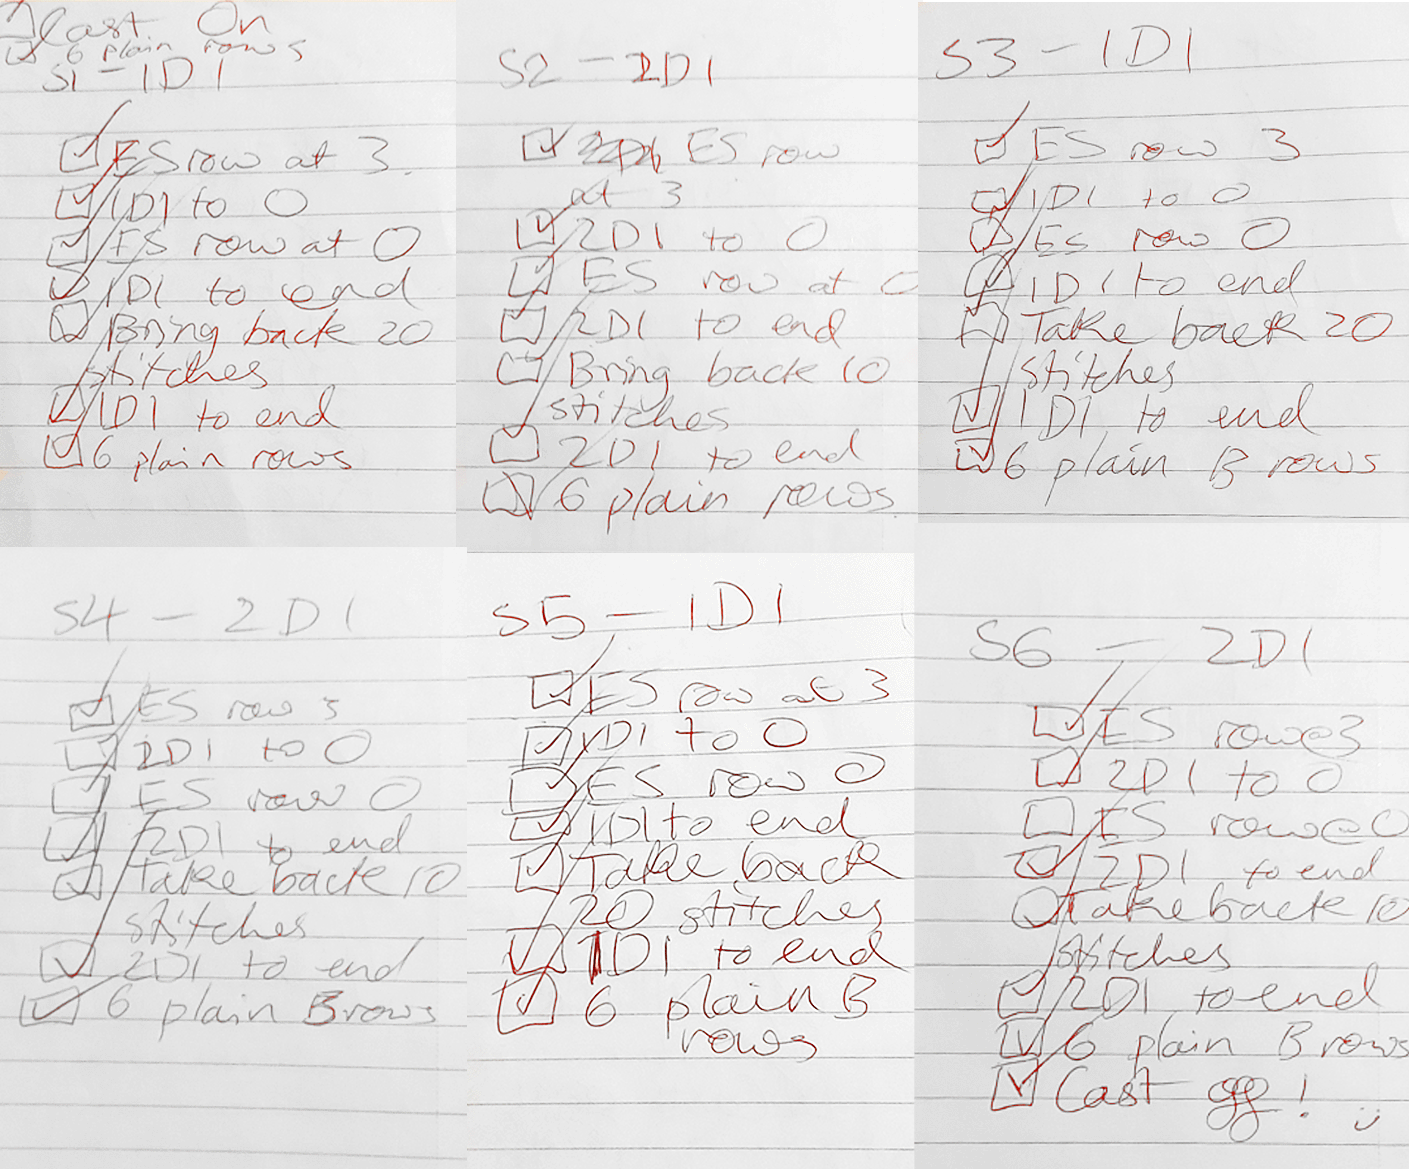
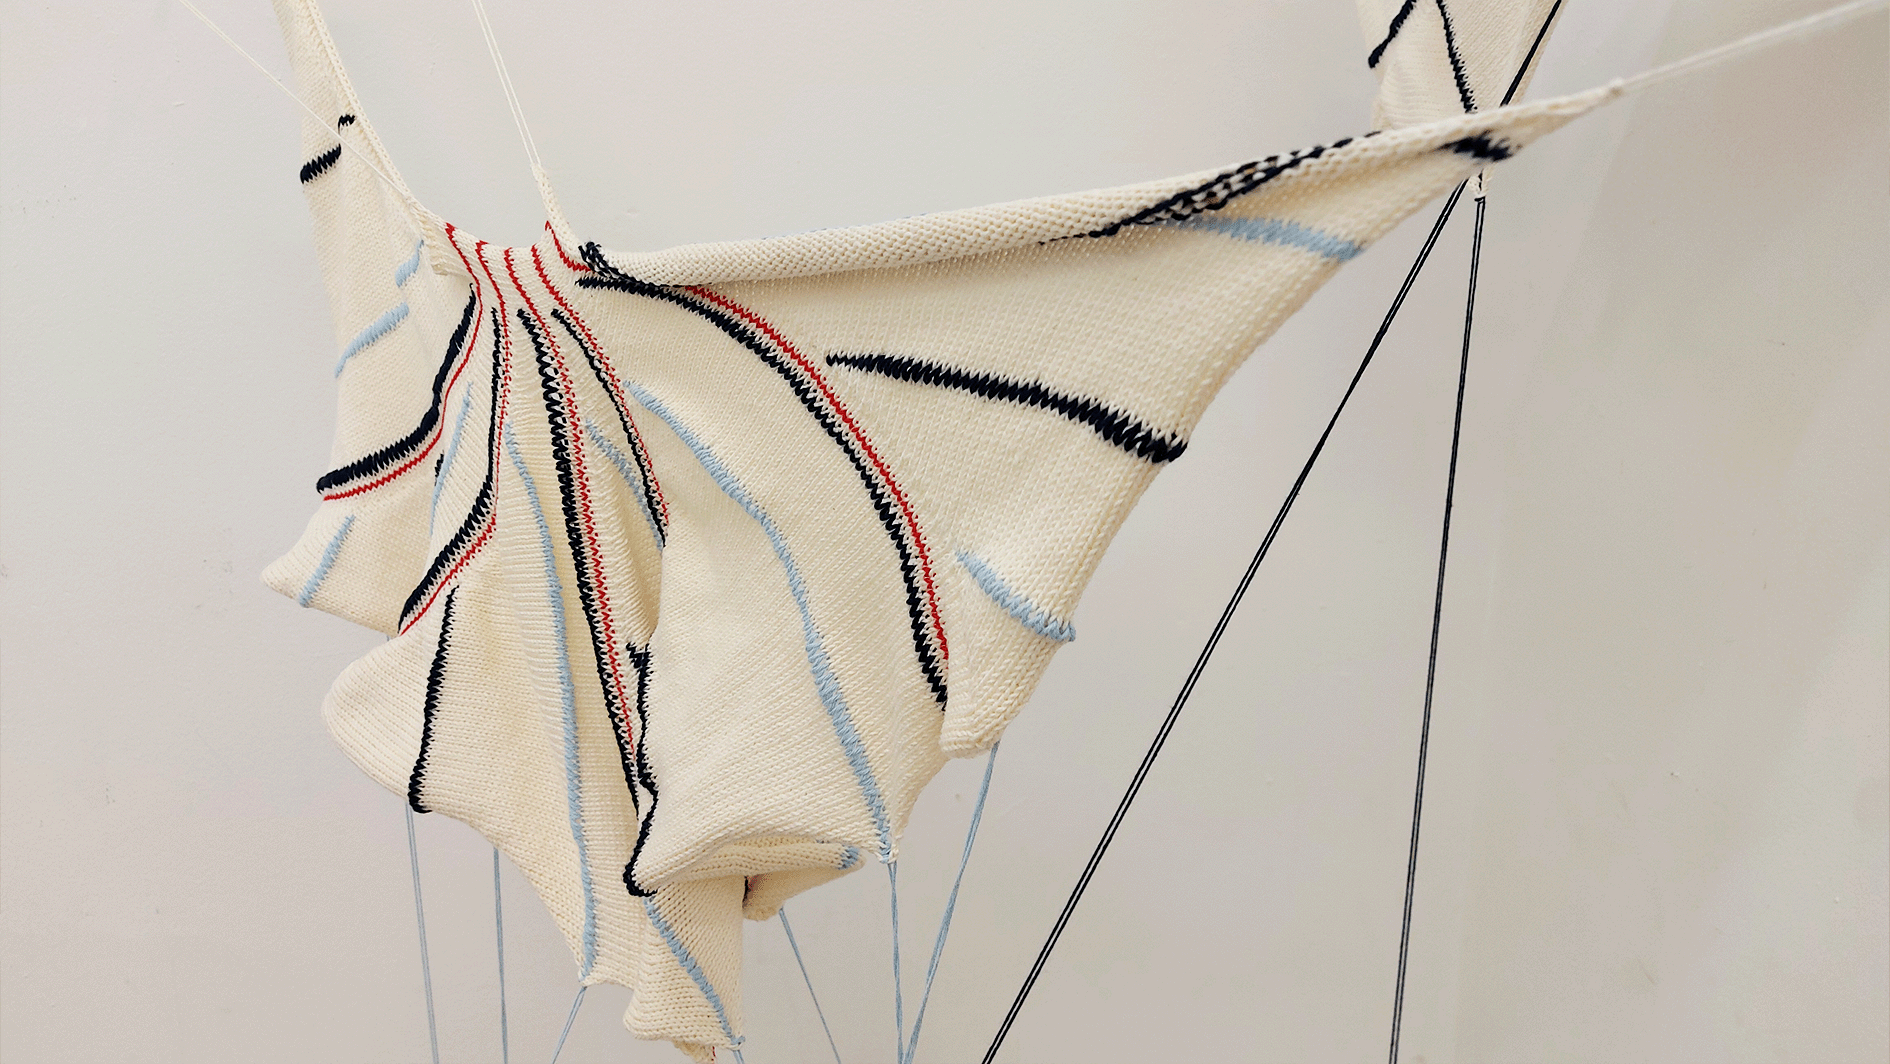
When machine knitting these shapes used within the installation, I made them bigger than I had done before, creating 6 sections that included strands of elongated stitches. At first I found that it could be hard to keep track of when to put in the elongated stitches and the lines of colour, as well as ensuring they were uniform across the piece. To keep track of the work, I made small checklists within my notebook, seeing as I couldn't put my laptop next to the machine. Pictured below are the 6 sections of my navy lined shape, each line on the checklist detailing when I need to do a row of elongated stitches or when I take back needles within the work to create another section. L2 and R2 are referring to the numbers printed on the knitting machine, with a 2 placed on the right hand side and the left hand side which signalled to me where to put the row of elongated stitches.
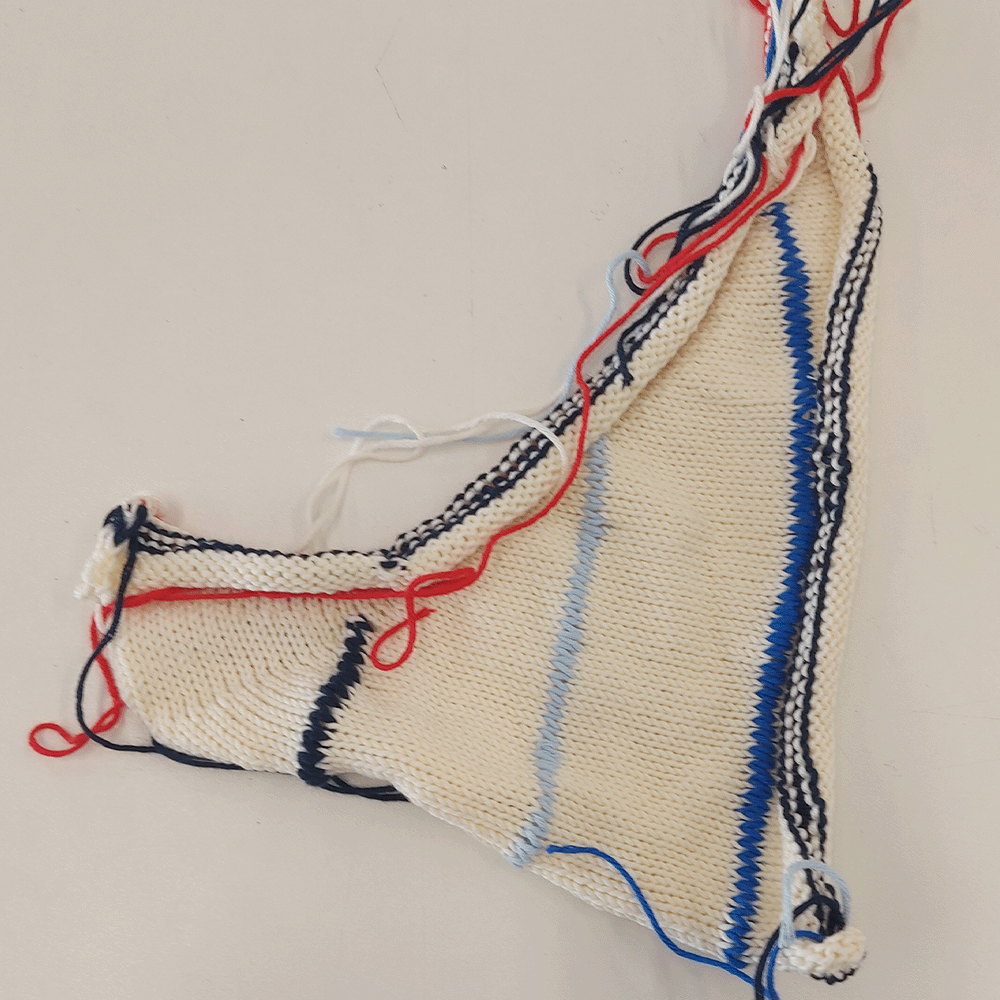
Learning from previous material development, I knew that I wanted to use the same yarn but in different colours for the different rows. I also made sure that I used longer weights across the piece as the elongated stitches needed to be weighed down. After testing three different colours within a sample, I realised that I only wanted two types of blue, as the bright blue did not fit in with the other two colours used. I also used one colour only for the two other knitted shapes after talking about it in a tutorial, this would signify the relaxing colours and put more of a spotlight on them.
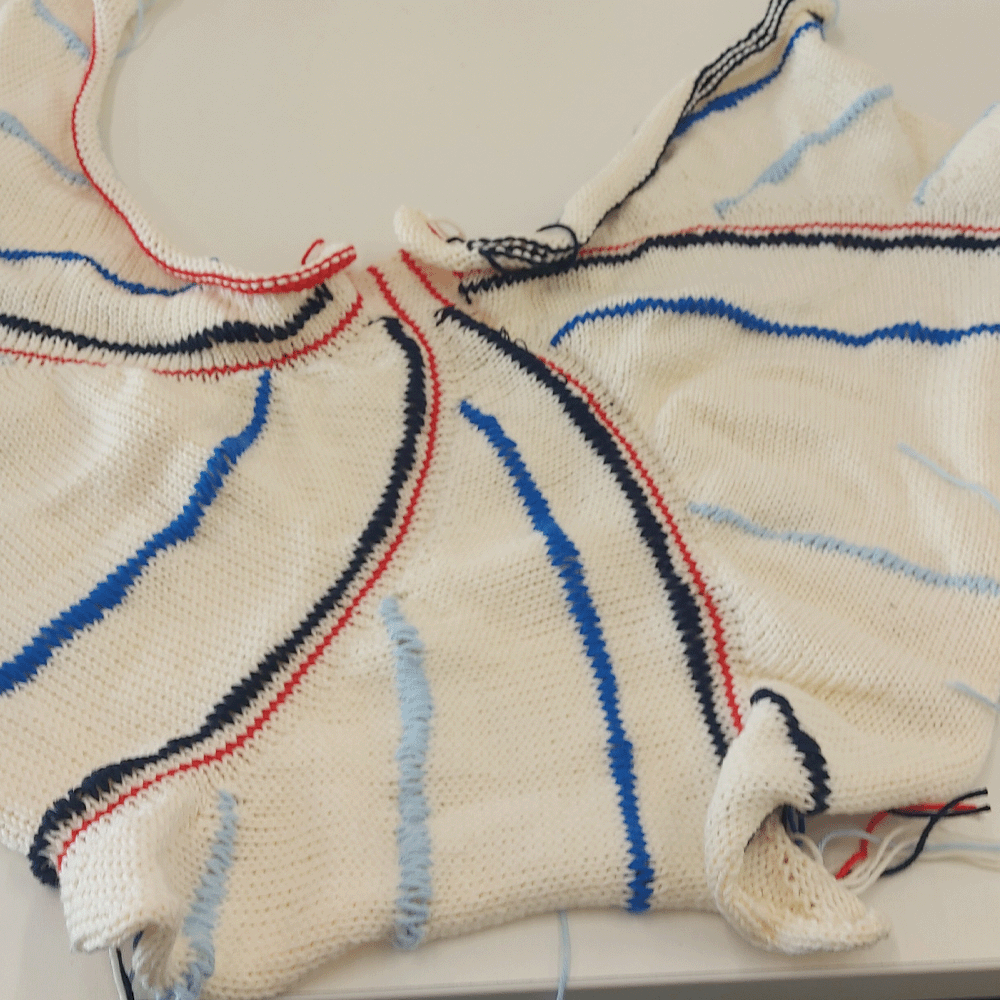
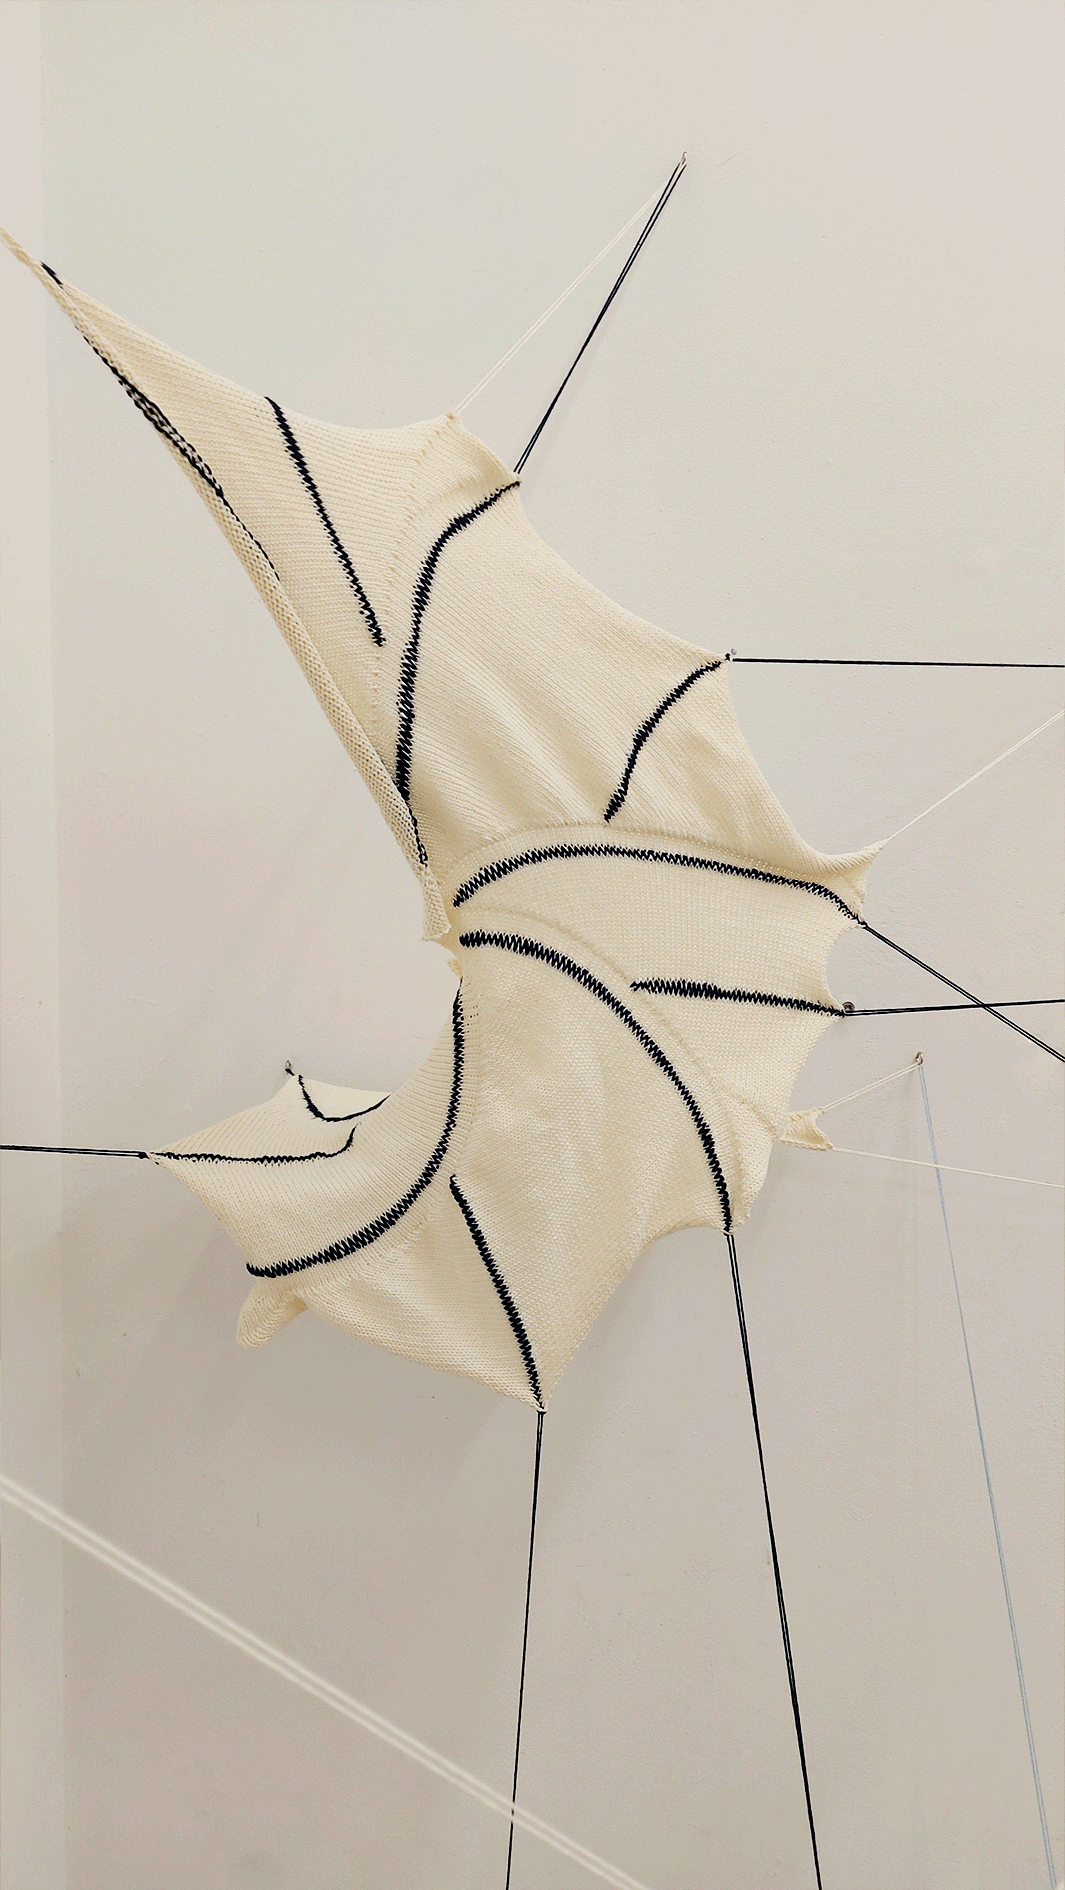
Throughout the experience of using the knitted machine it got me in a flow when using it, I also found myself reflecting on my work. I thought about how the tension of the yarn is so important within the knitting machine, with the yarn flowing through each part of the machine to create a long piece of yarn connecting the cone to the carriage, very similar to how the installation works with connecting the ceramic to the knitting. I also noticed the cream of the knitting machine was the same colour as the yarn I had been using throughout me learning how to use the machine. The hint of red in the middle shape of the installation, alluding to the small hints of red within the text of the machine. I also reflected on all that I had learnt throughout the 8 weeks I had been using the machine and how much I had learnt.
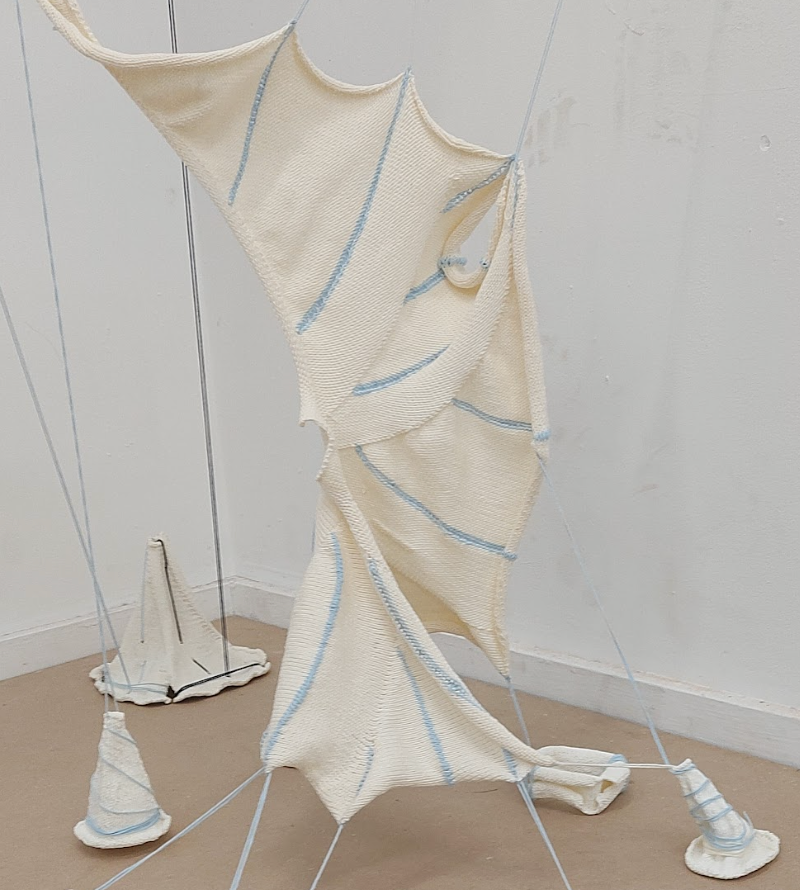
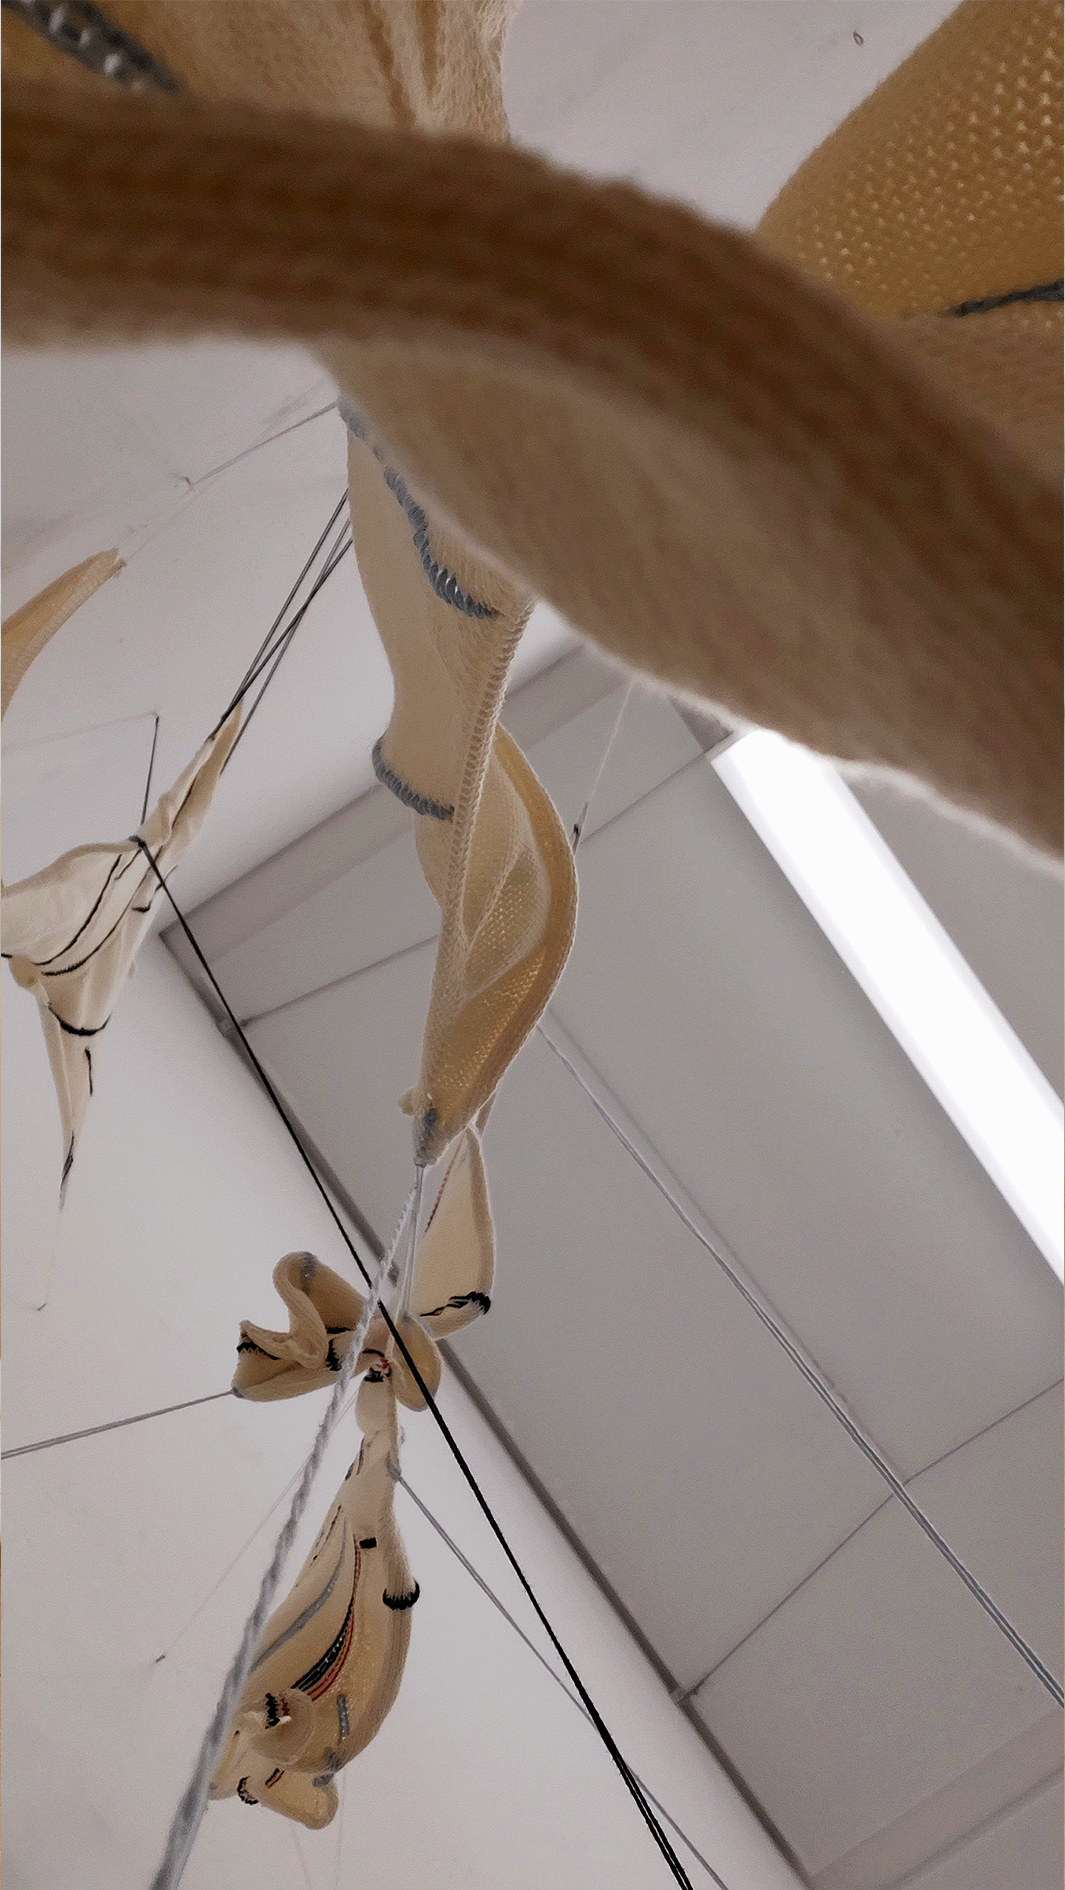
Within the installation, I was inspired by previous experimentation when shaping and forming my knitted shapes. The top and bottom knitted shapes were inspired by my work from Day 4 in the 'pull' section of the portfolio, with the middle piece being the busiest and connecting to the lower piece through the long pieces of yarn. The top piece connected mainly to the wall, with the shape turning from horizontal to vertical, however I kept the middle piece just vertical, pulling the ends backwards and forwards to accentuate the natural way that the knitting curves. I didn't just want the knitting to be taut all over the piece as I wanted it to still look like knitting and show off the flexibility of it as well as the shaping and detail. The bottom shape twisted round and relied heavily on the weights to shape it, I also created a loop by tying two pieces together, although this isn't how the material naturally forms, I thought this emphasised its reliance on the ceramic and yarn to form the material into the shape it is.
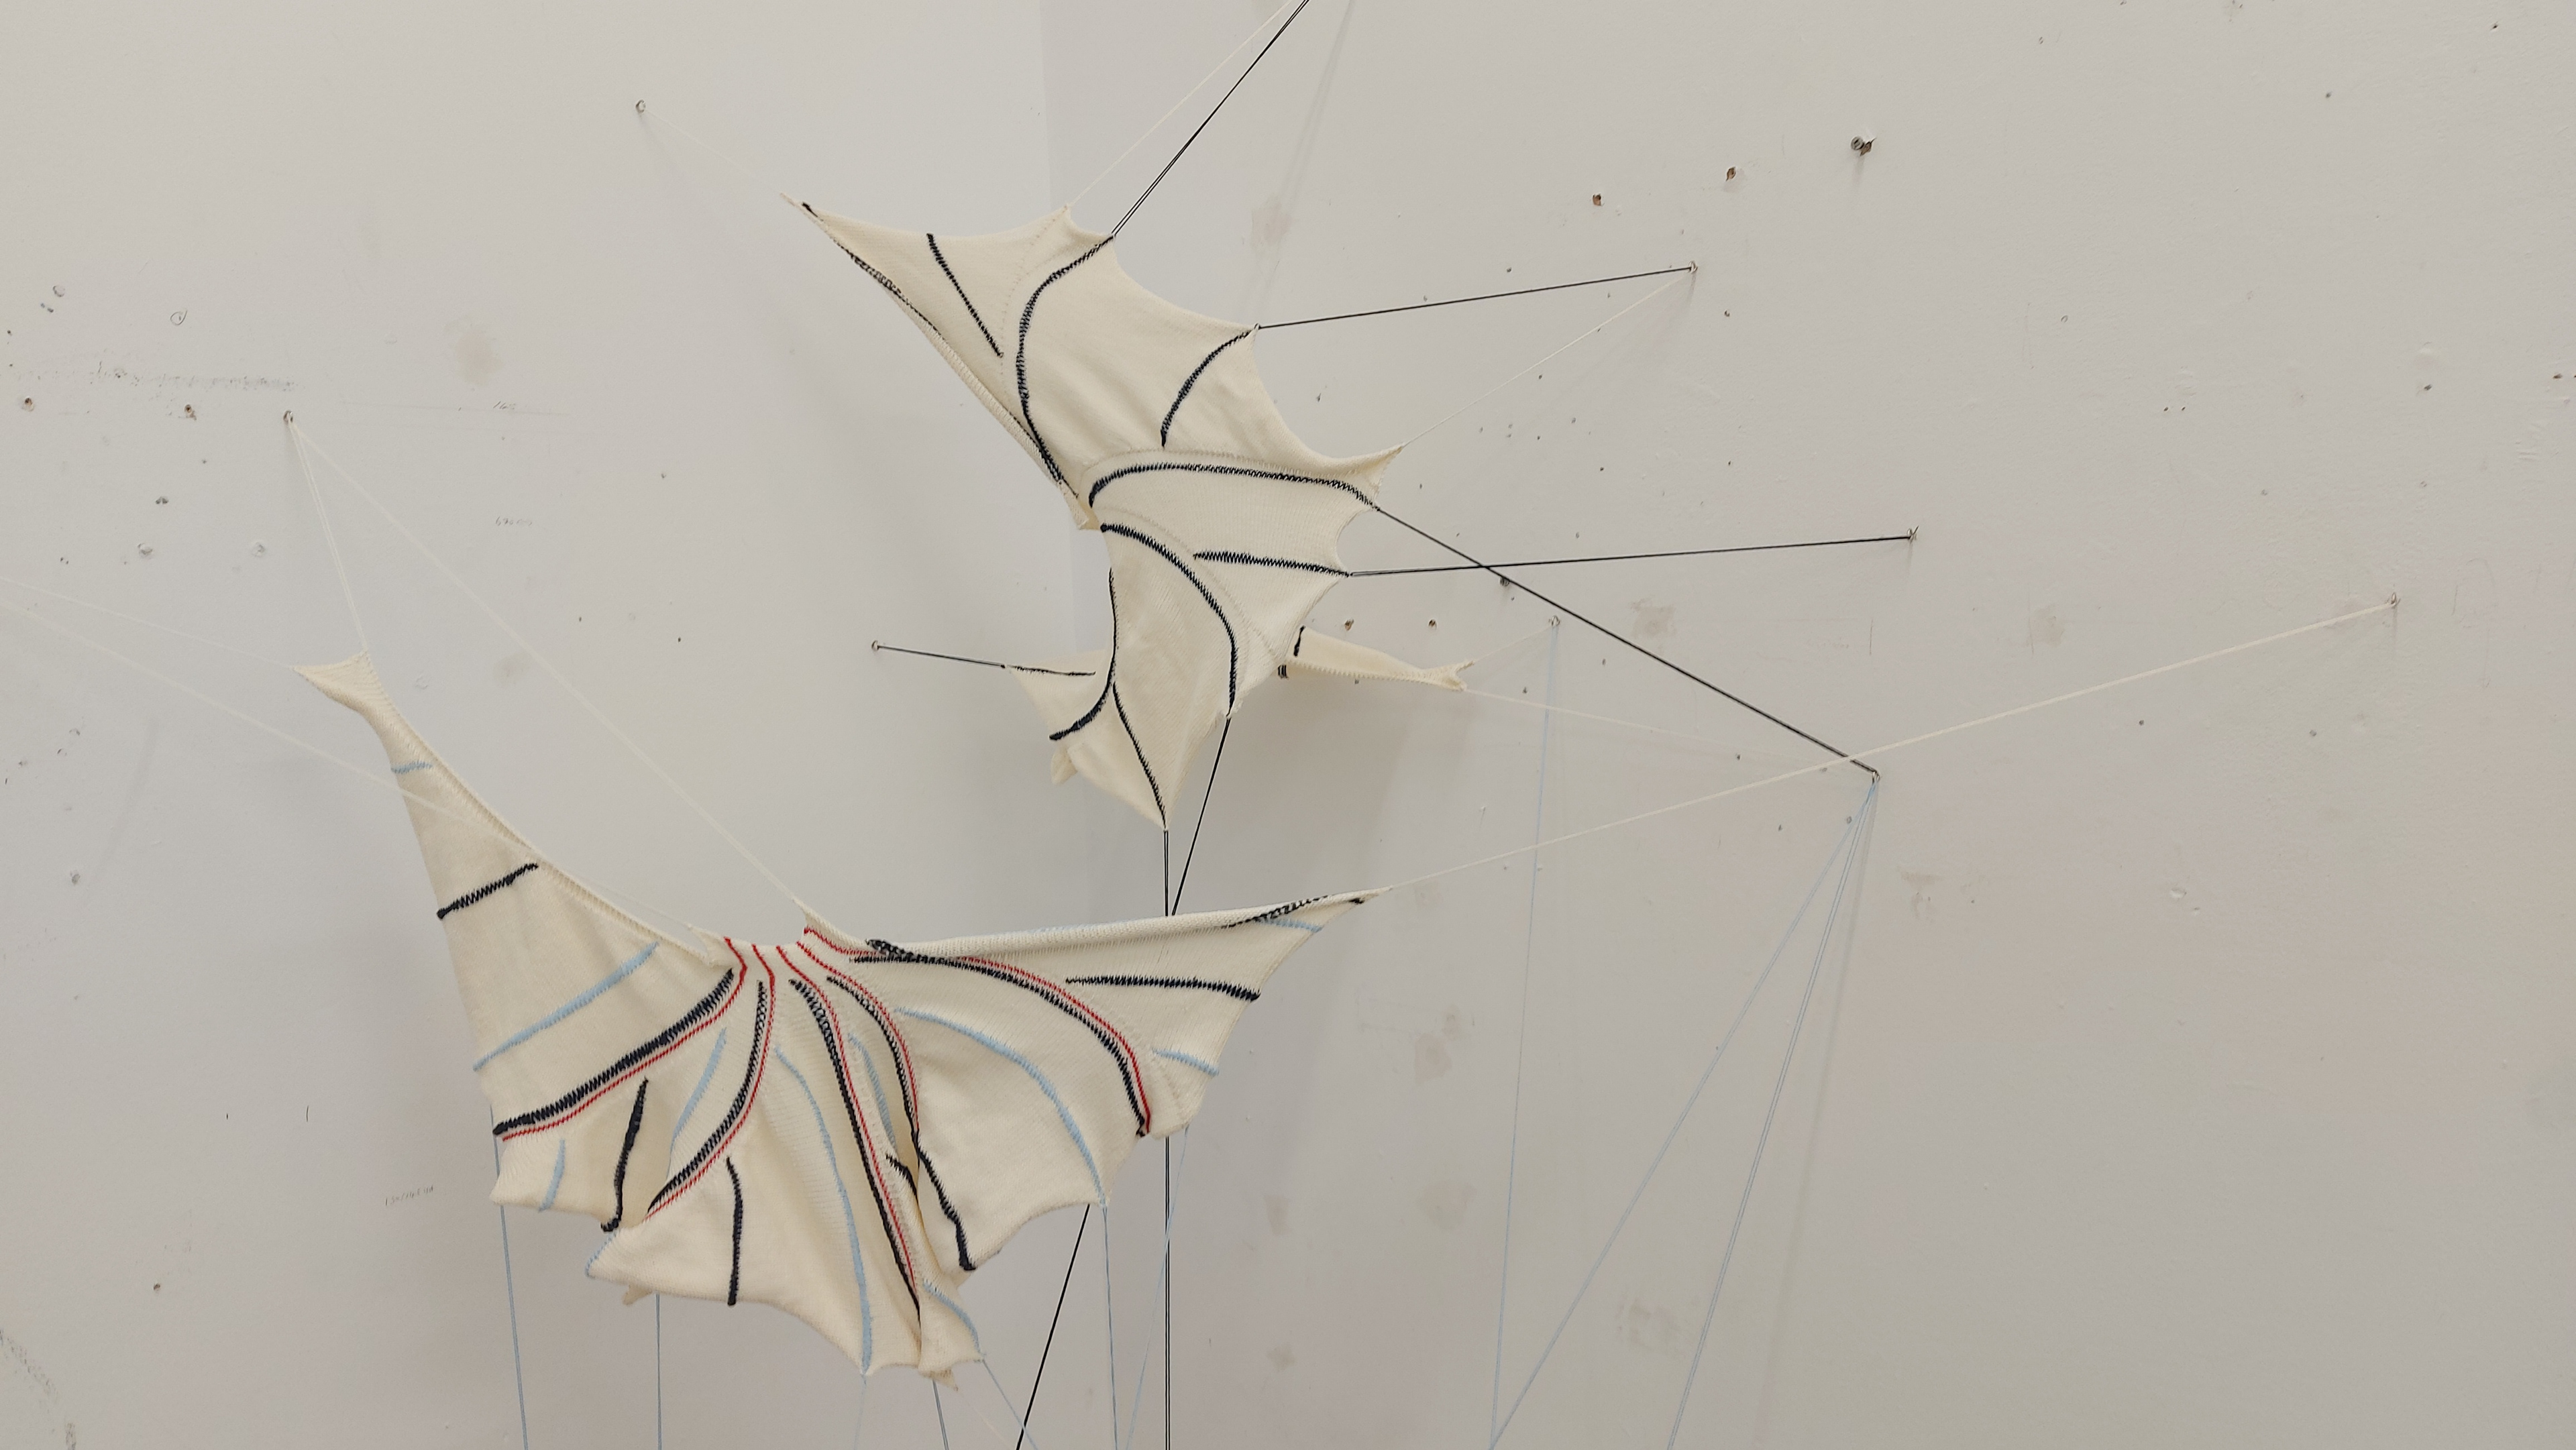
Within the video above, I explain how the sound around me translates into the elongated stitches that I make throughout my final machine knitted shapes. How the louder the volume means that I will pull the needle further back to create a longer stitch.
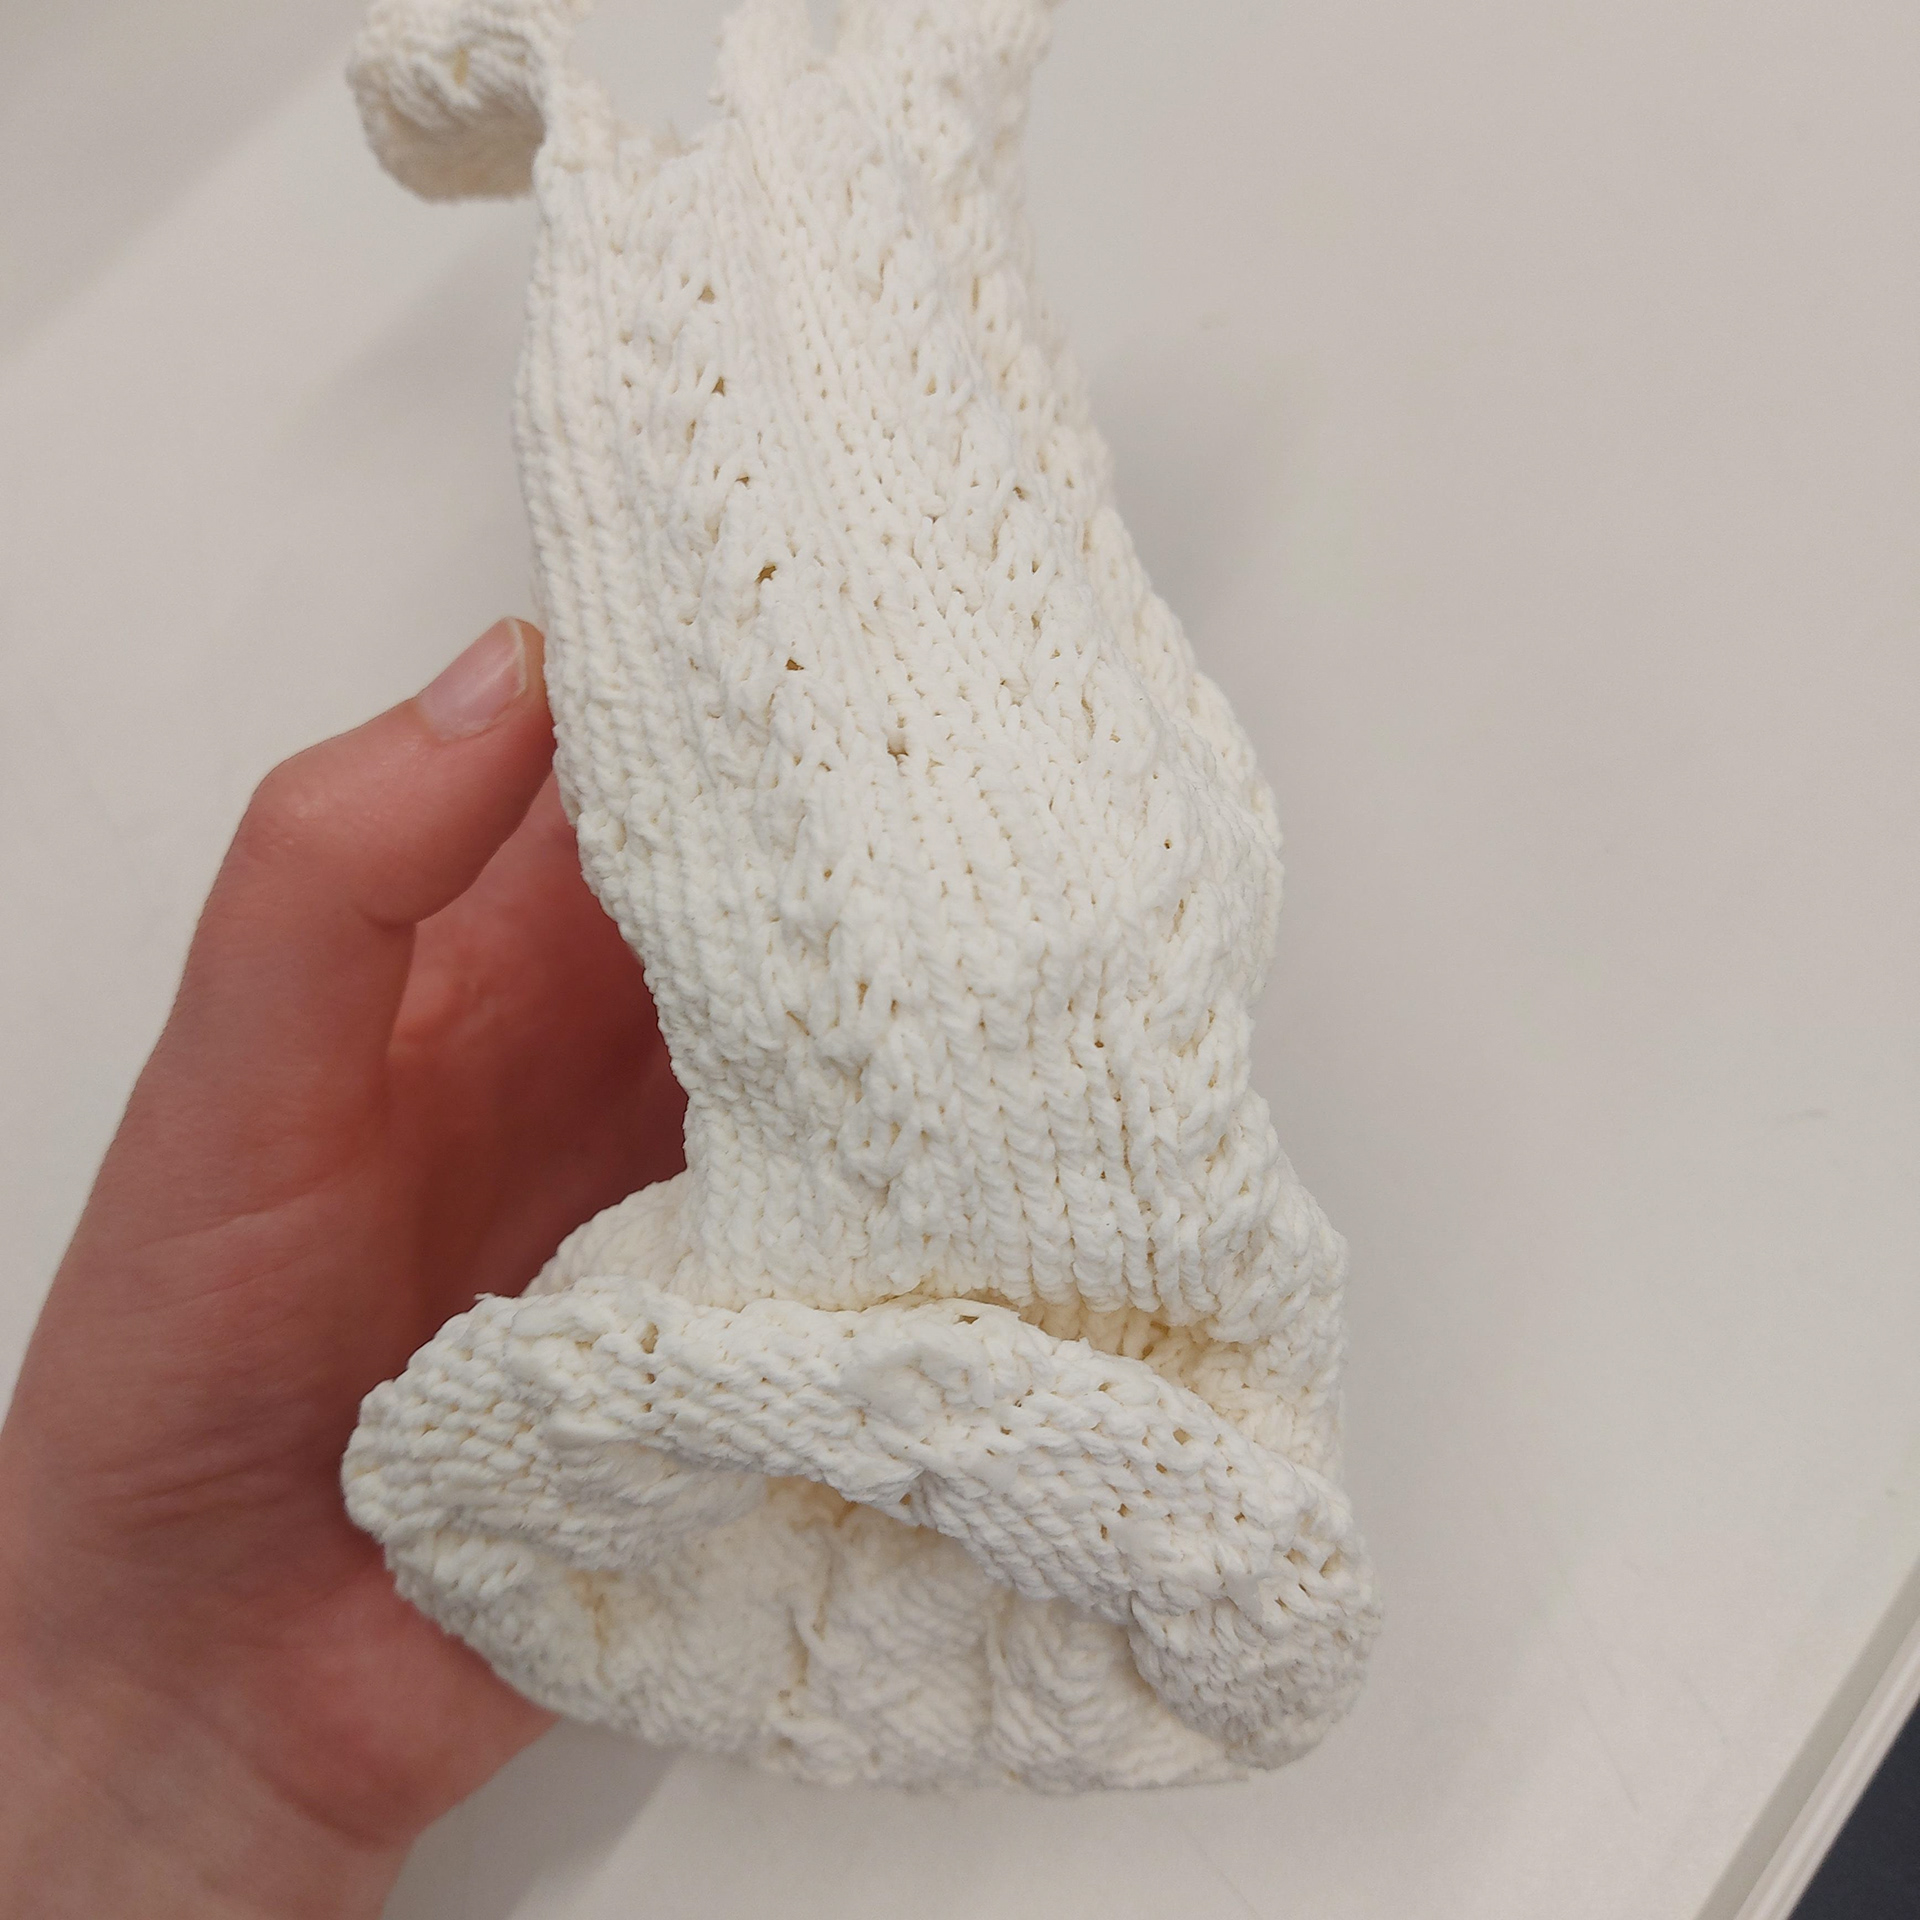
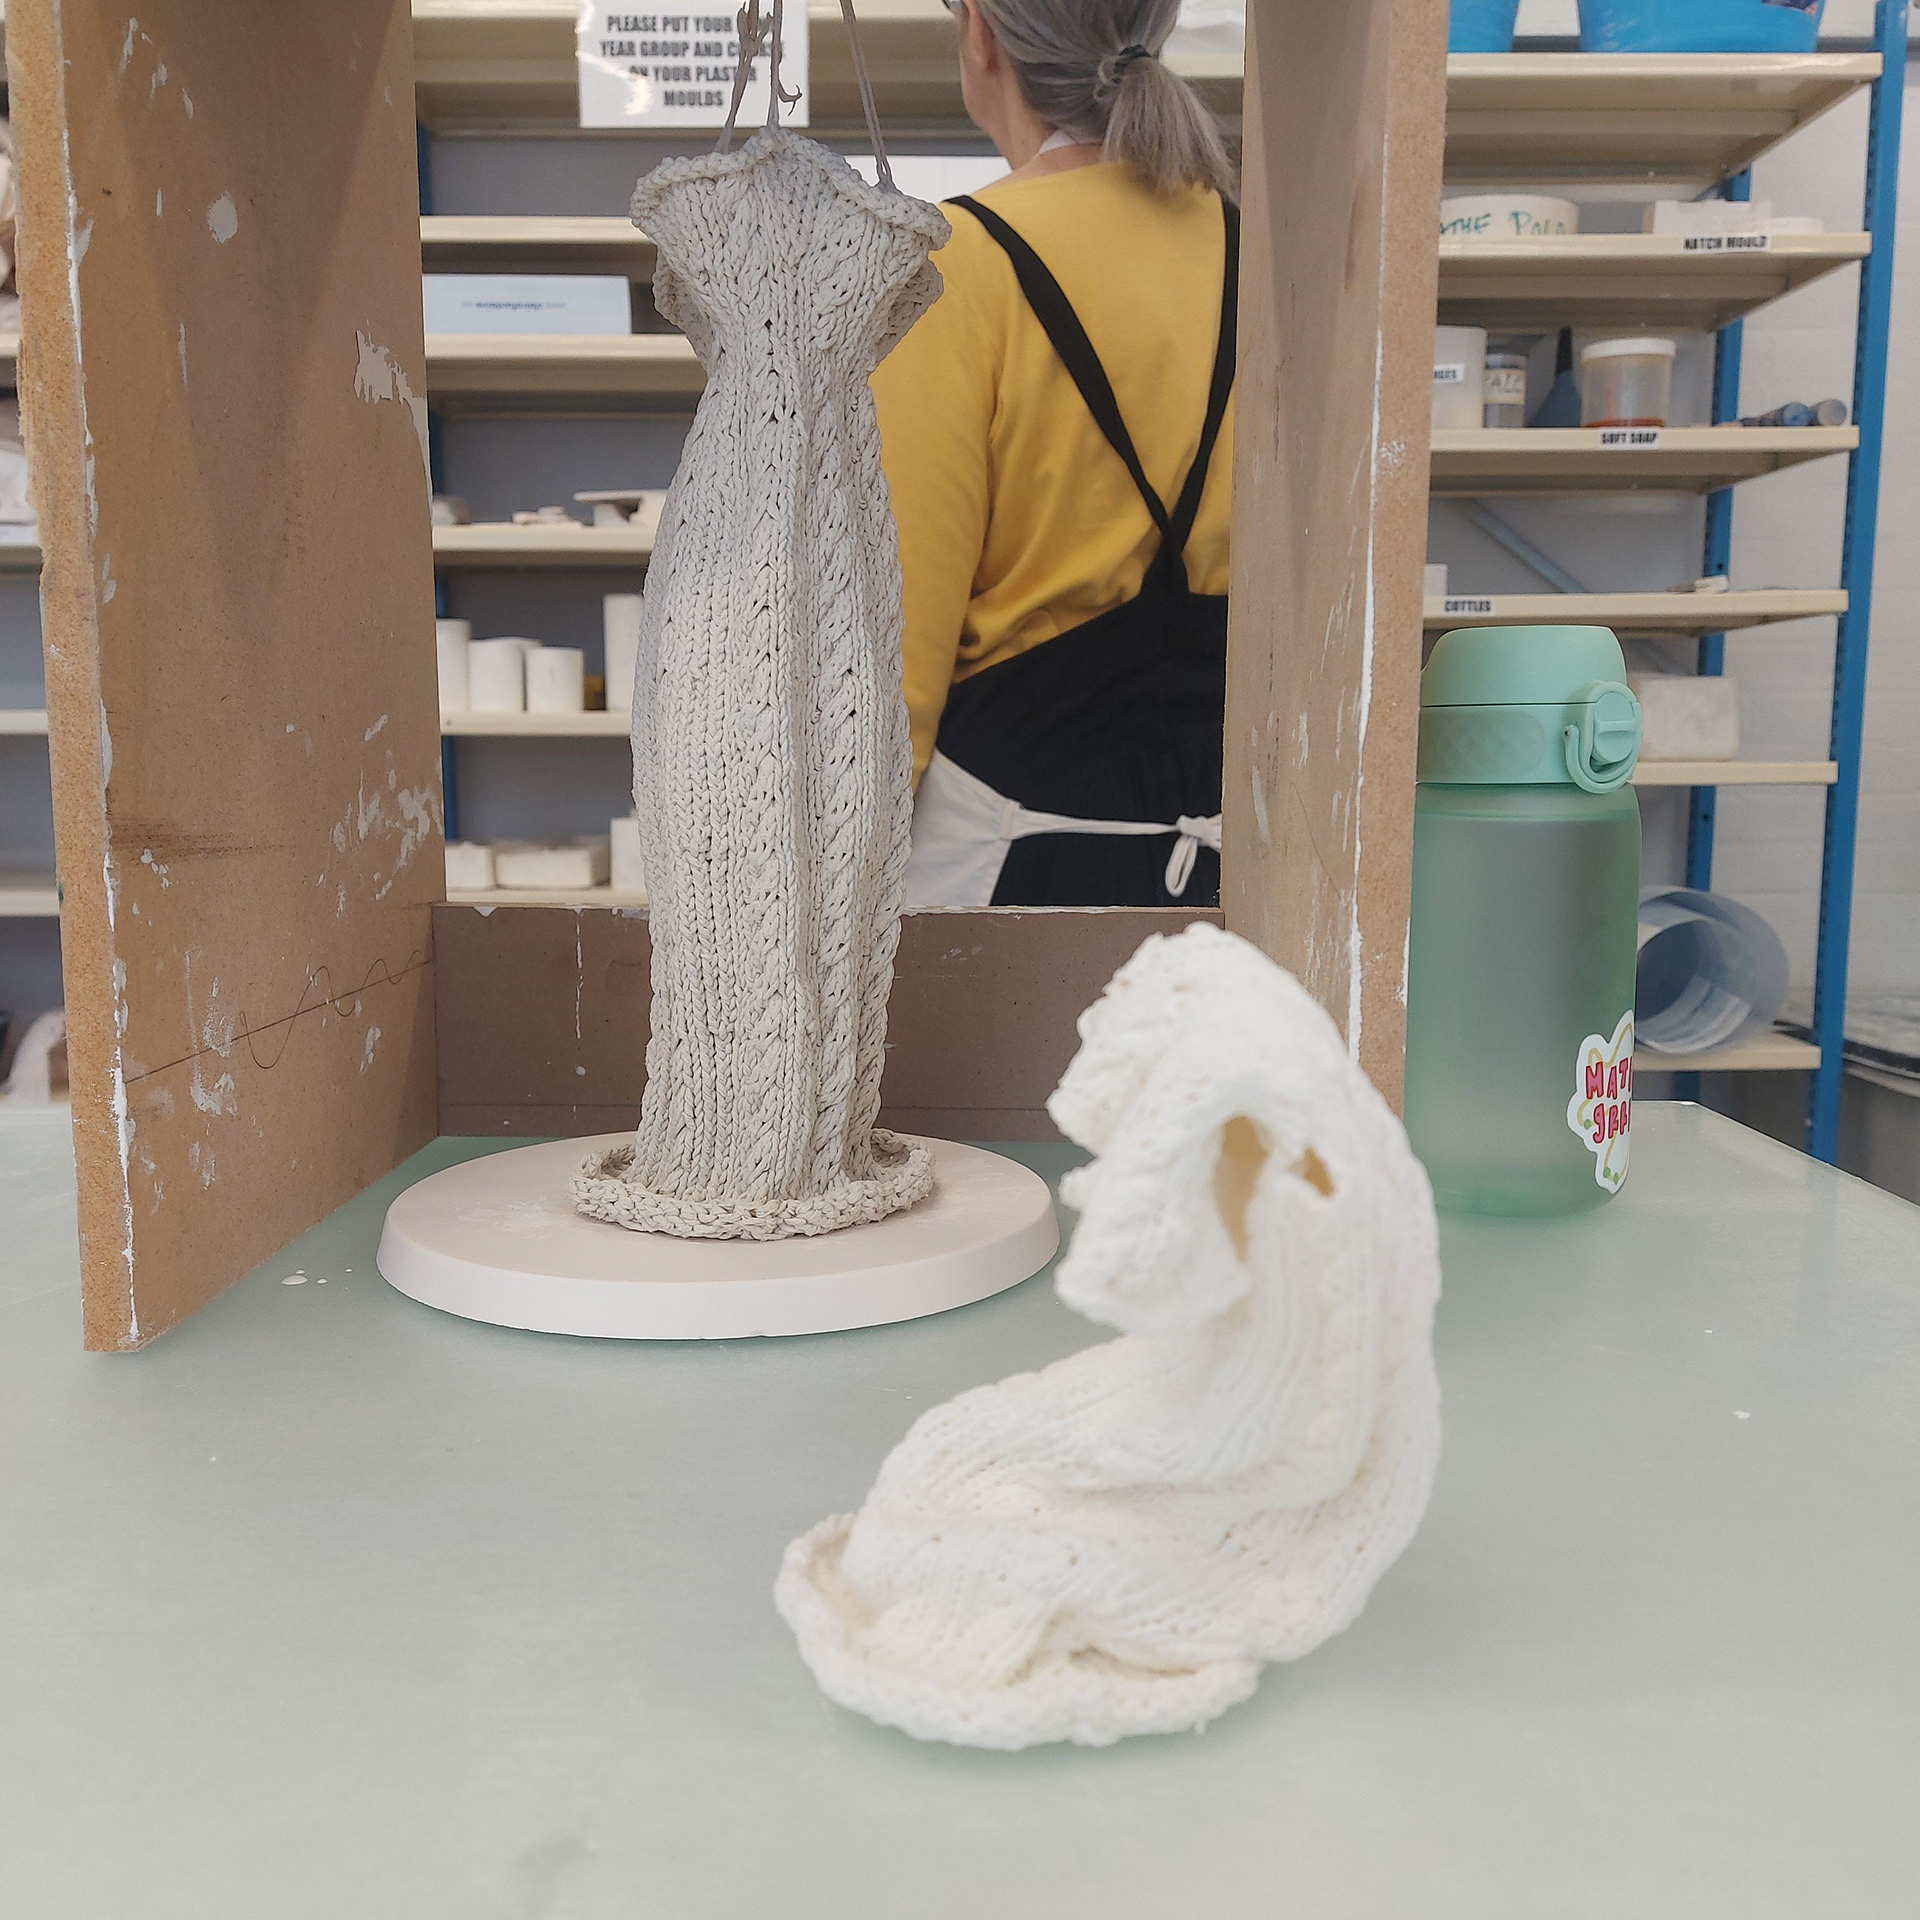
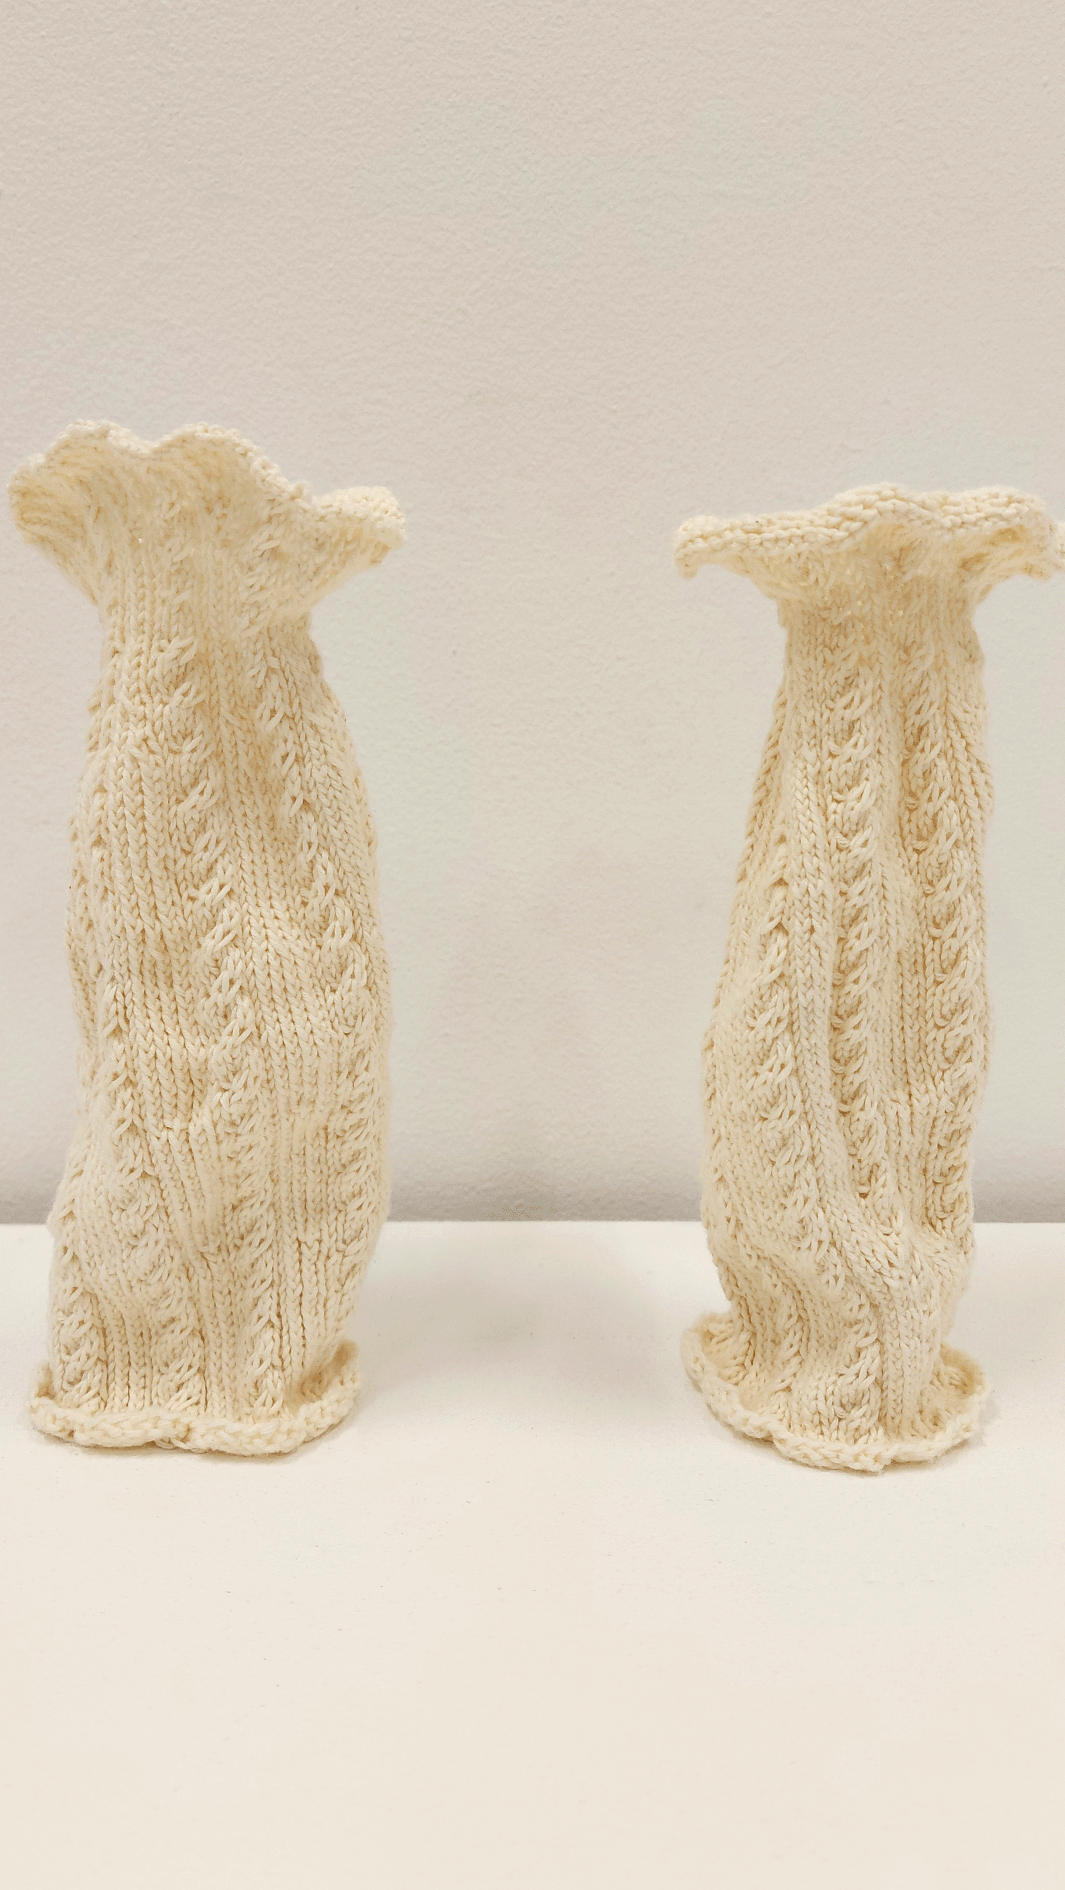
Cabled Knitting and Ceramics
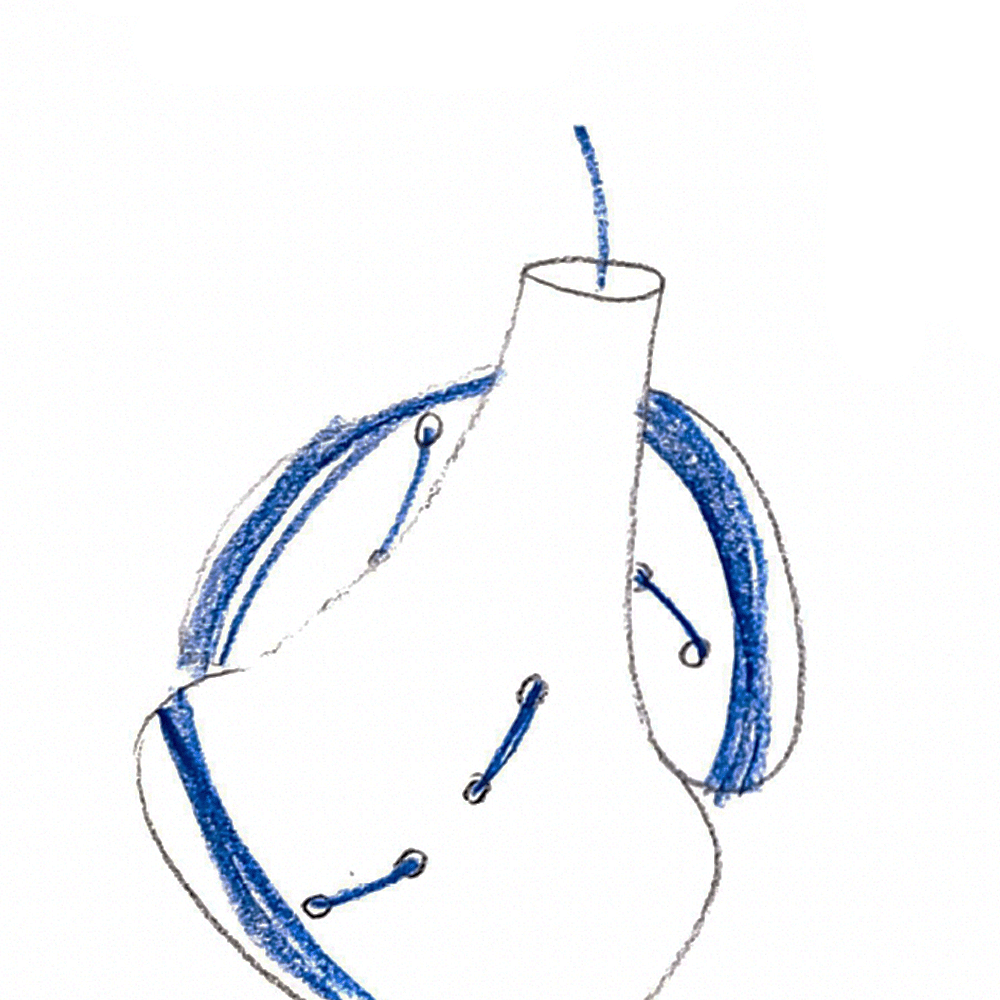
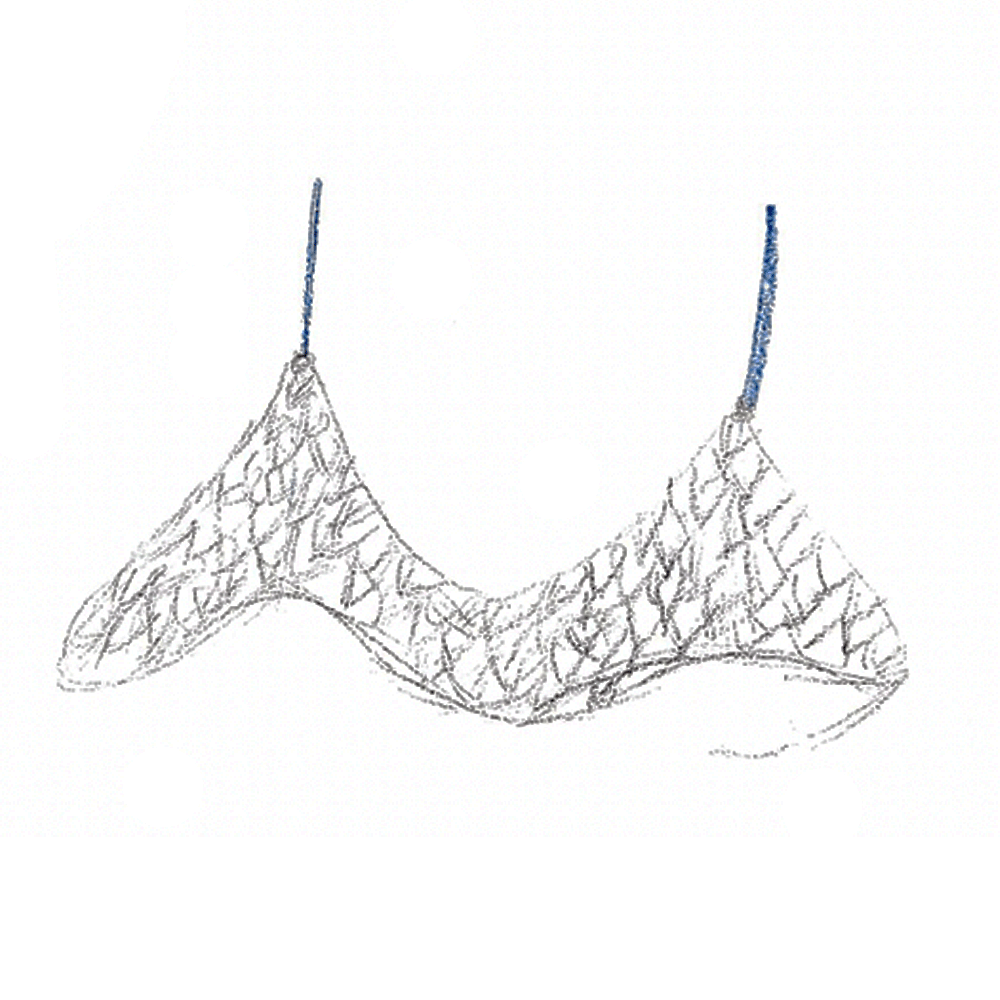
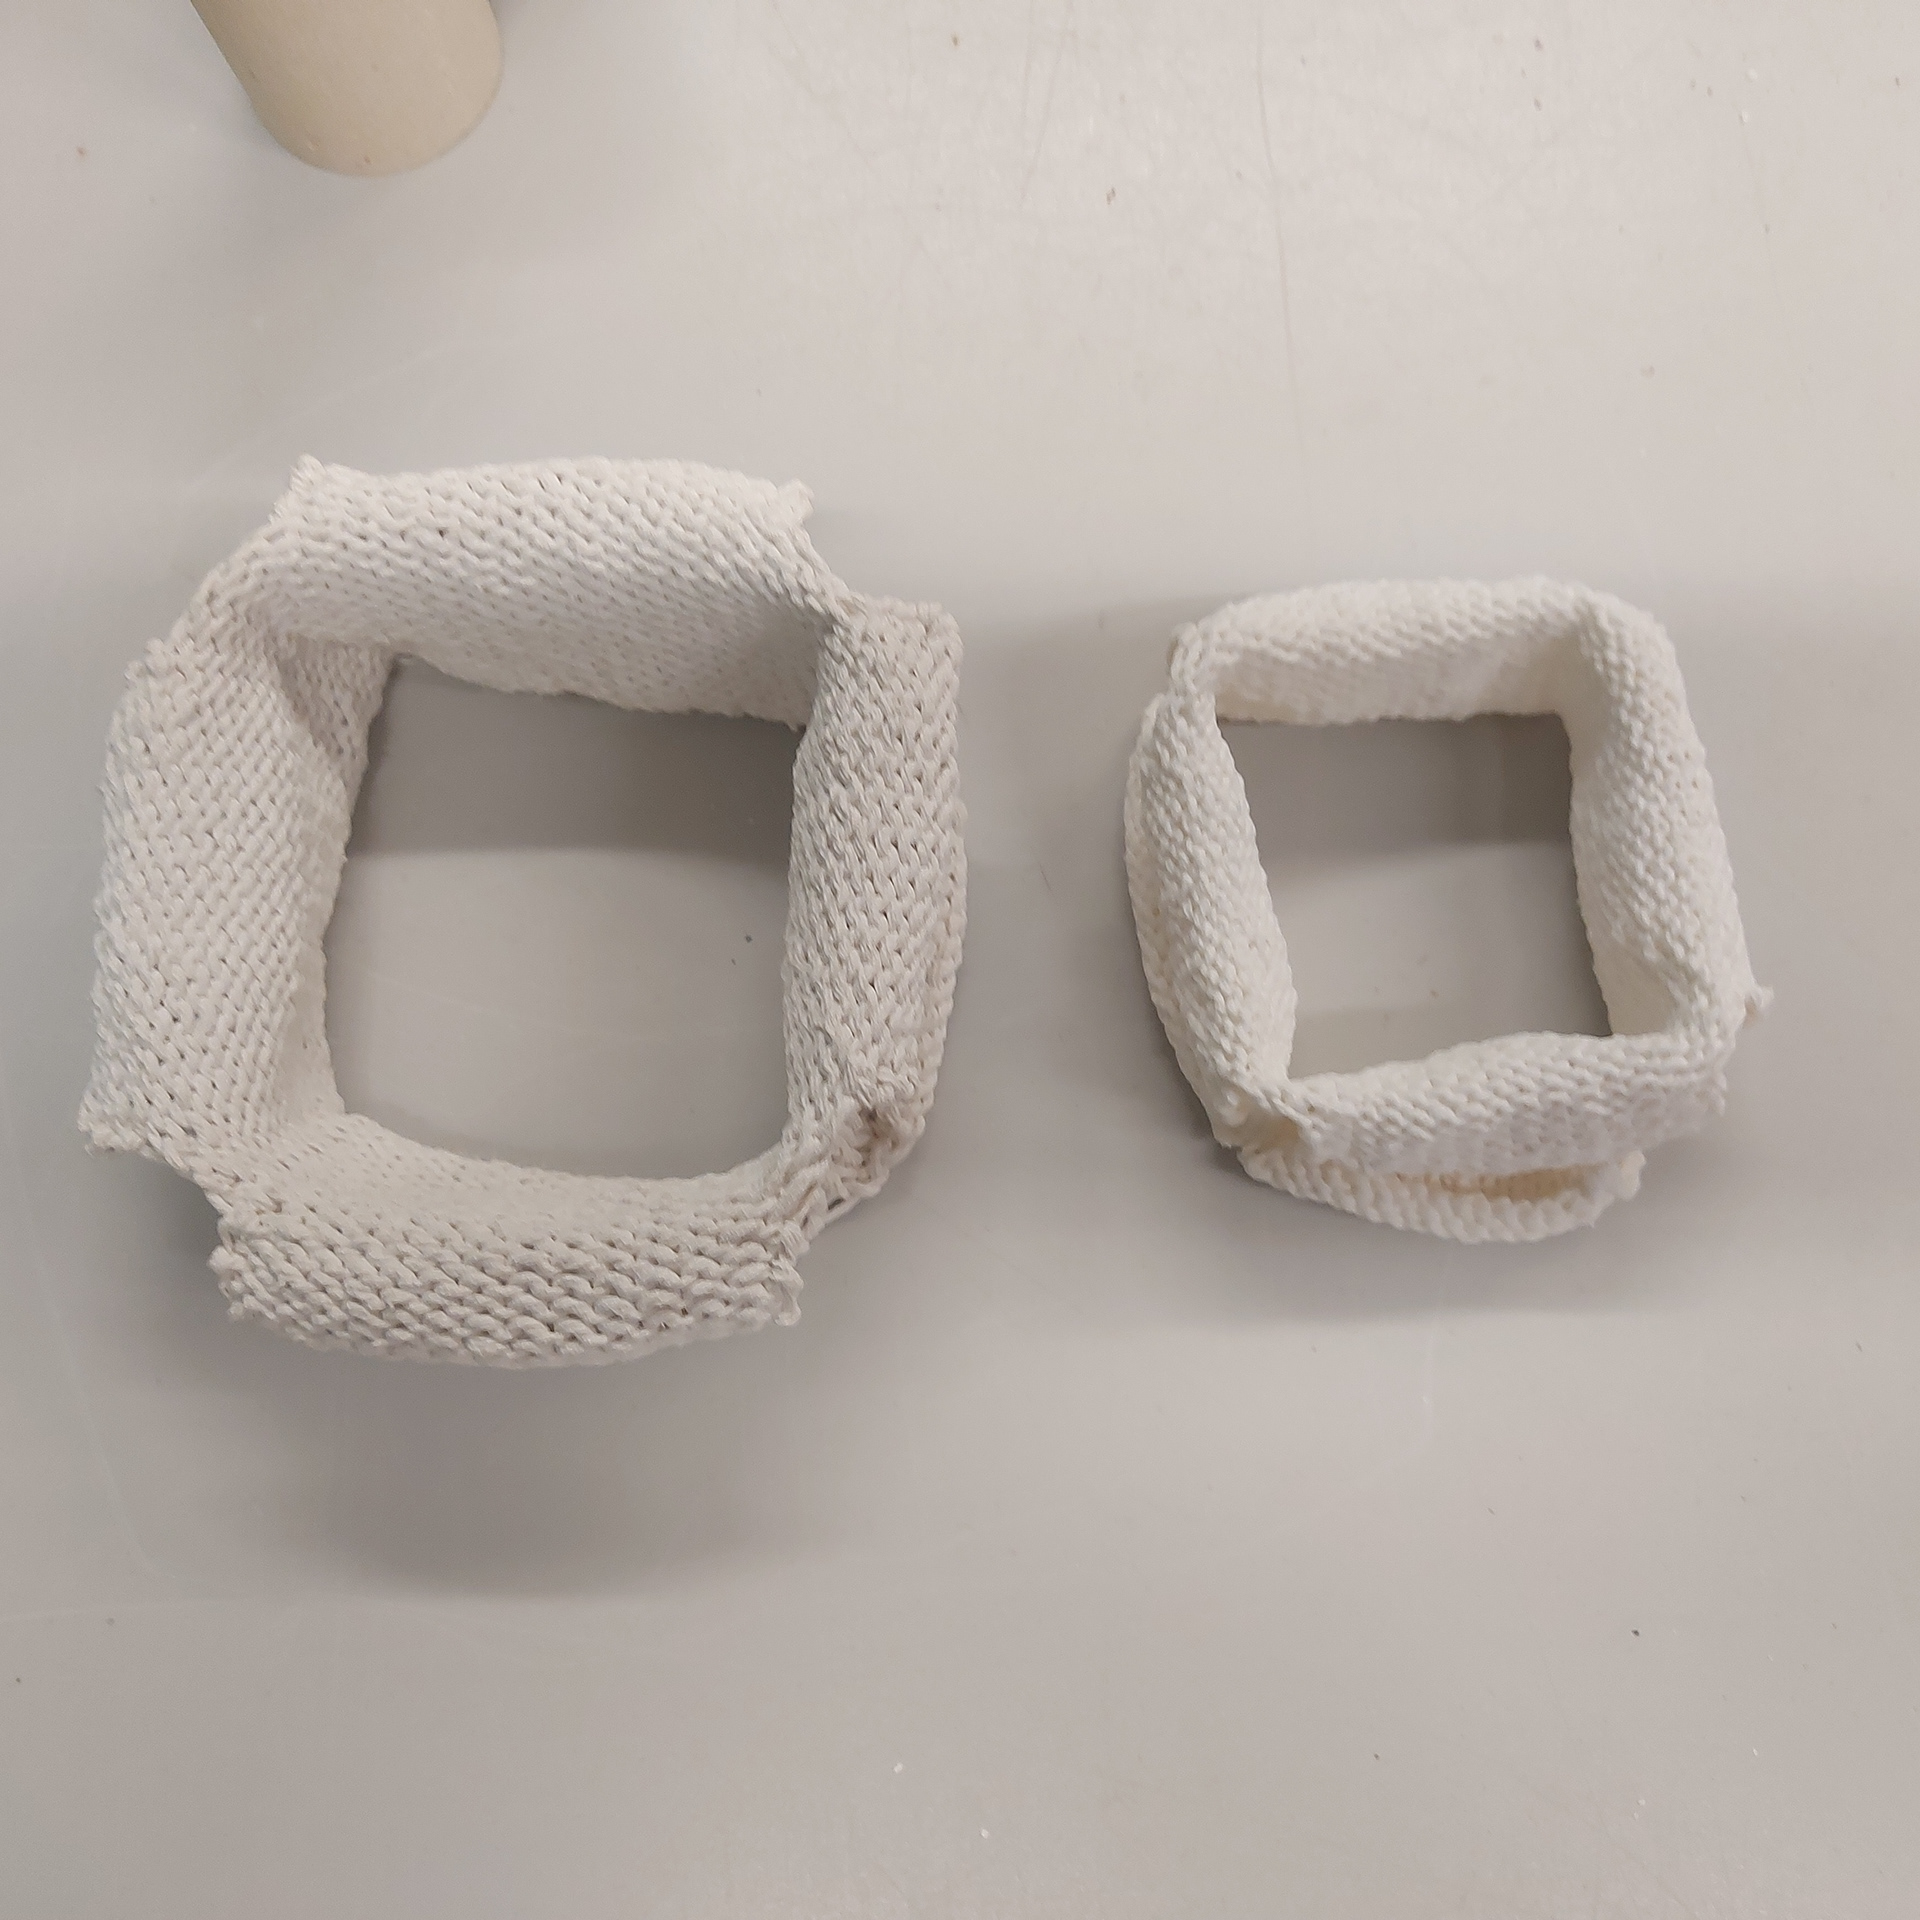
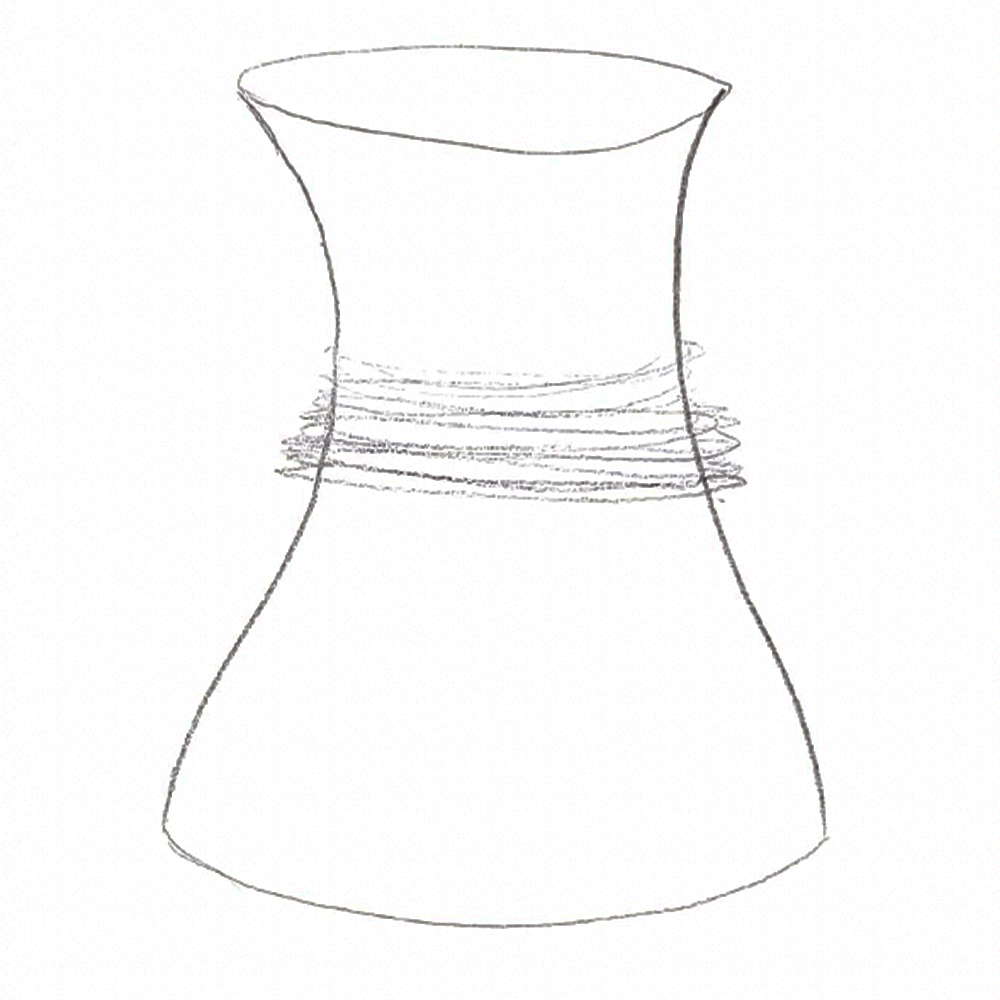
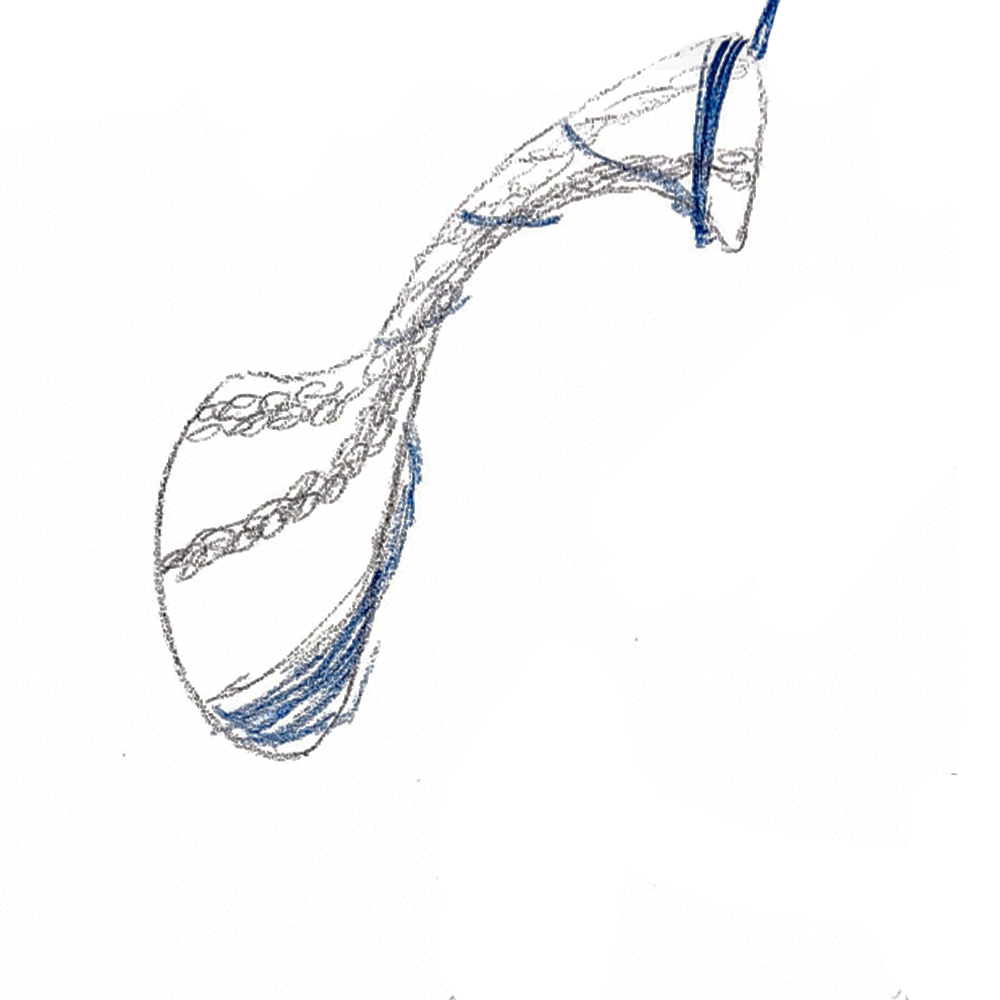
When creating the pattern for the cabled piece, my original idea was to have holes in between the cables in the middle of the shape to weave the yarn in and out within the installation (as seen in iteration one). The shape was made with the intention to be used within the exhibition and to be used to wrap yarn around (as seen in the sketch below). As I continued to try and get the firing conditions right, I decided to separate this shape from the installation and to only have it as a knitted object. I used the pattern below for all three knitted shapes both ceramic and hand knitted cotton, not including the holes as those weren't going to be used anymore.
1
1
2
3
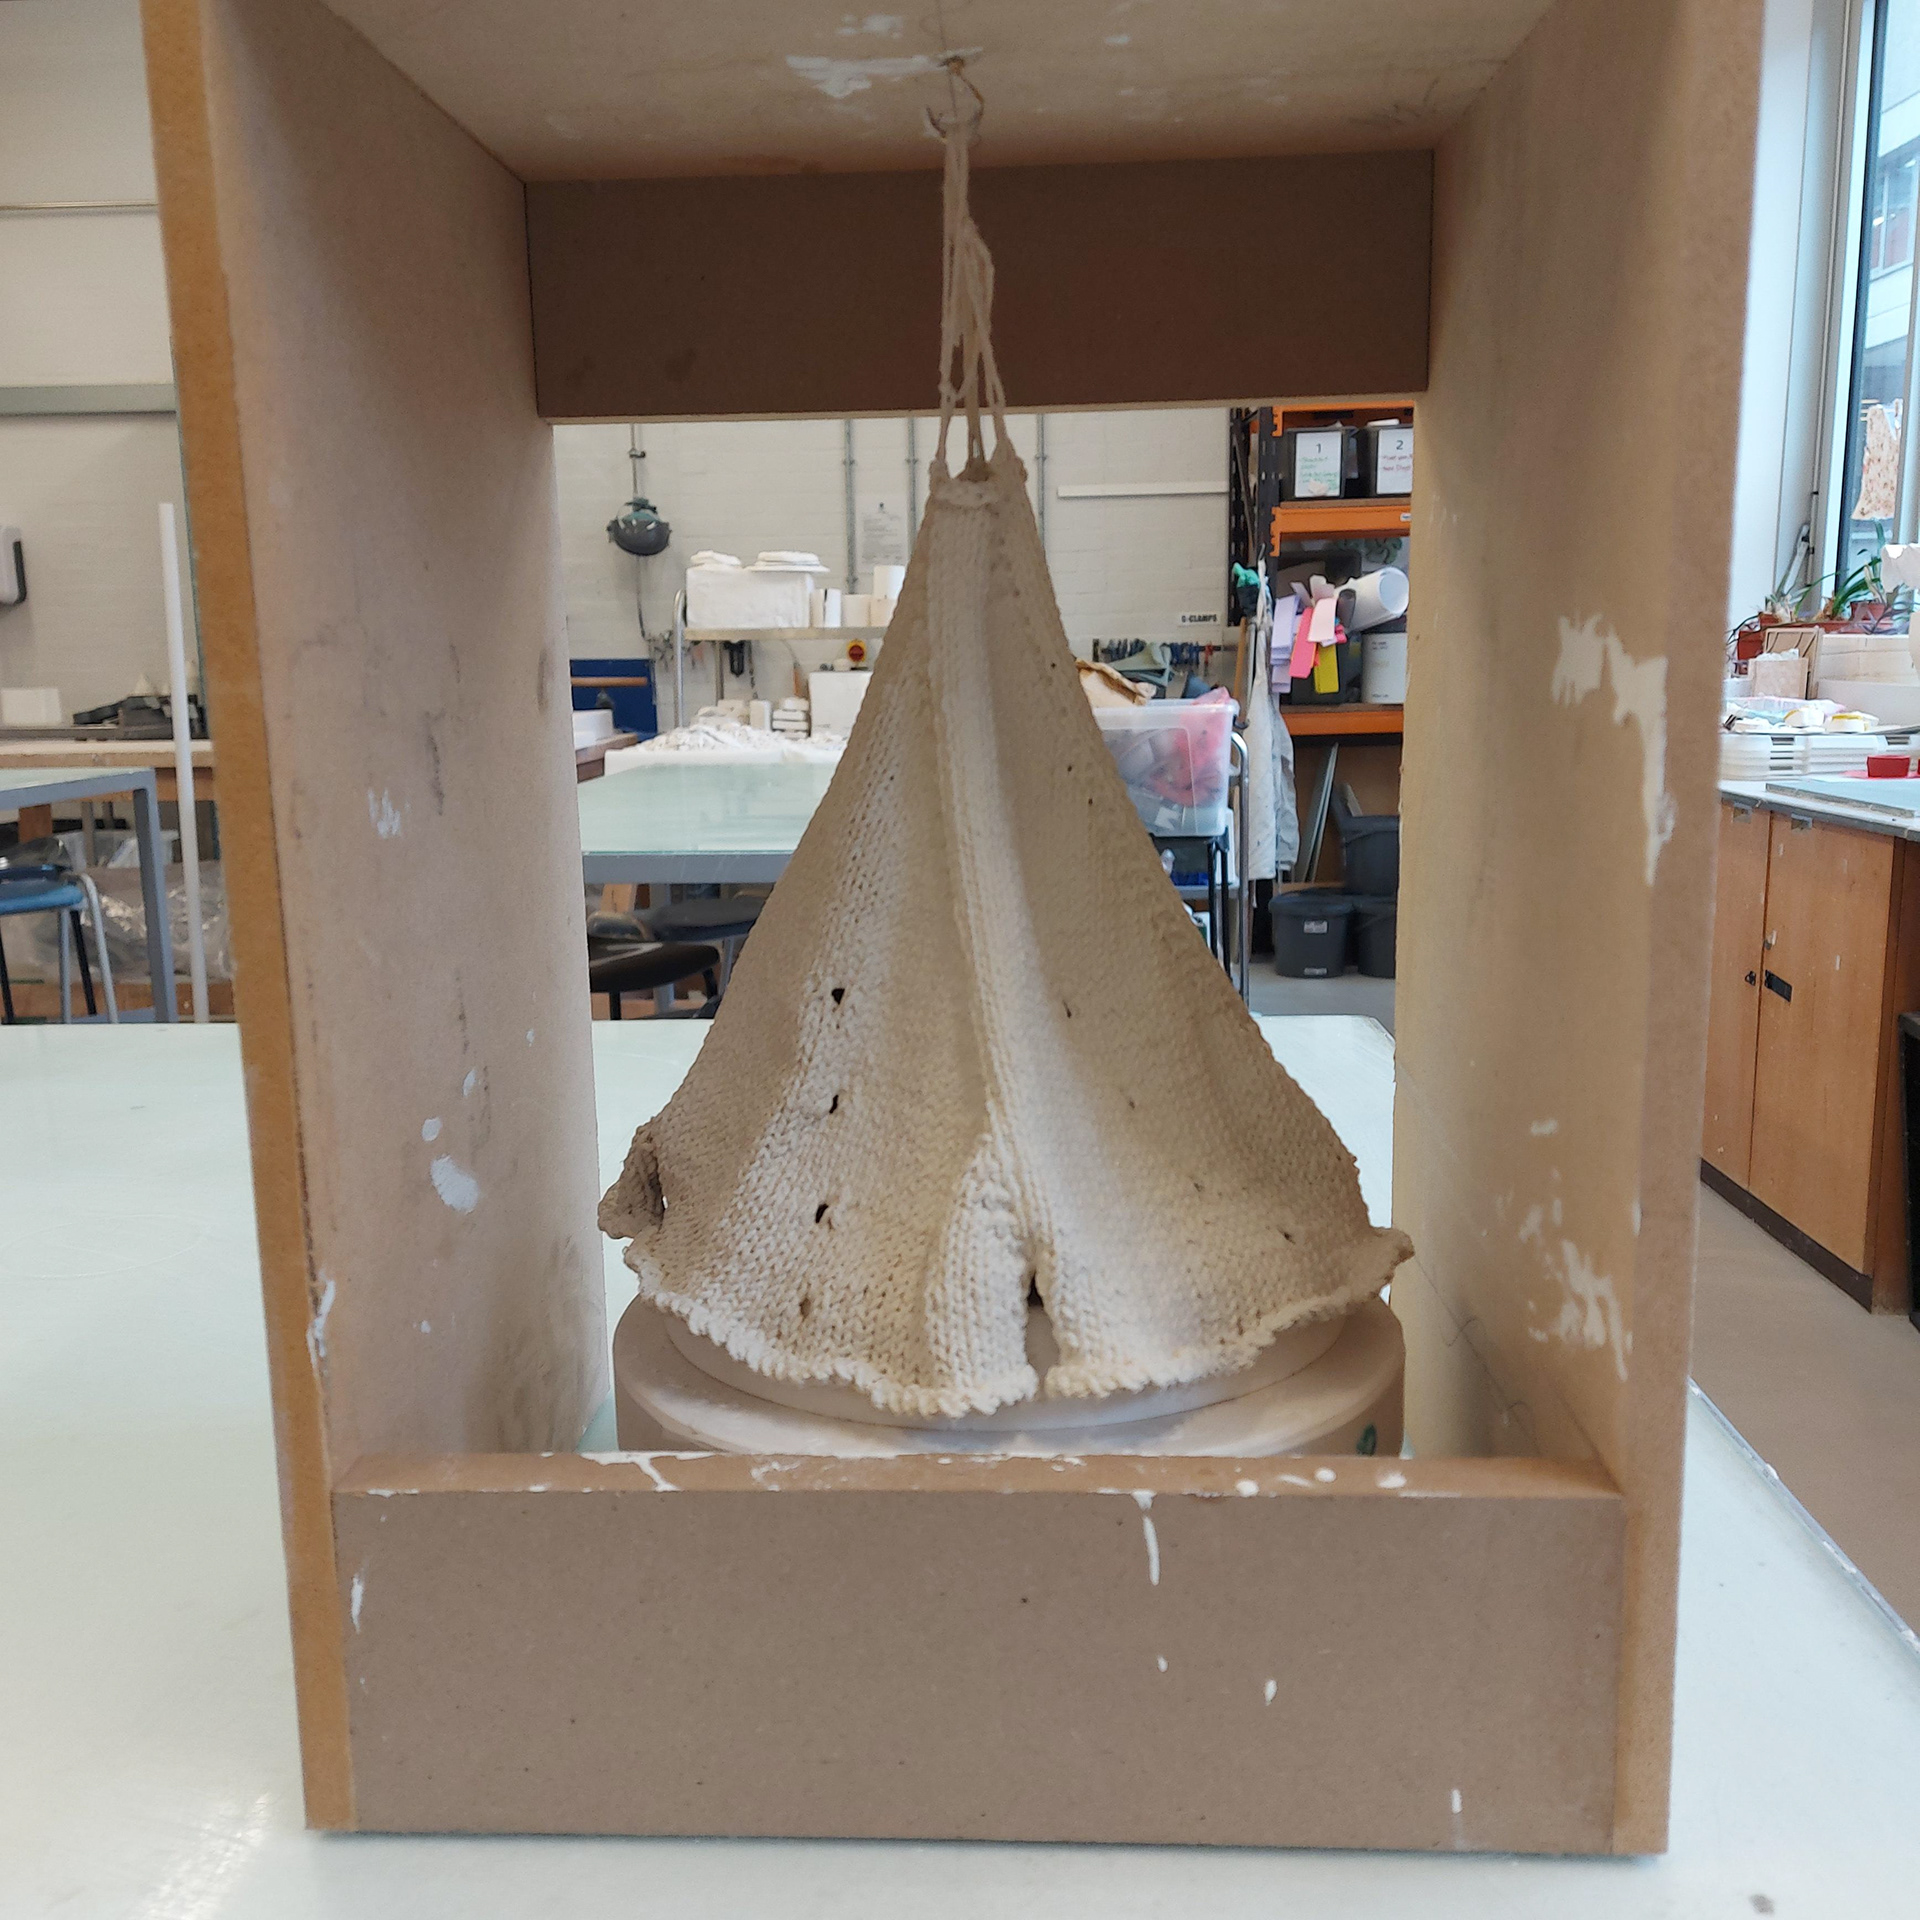
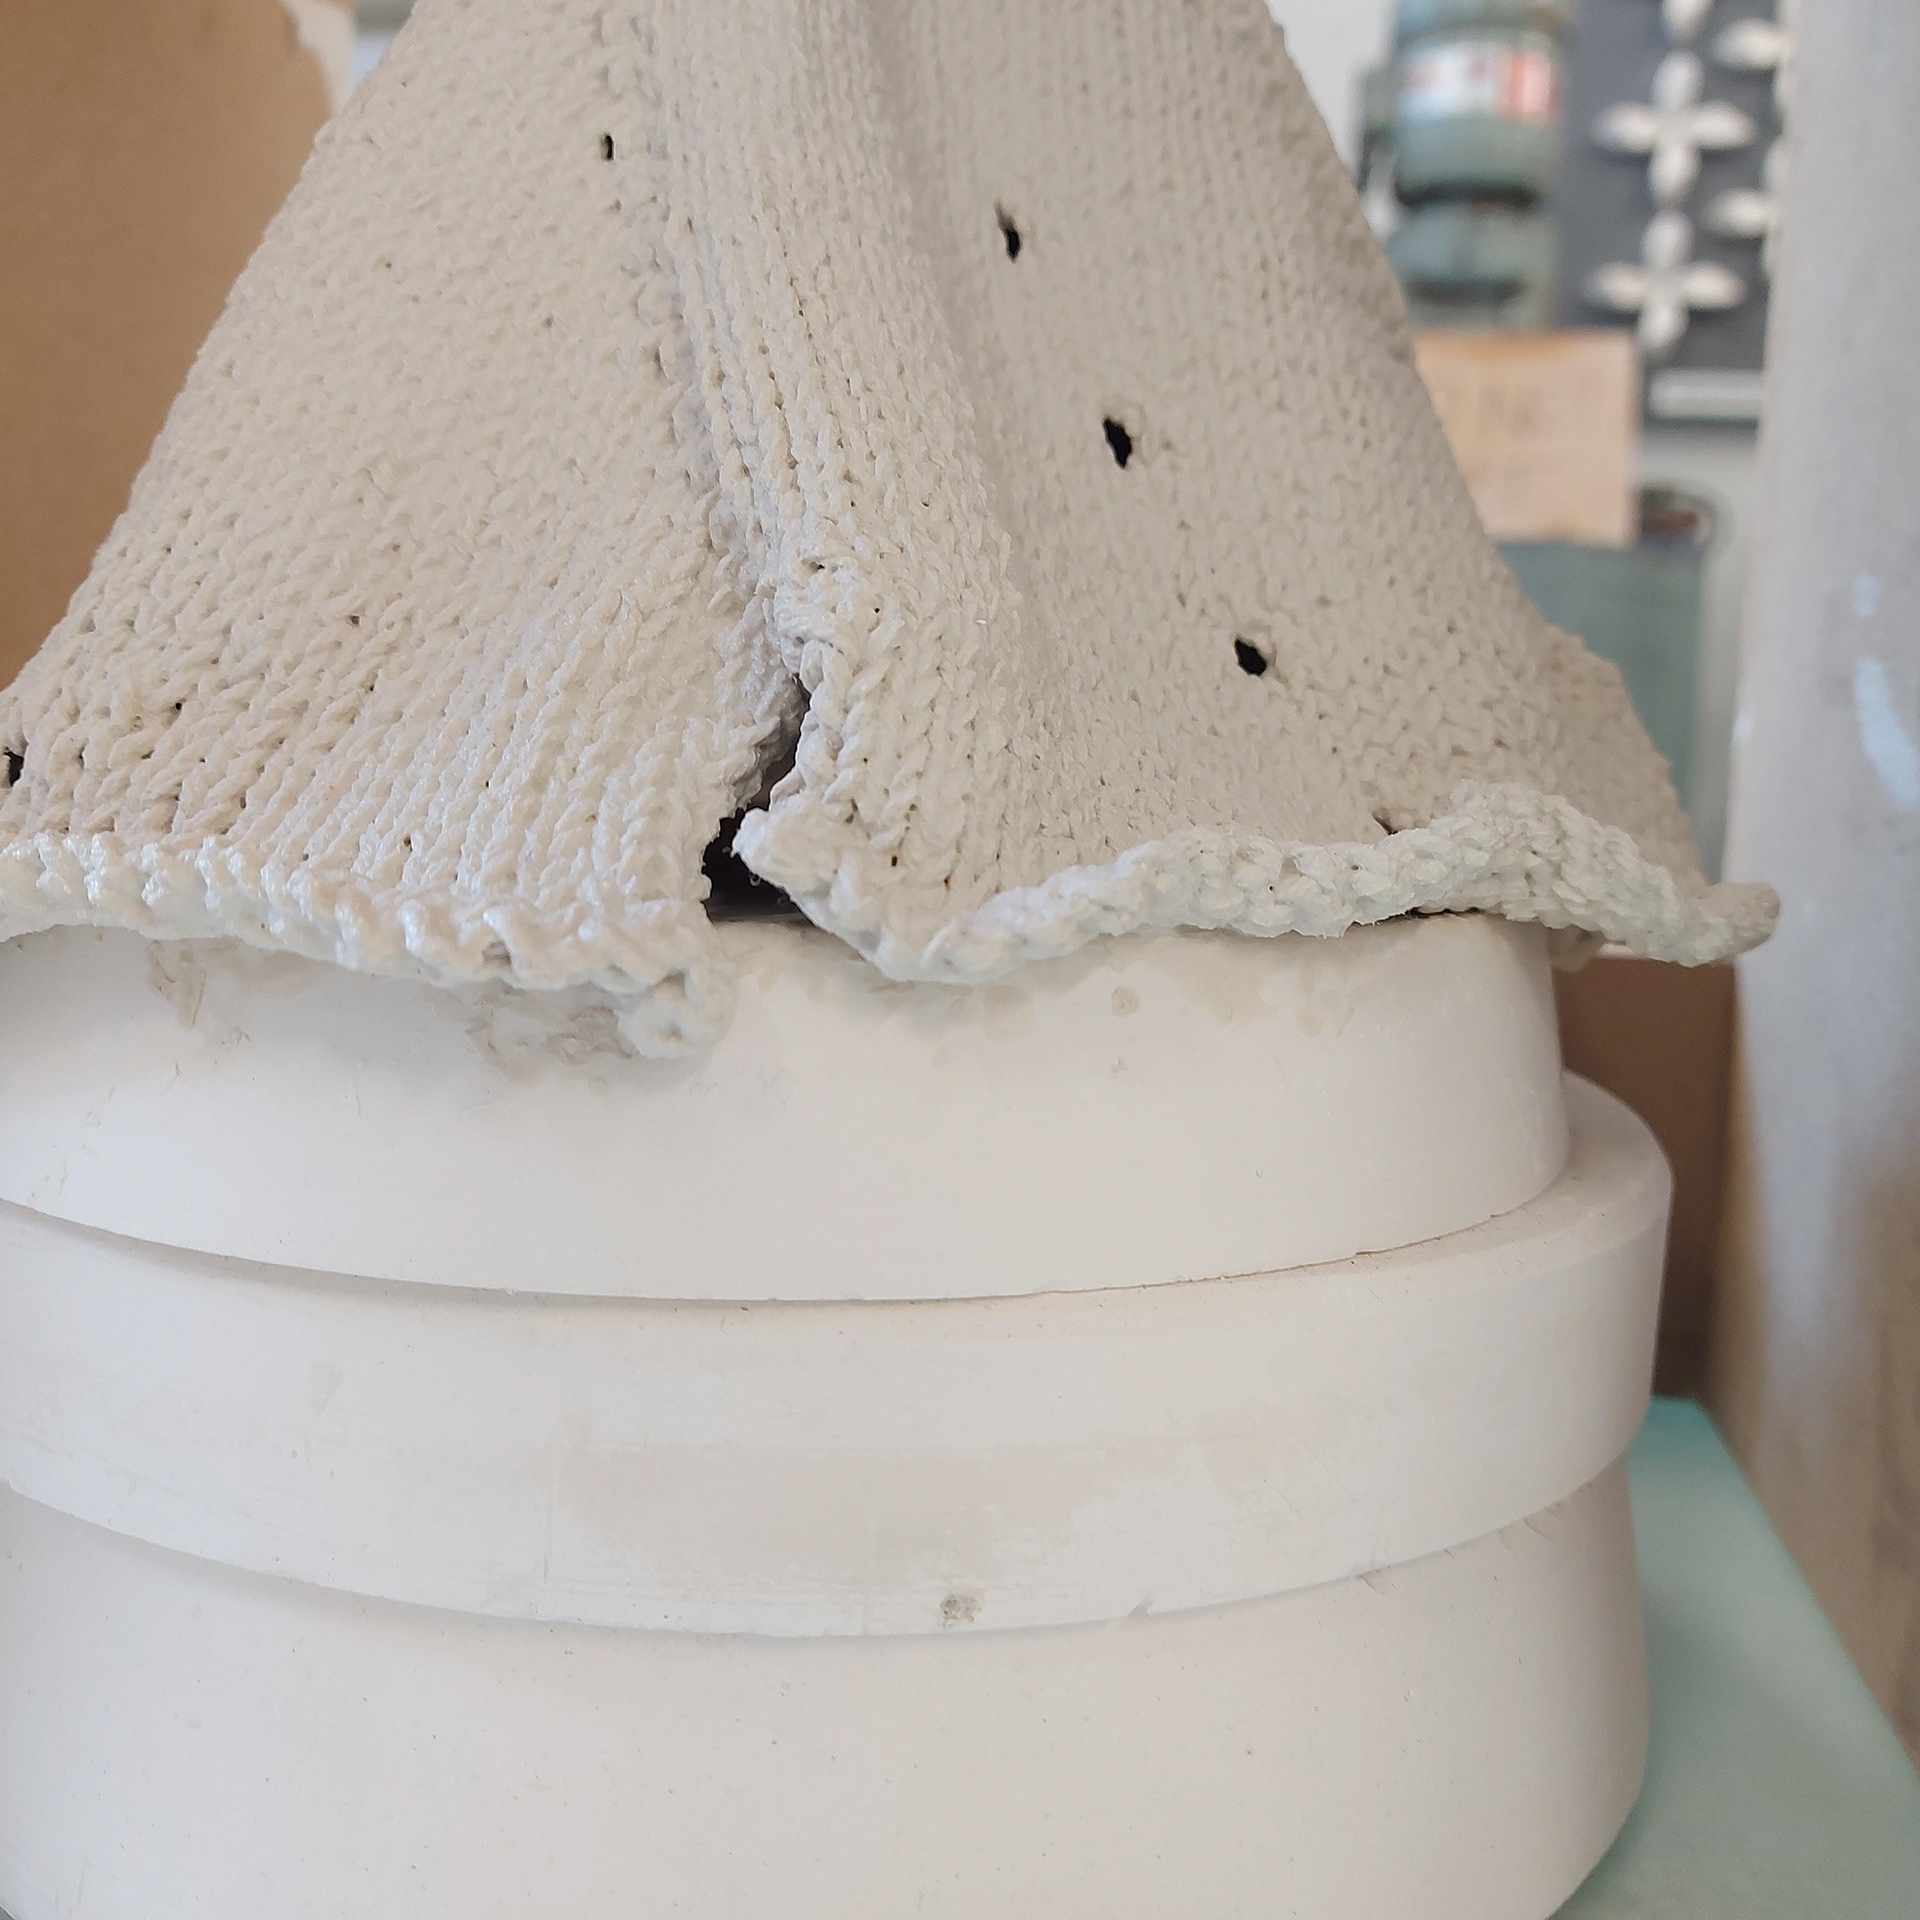
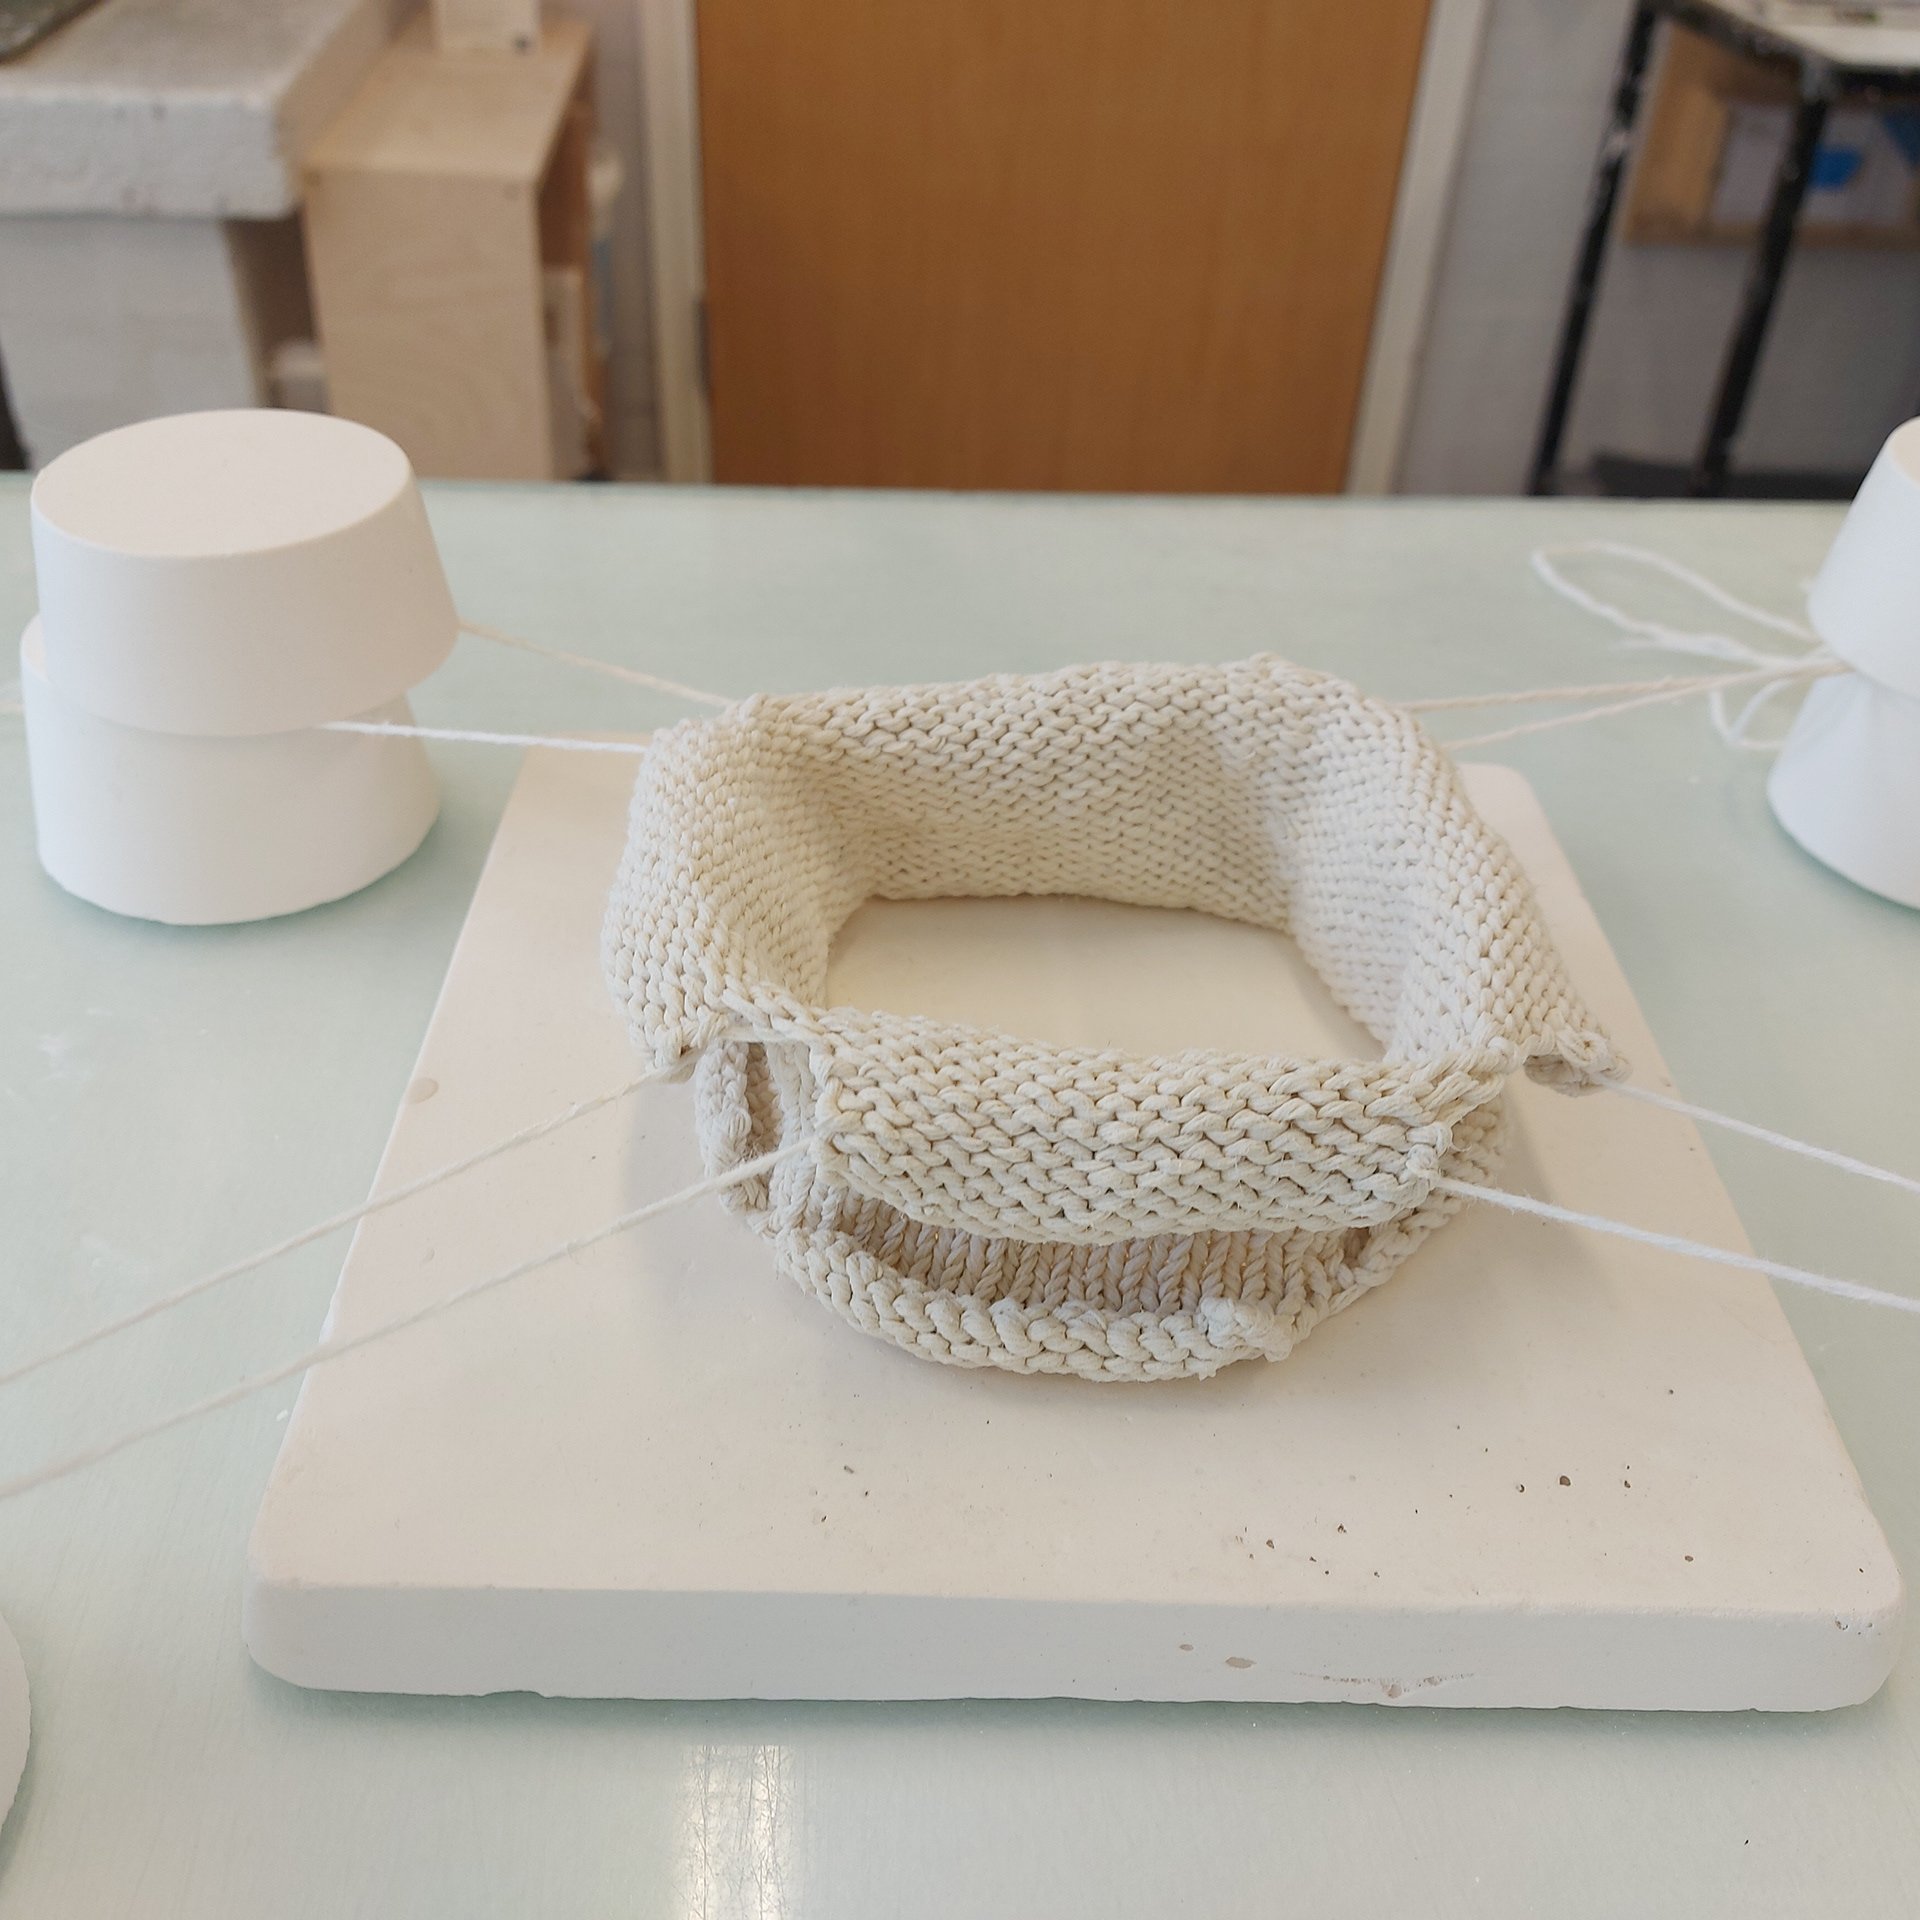
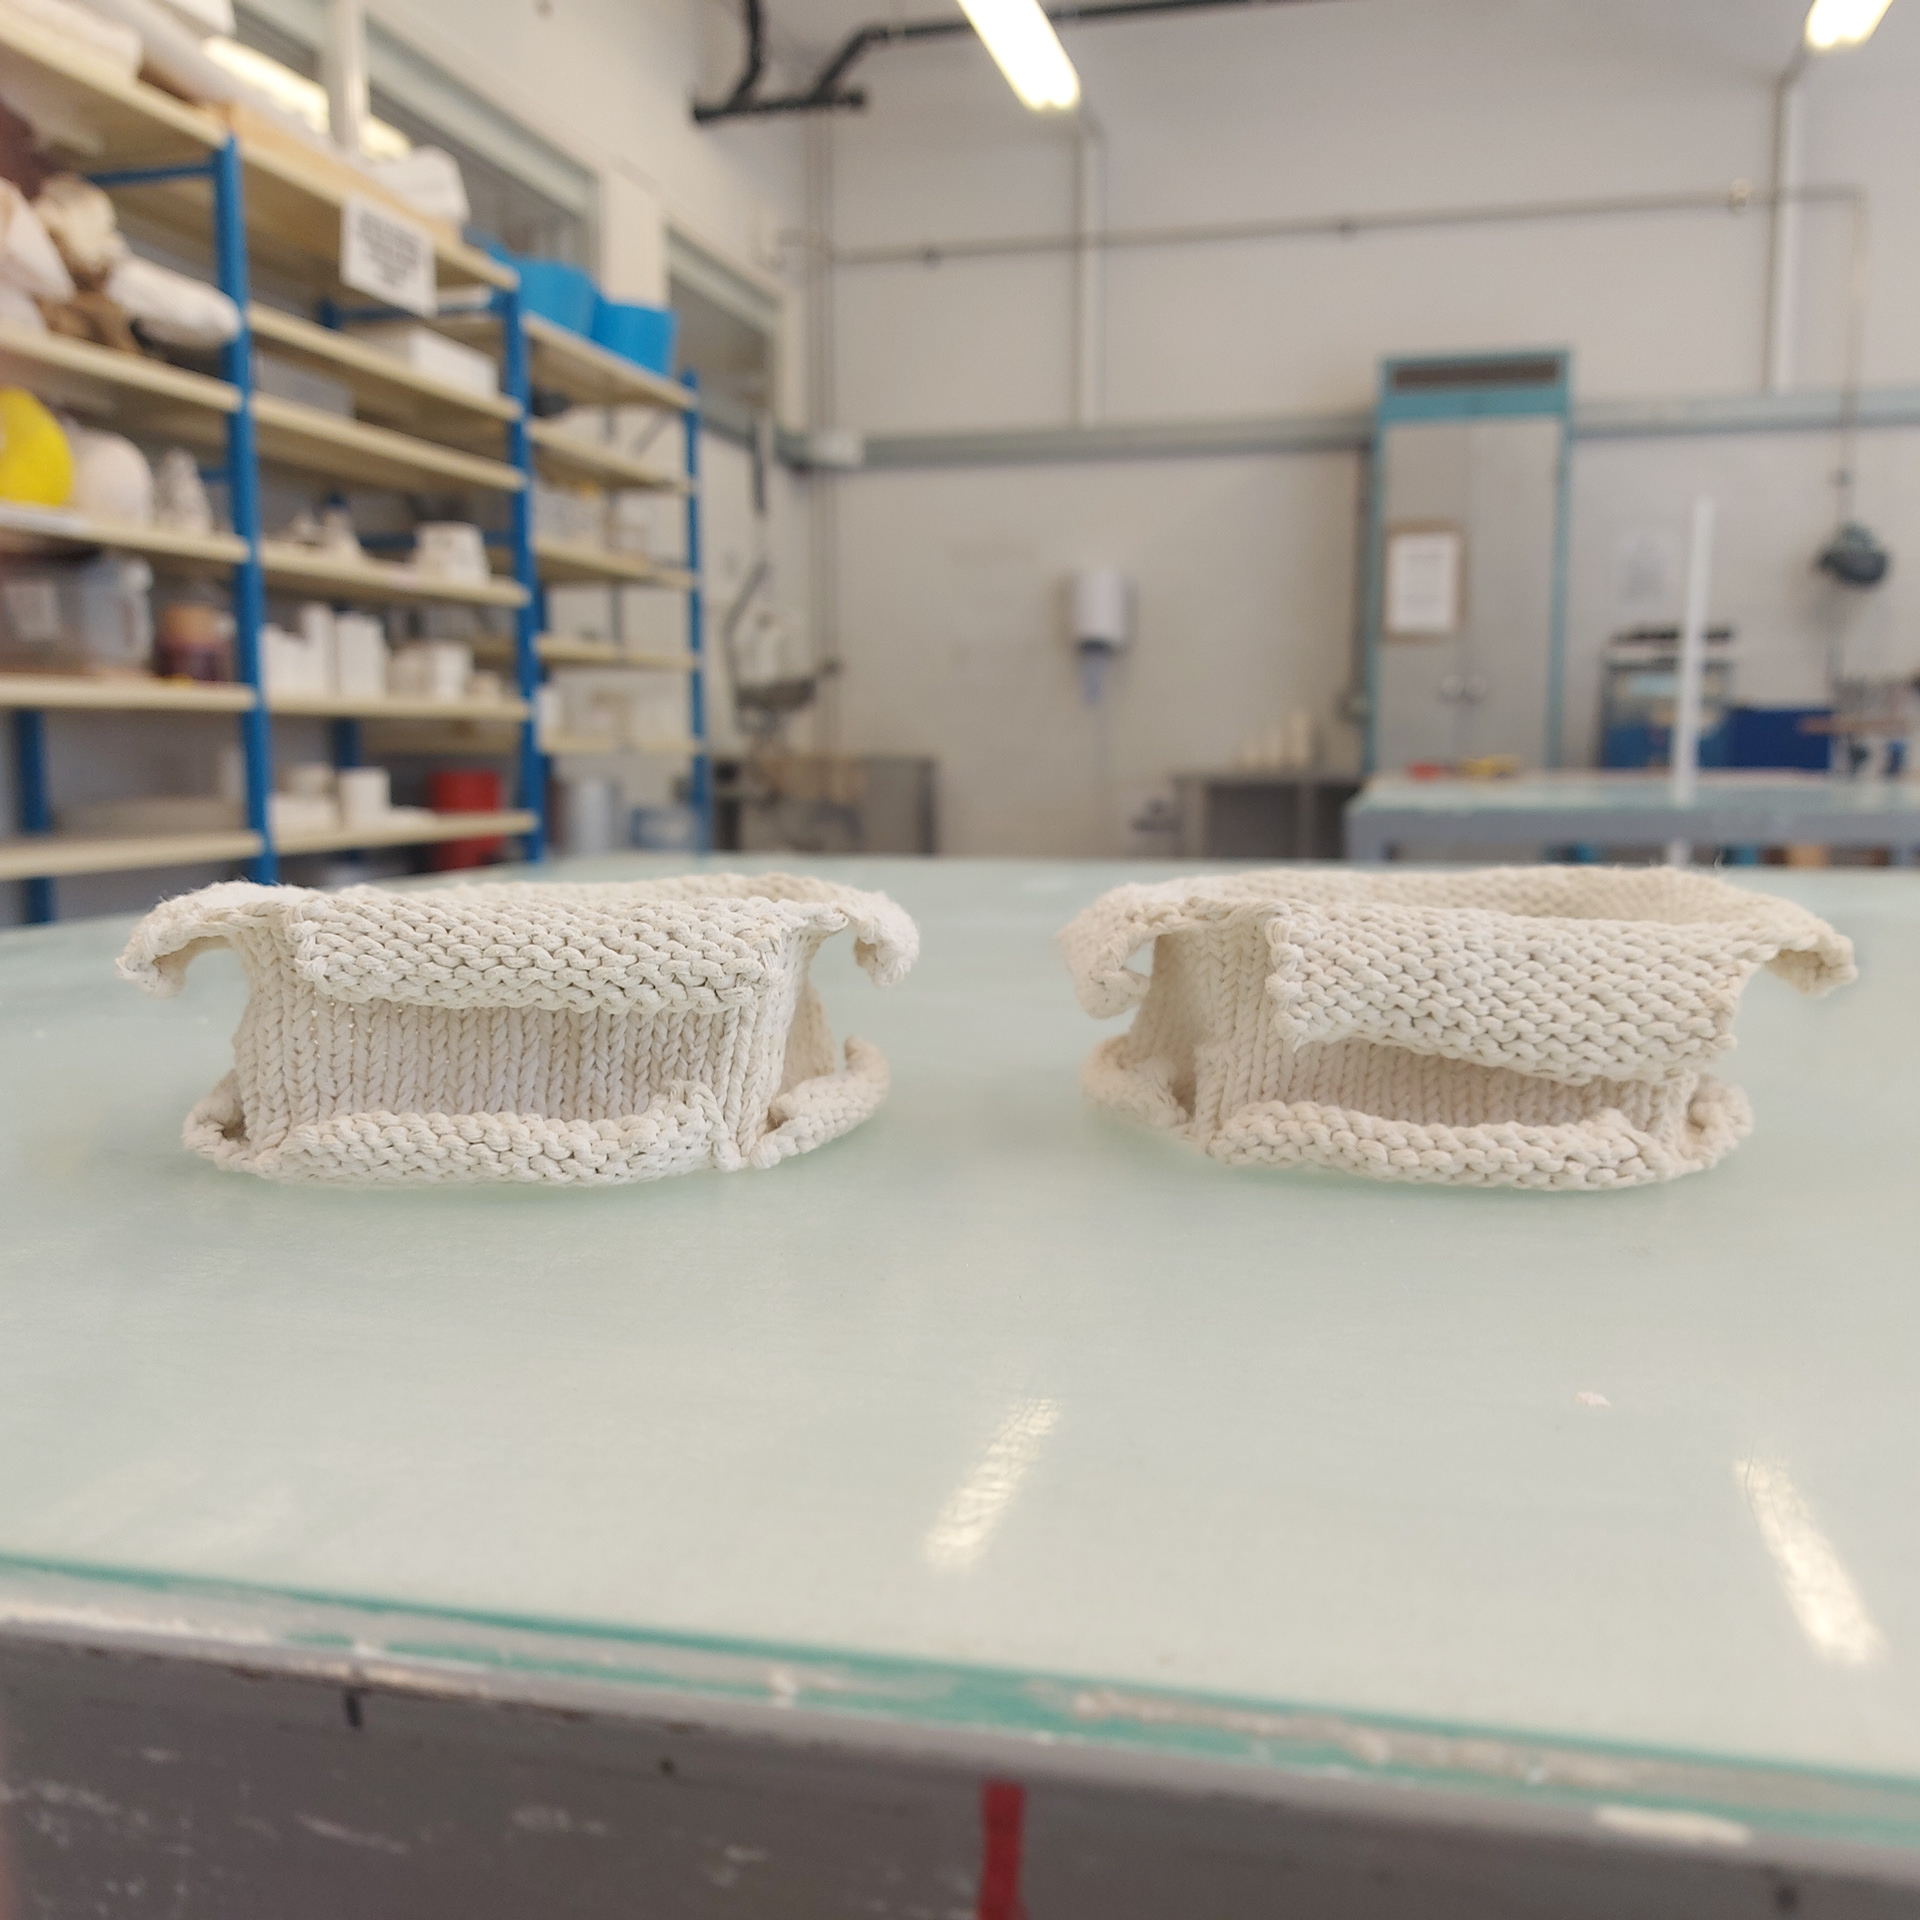
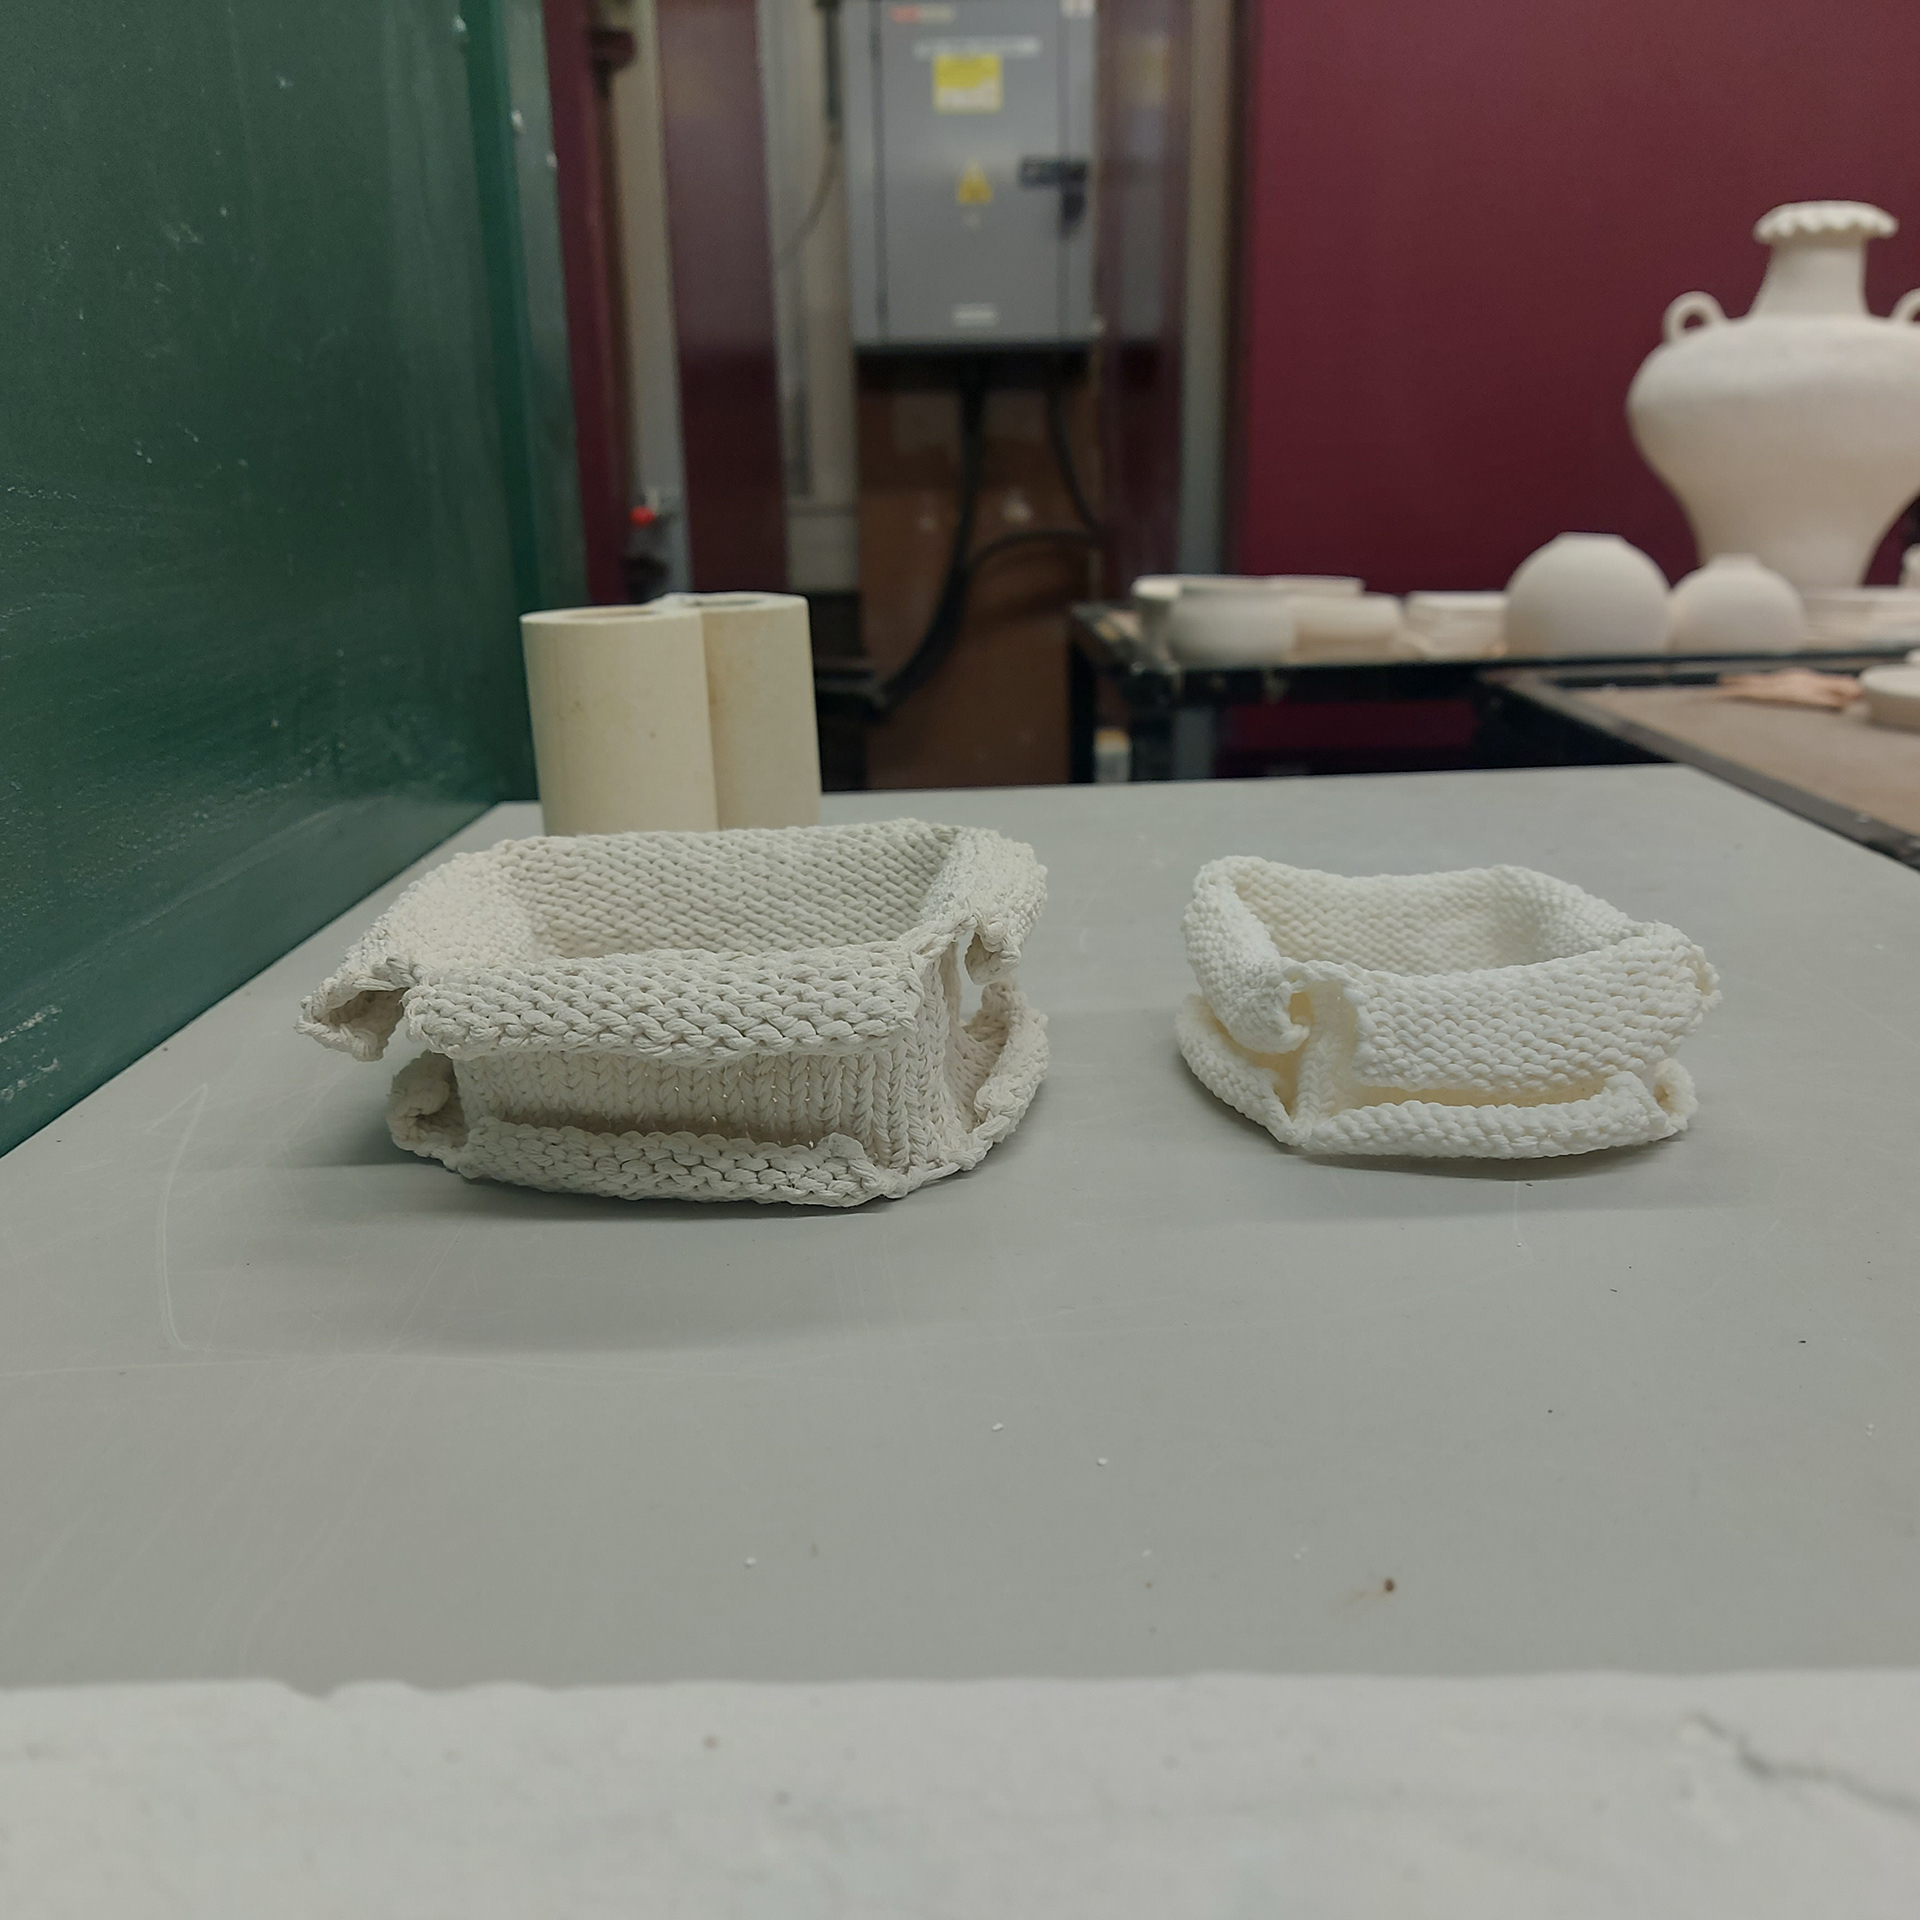
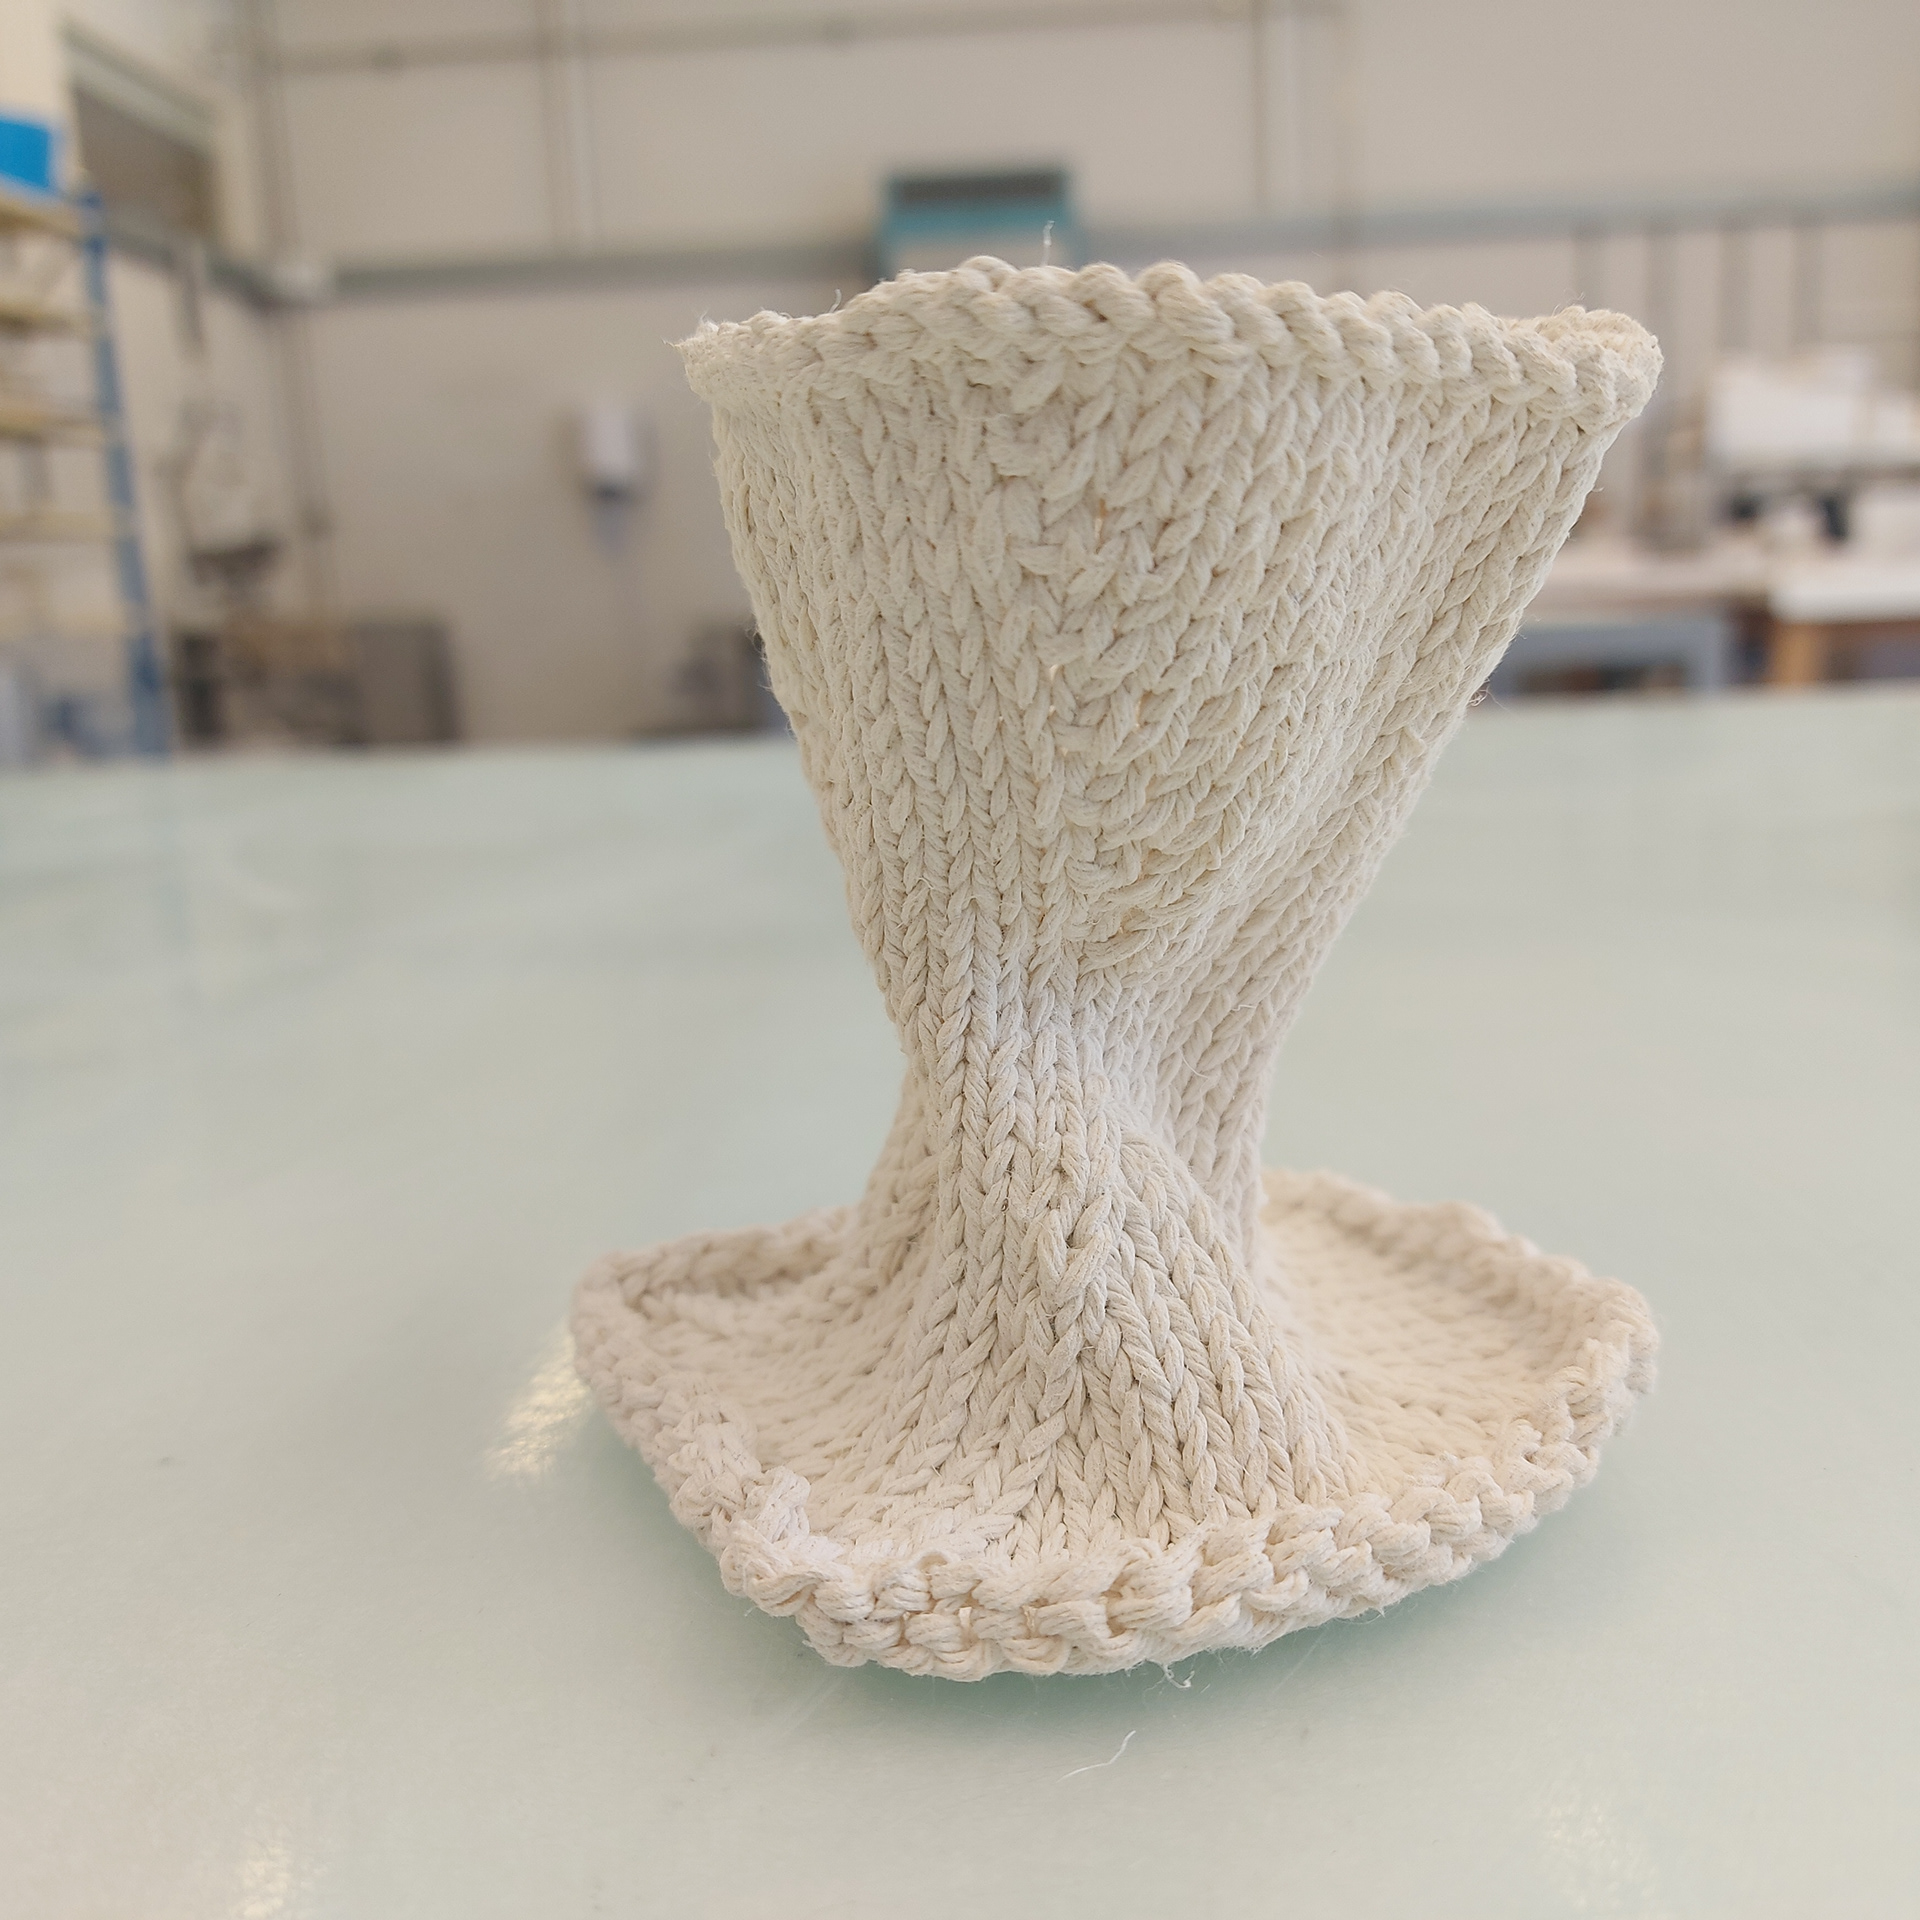
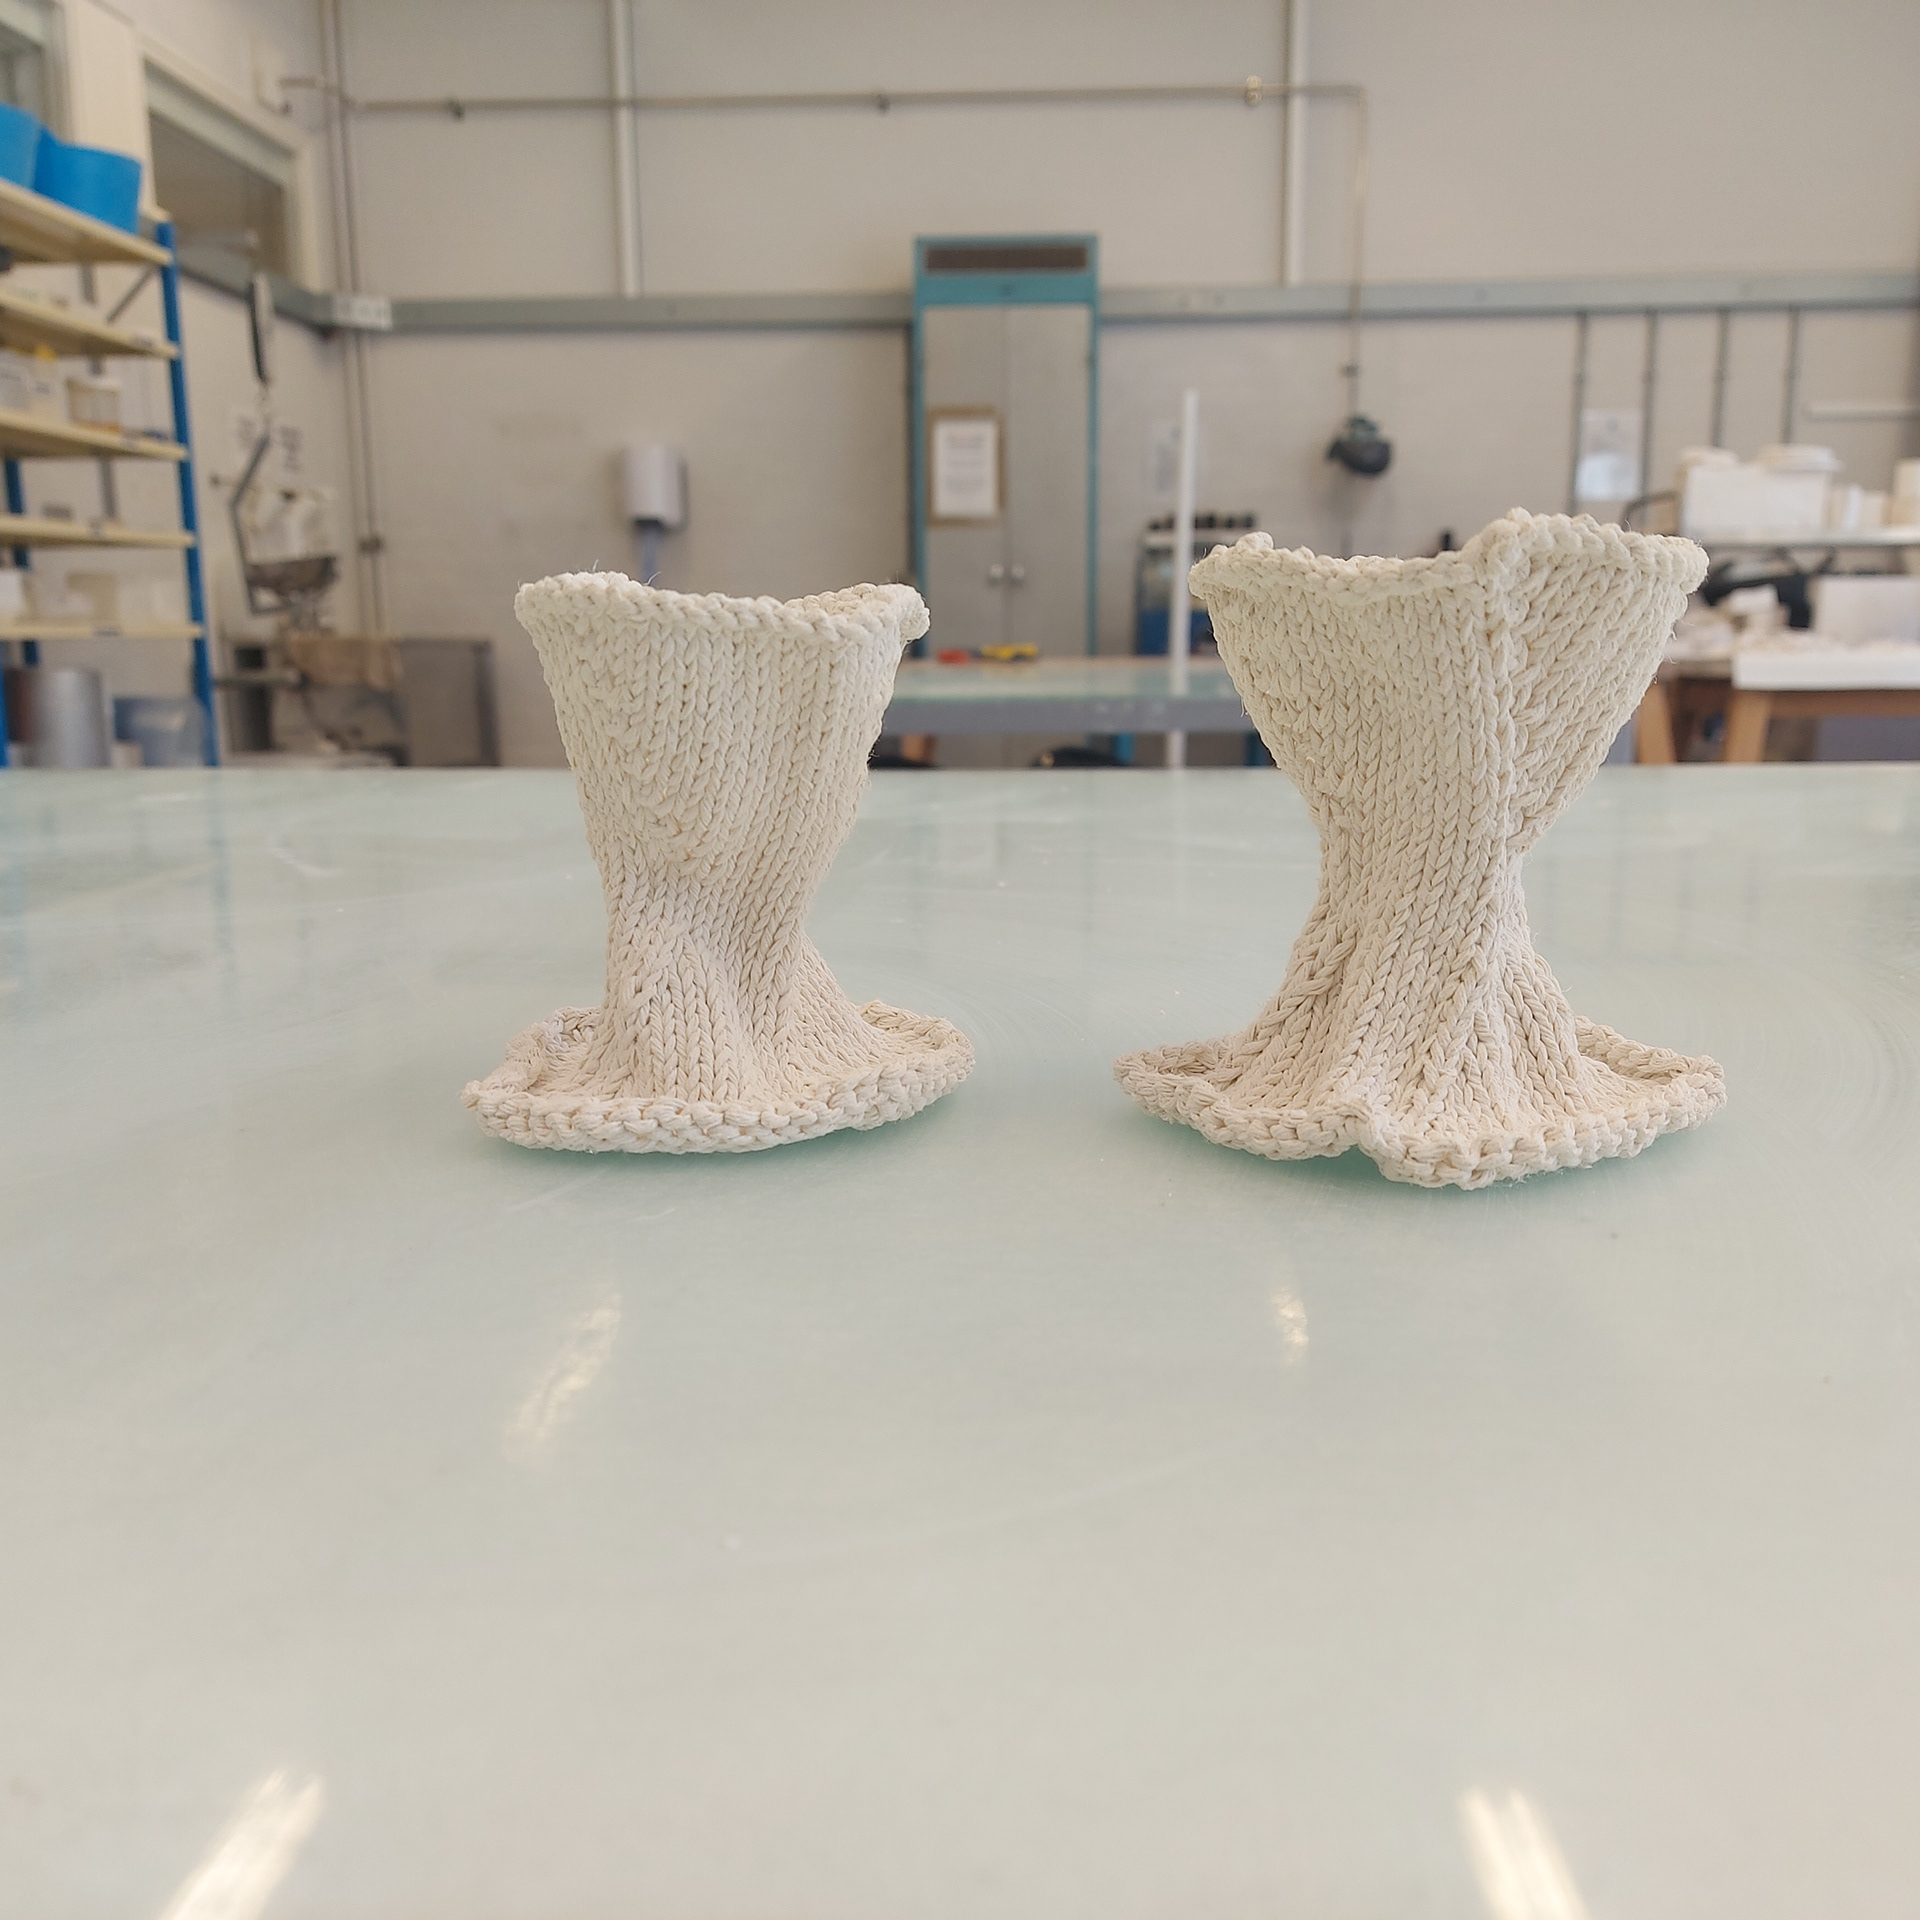
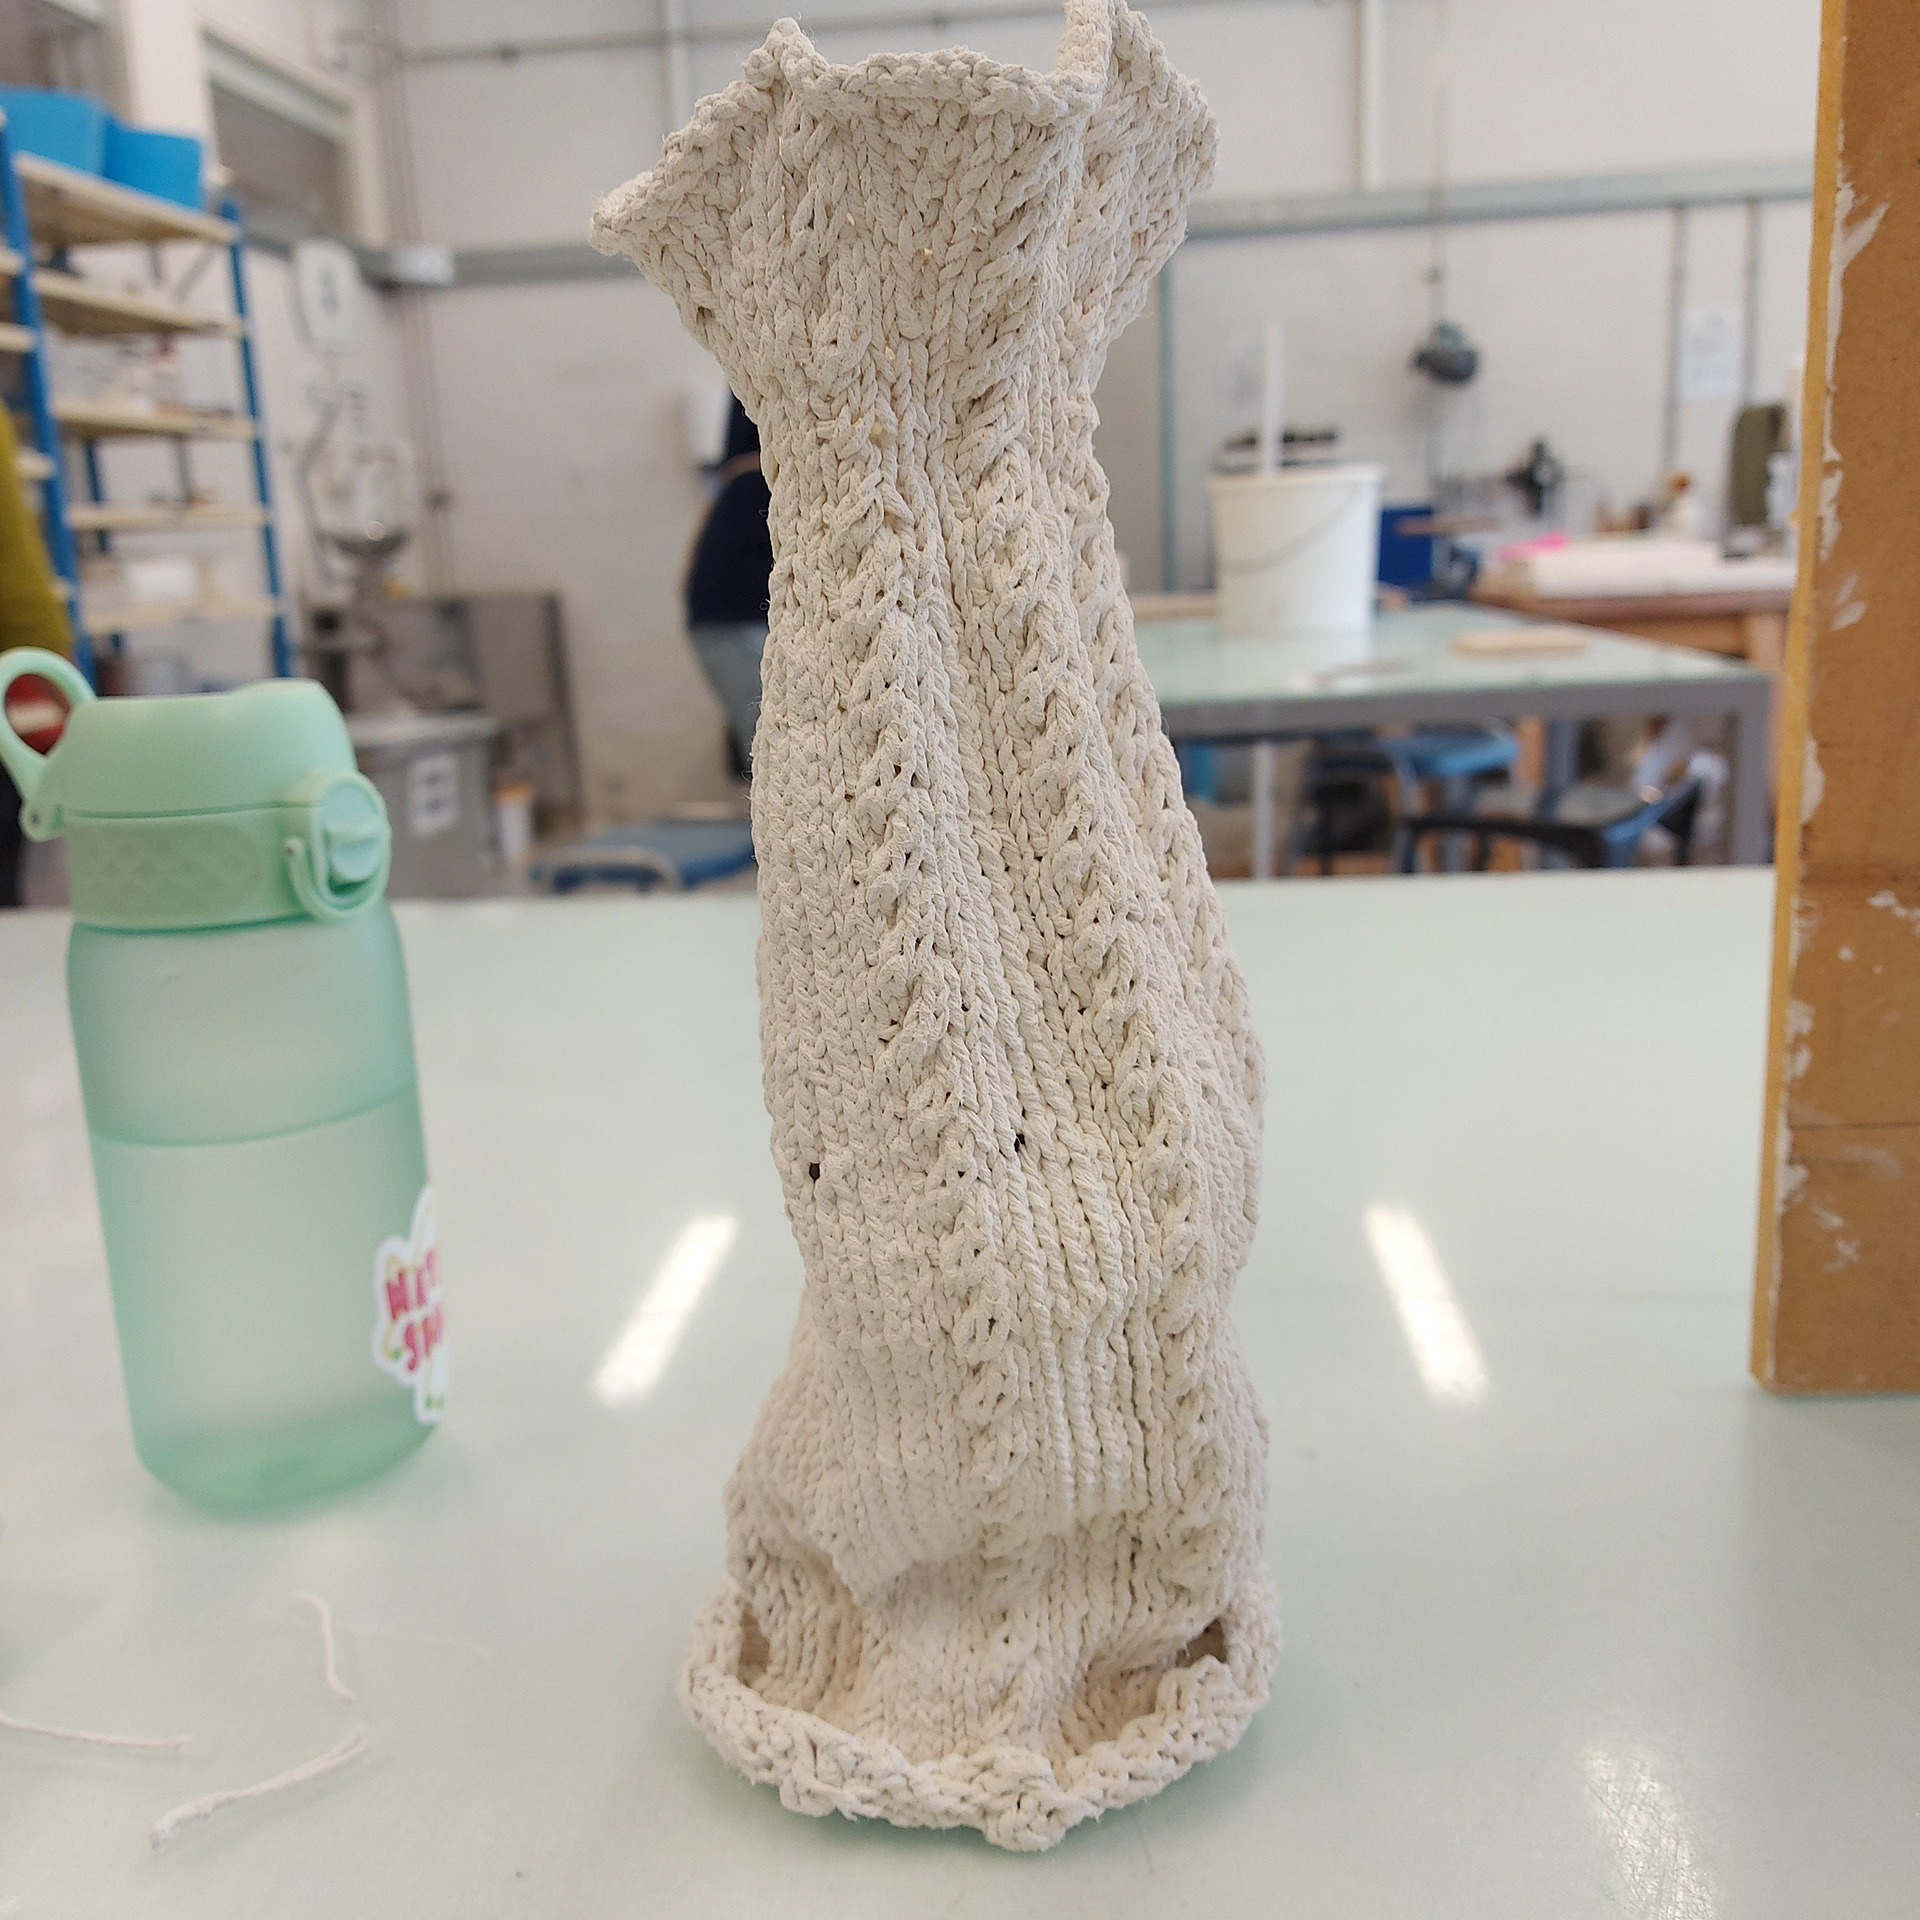
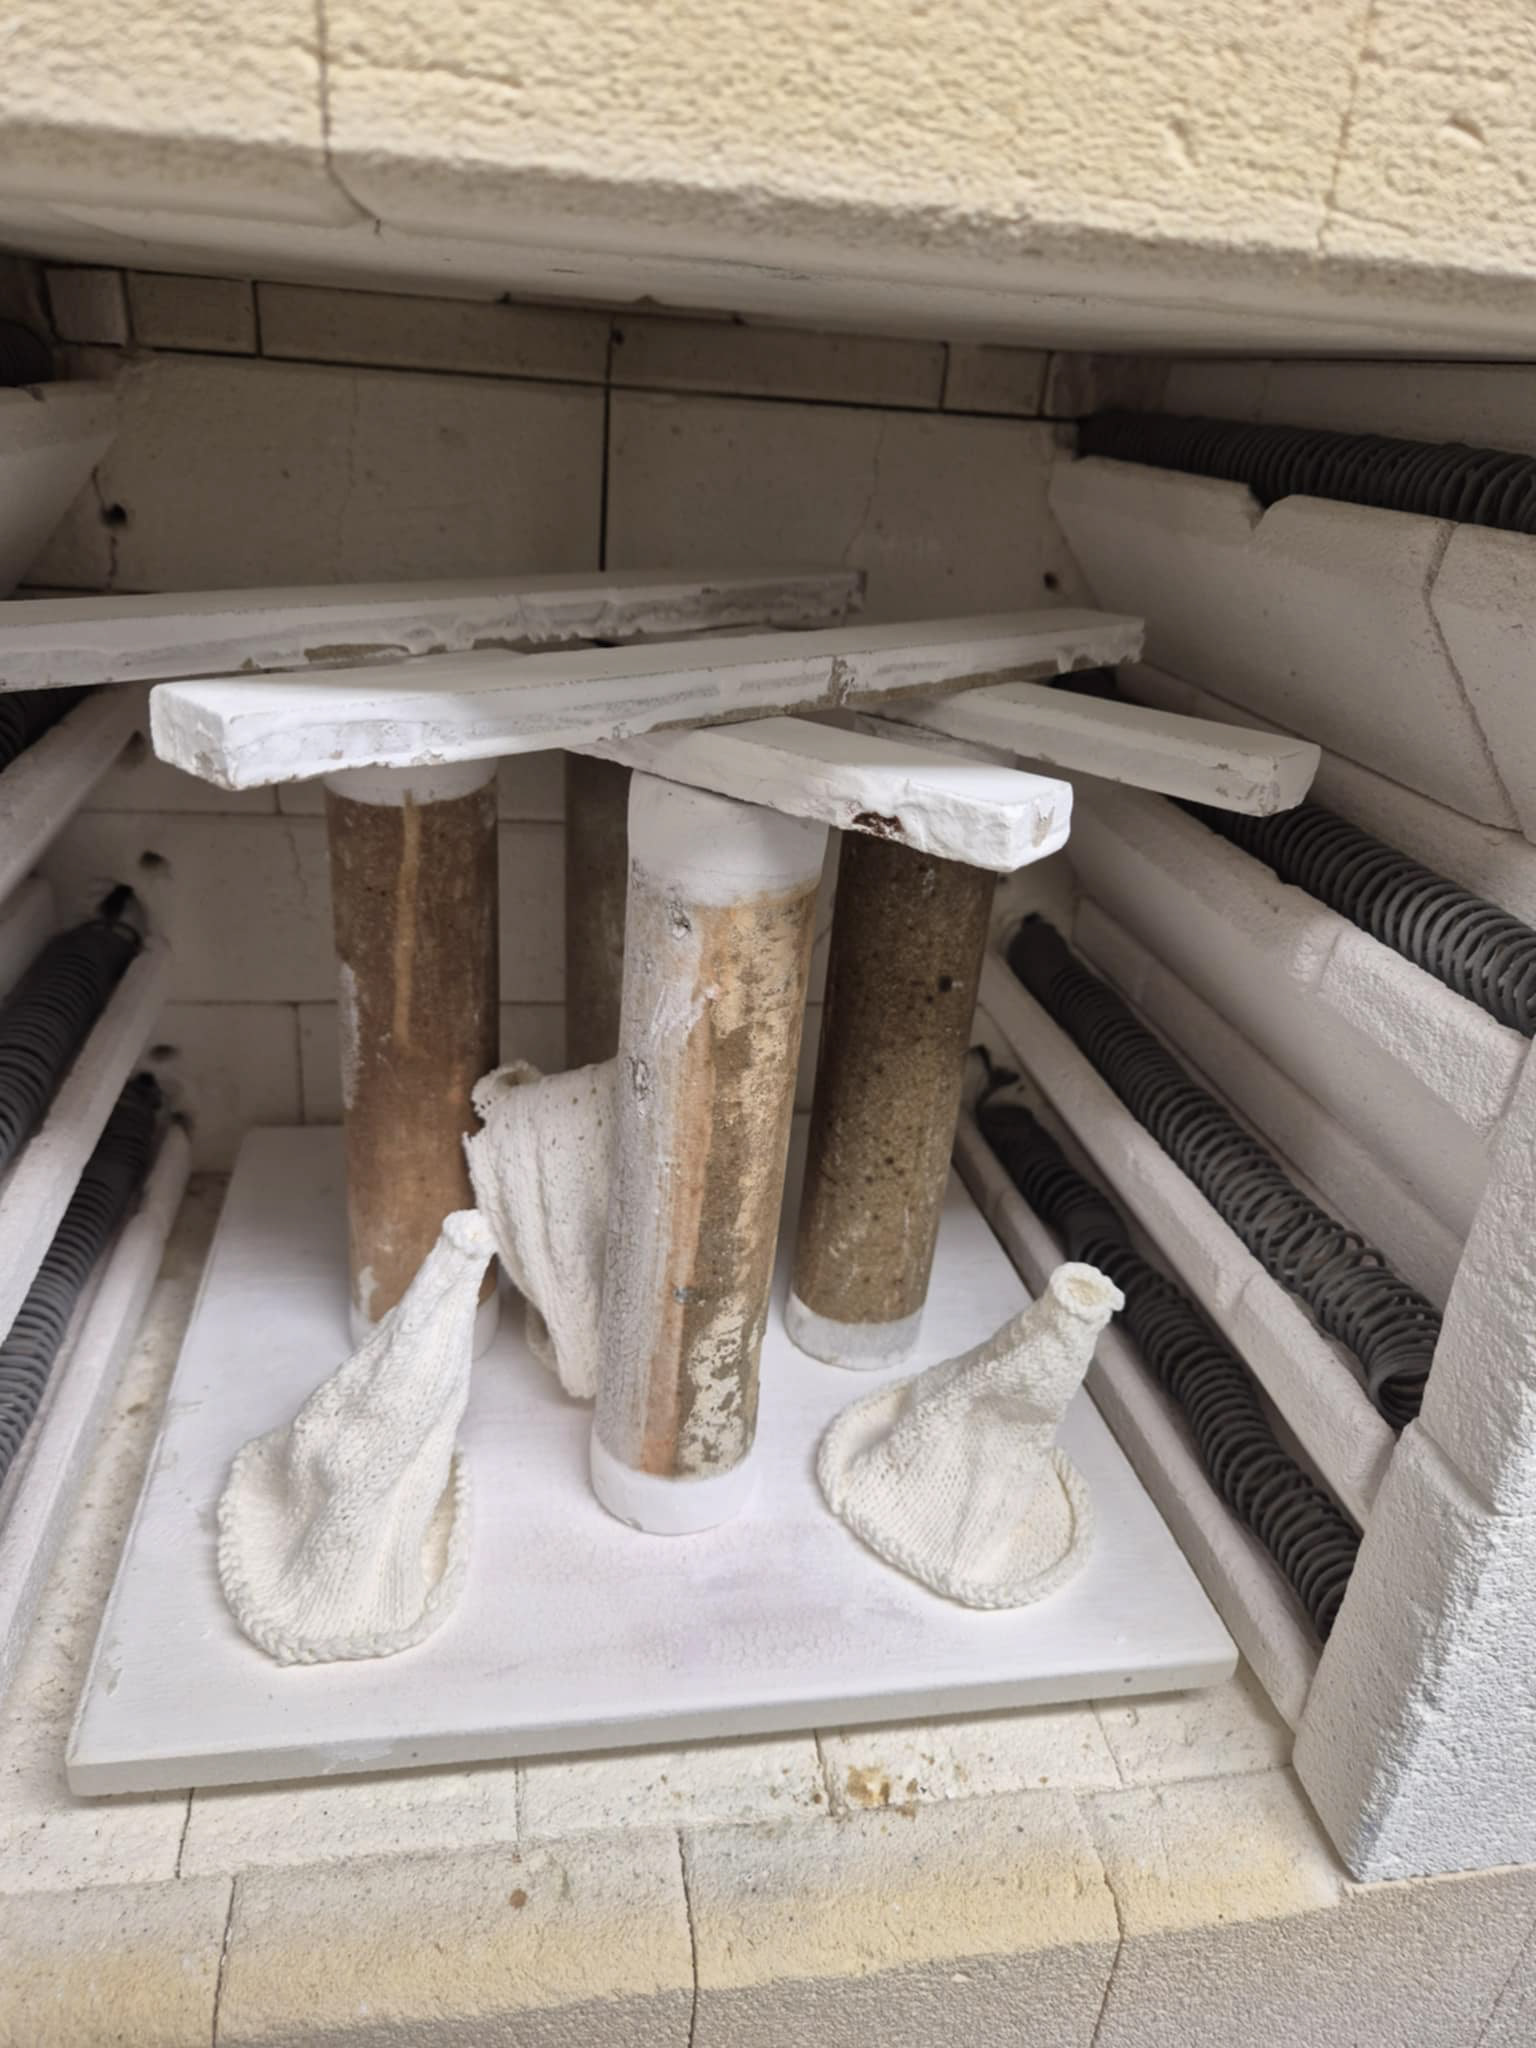
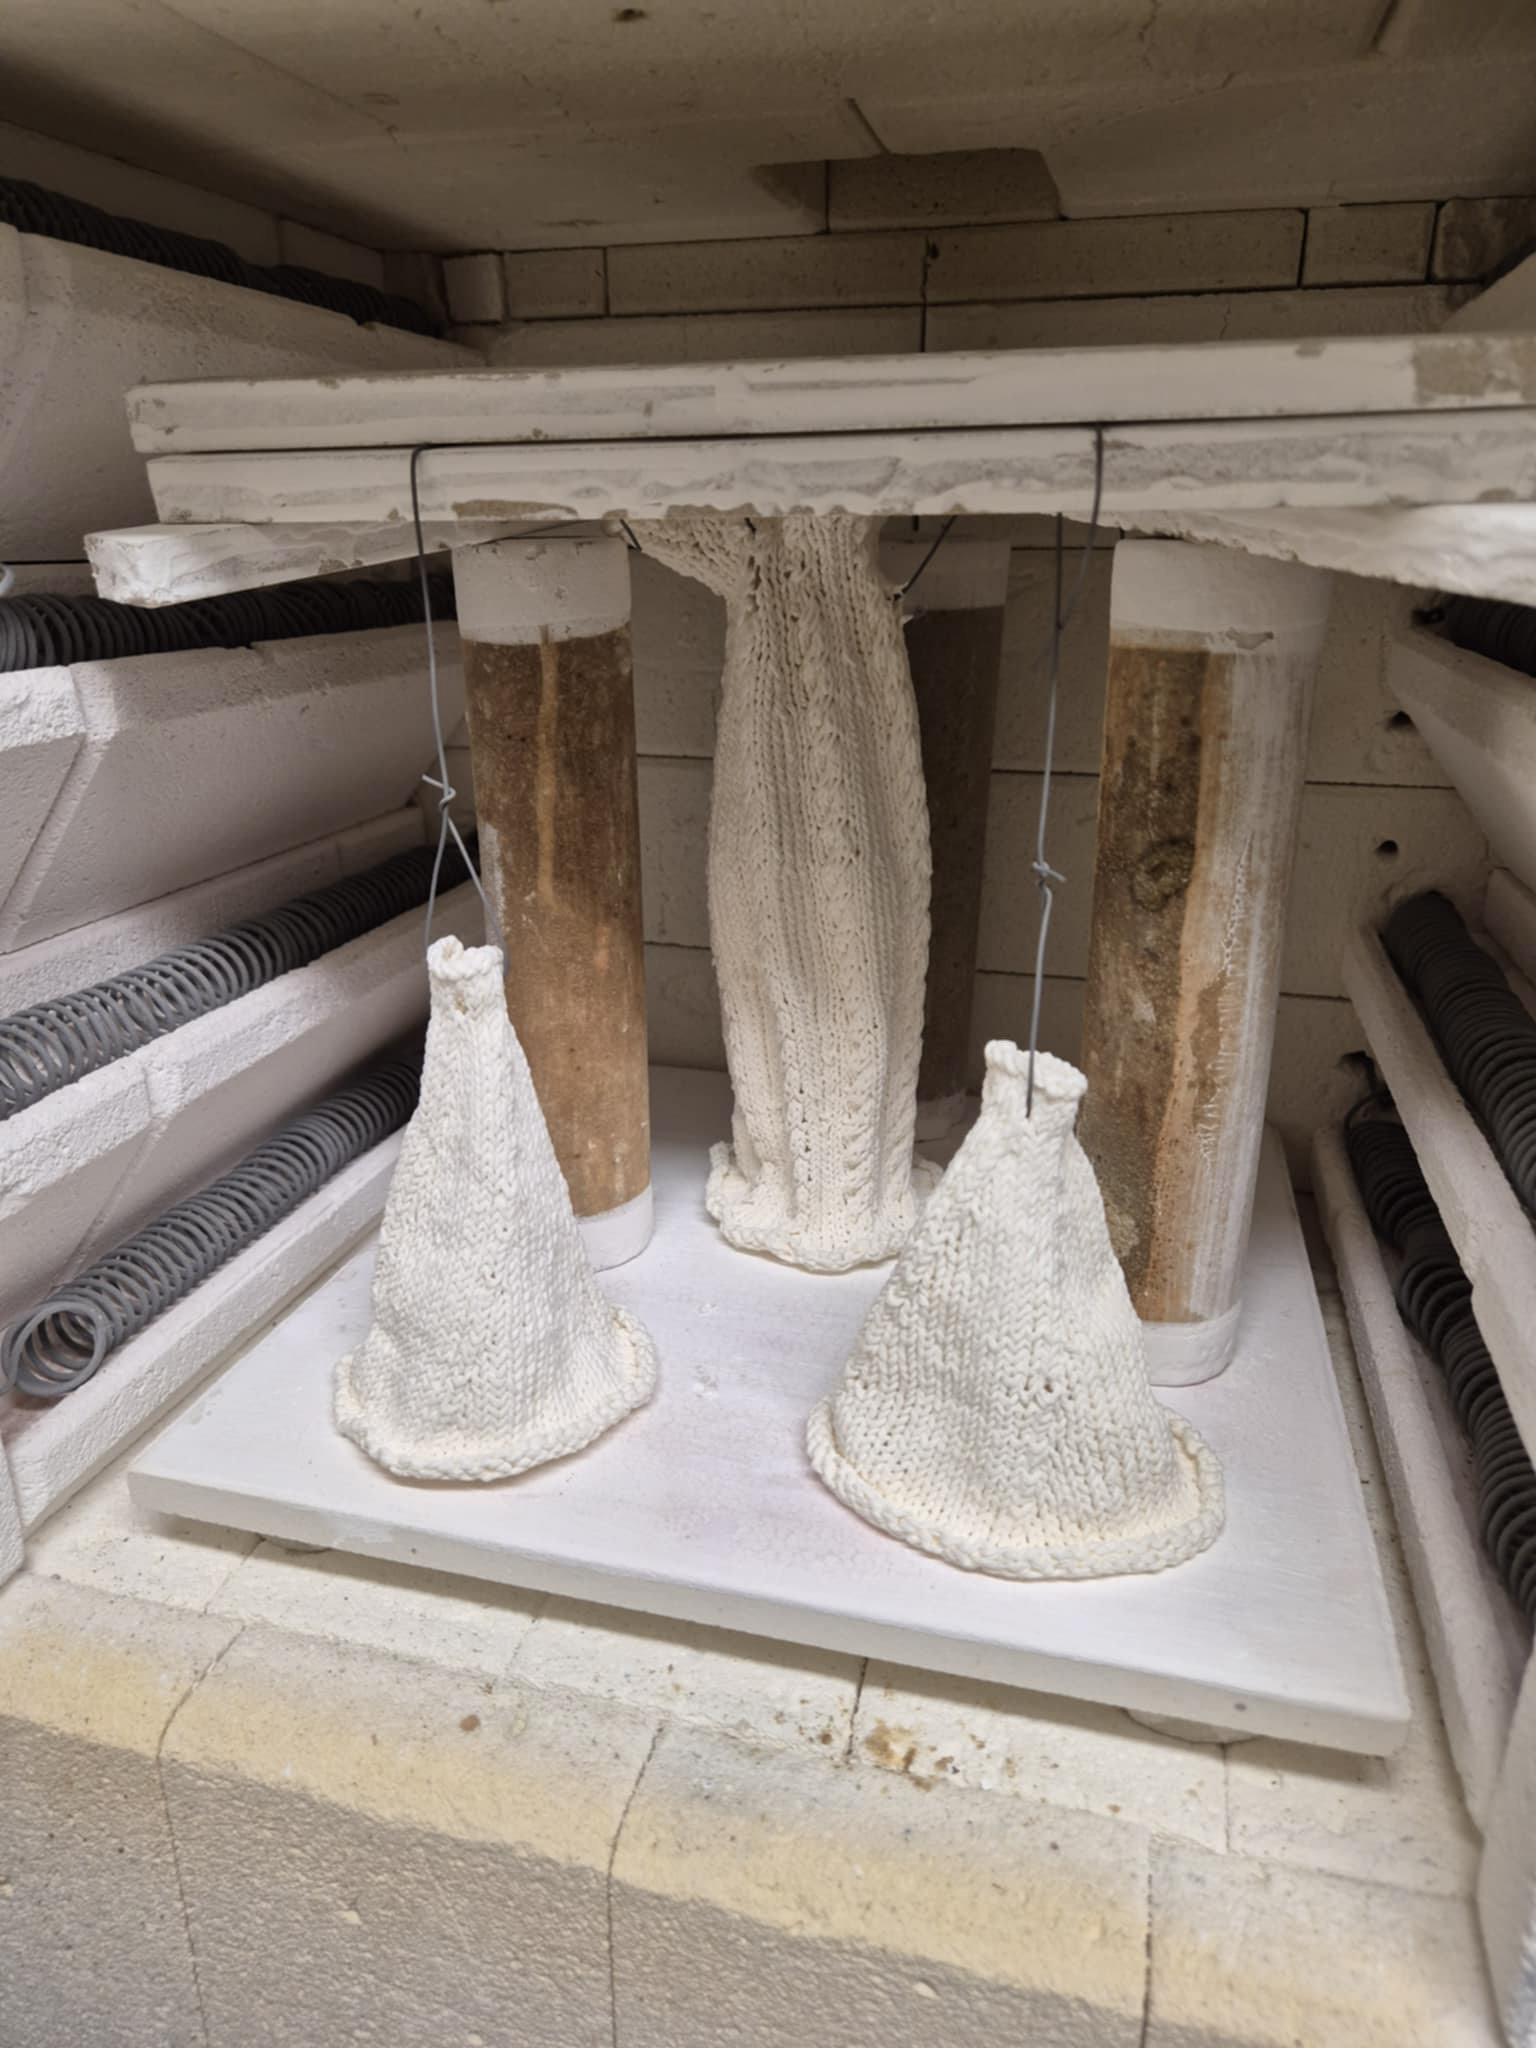
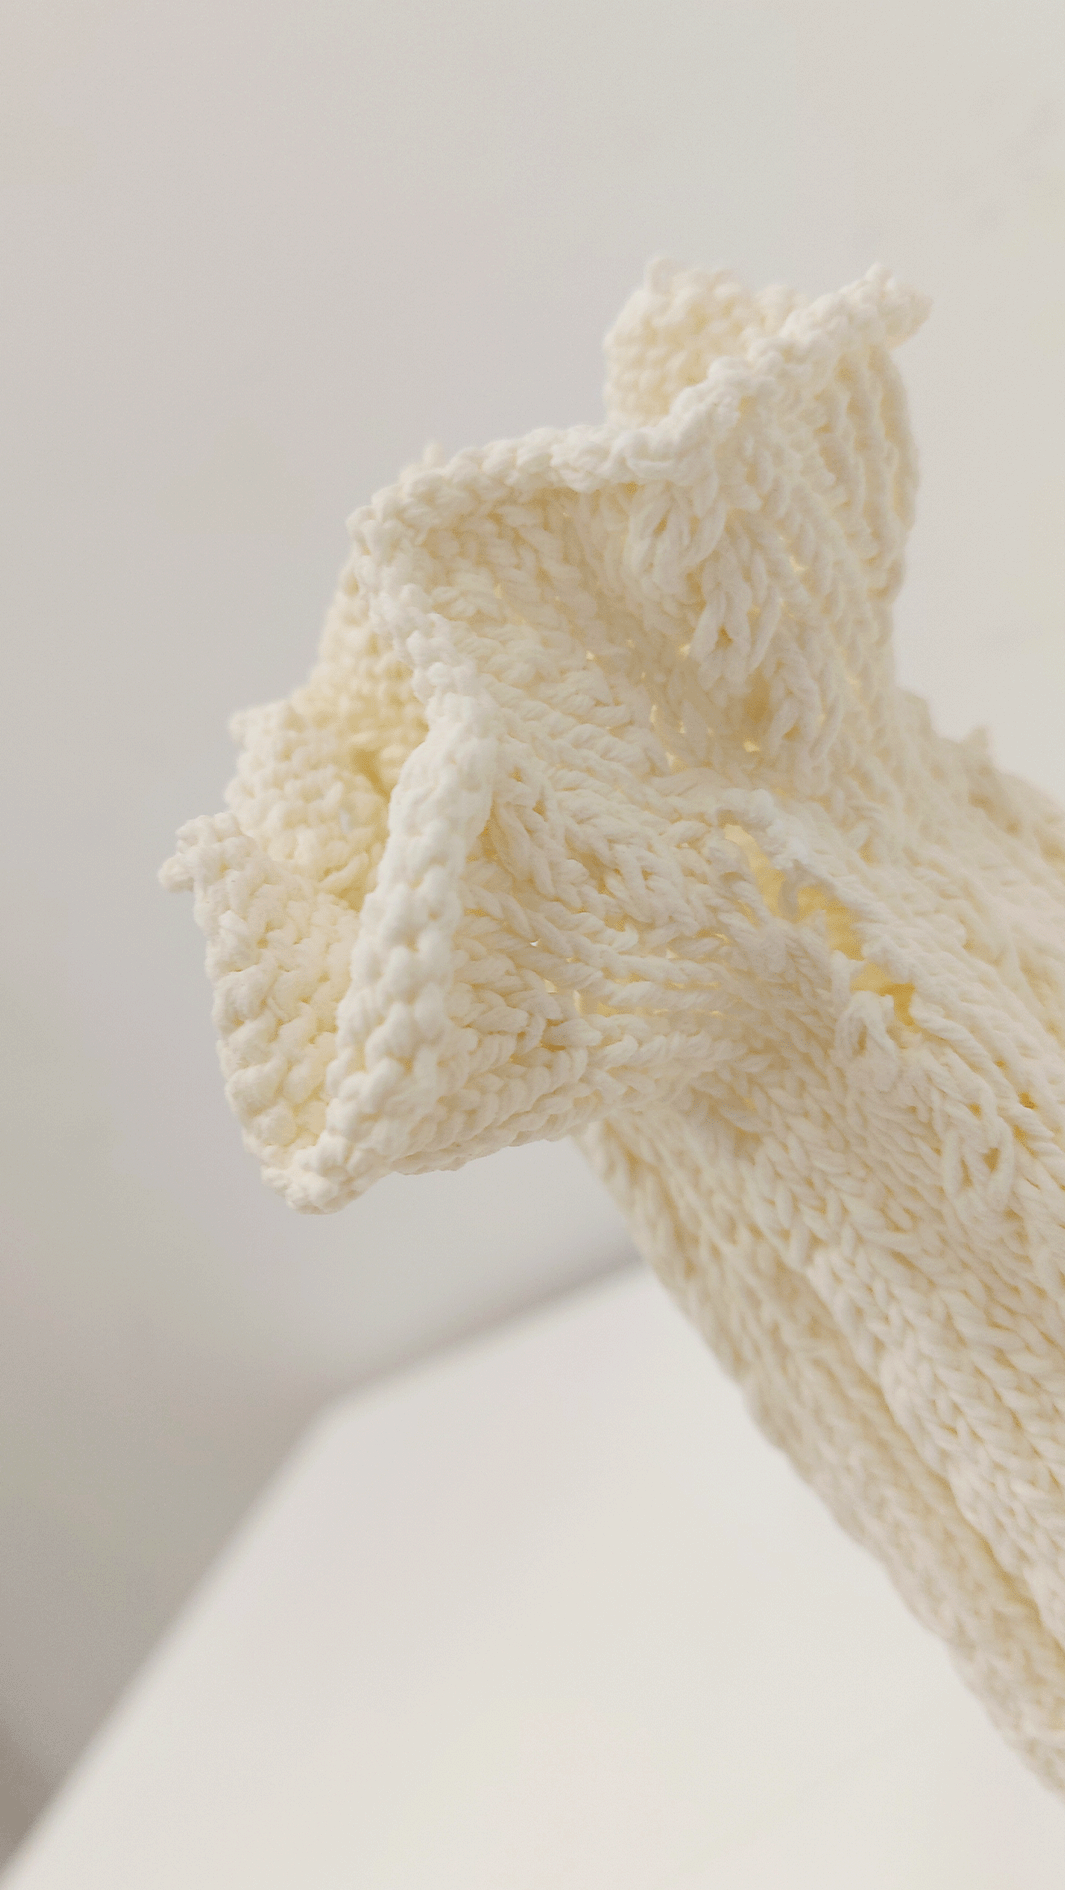
The cabled ceramic piece took three iterations to get to the final outcome. The first ceramic piece fell on another piece of work during the firing, the piece had been bisque fired first as I wanted to see if I could sand down some of the areas on the base of the piece where the slip had pooled. However, after taking the piece out I was advised against it by Rudi the ceramic technician and put the piece straight in to be put in the stoneware kiln. As the bottom of the work was slightly scrunched while drying, I believe due to the shrinkage and heat of the kiln, the piece fell over. For the second iteration of the cabled piece, props were used in the kiln to ensure it didn't sway to the side, however, the piece just crumpled up and flopped down, similar to the double sided cup shapes. For the third iteration of the cabled piece, I made some holes in the top of the form while it was drying so that wire could be used to prop up the shape in the kiln, this did lead to some slight breakage where the wires moved, however, the piece stayed straight and you could still see the resolution of each stitch.
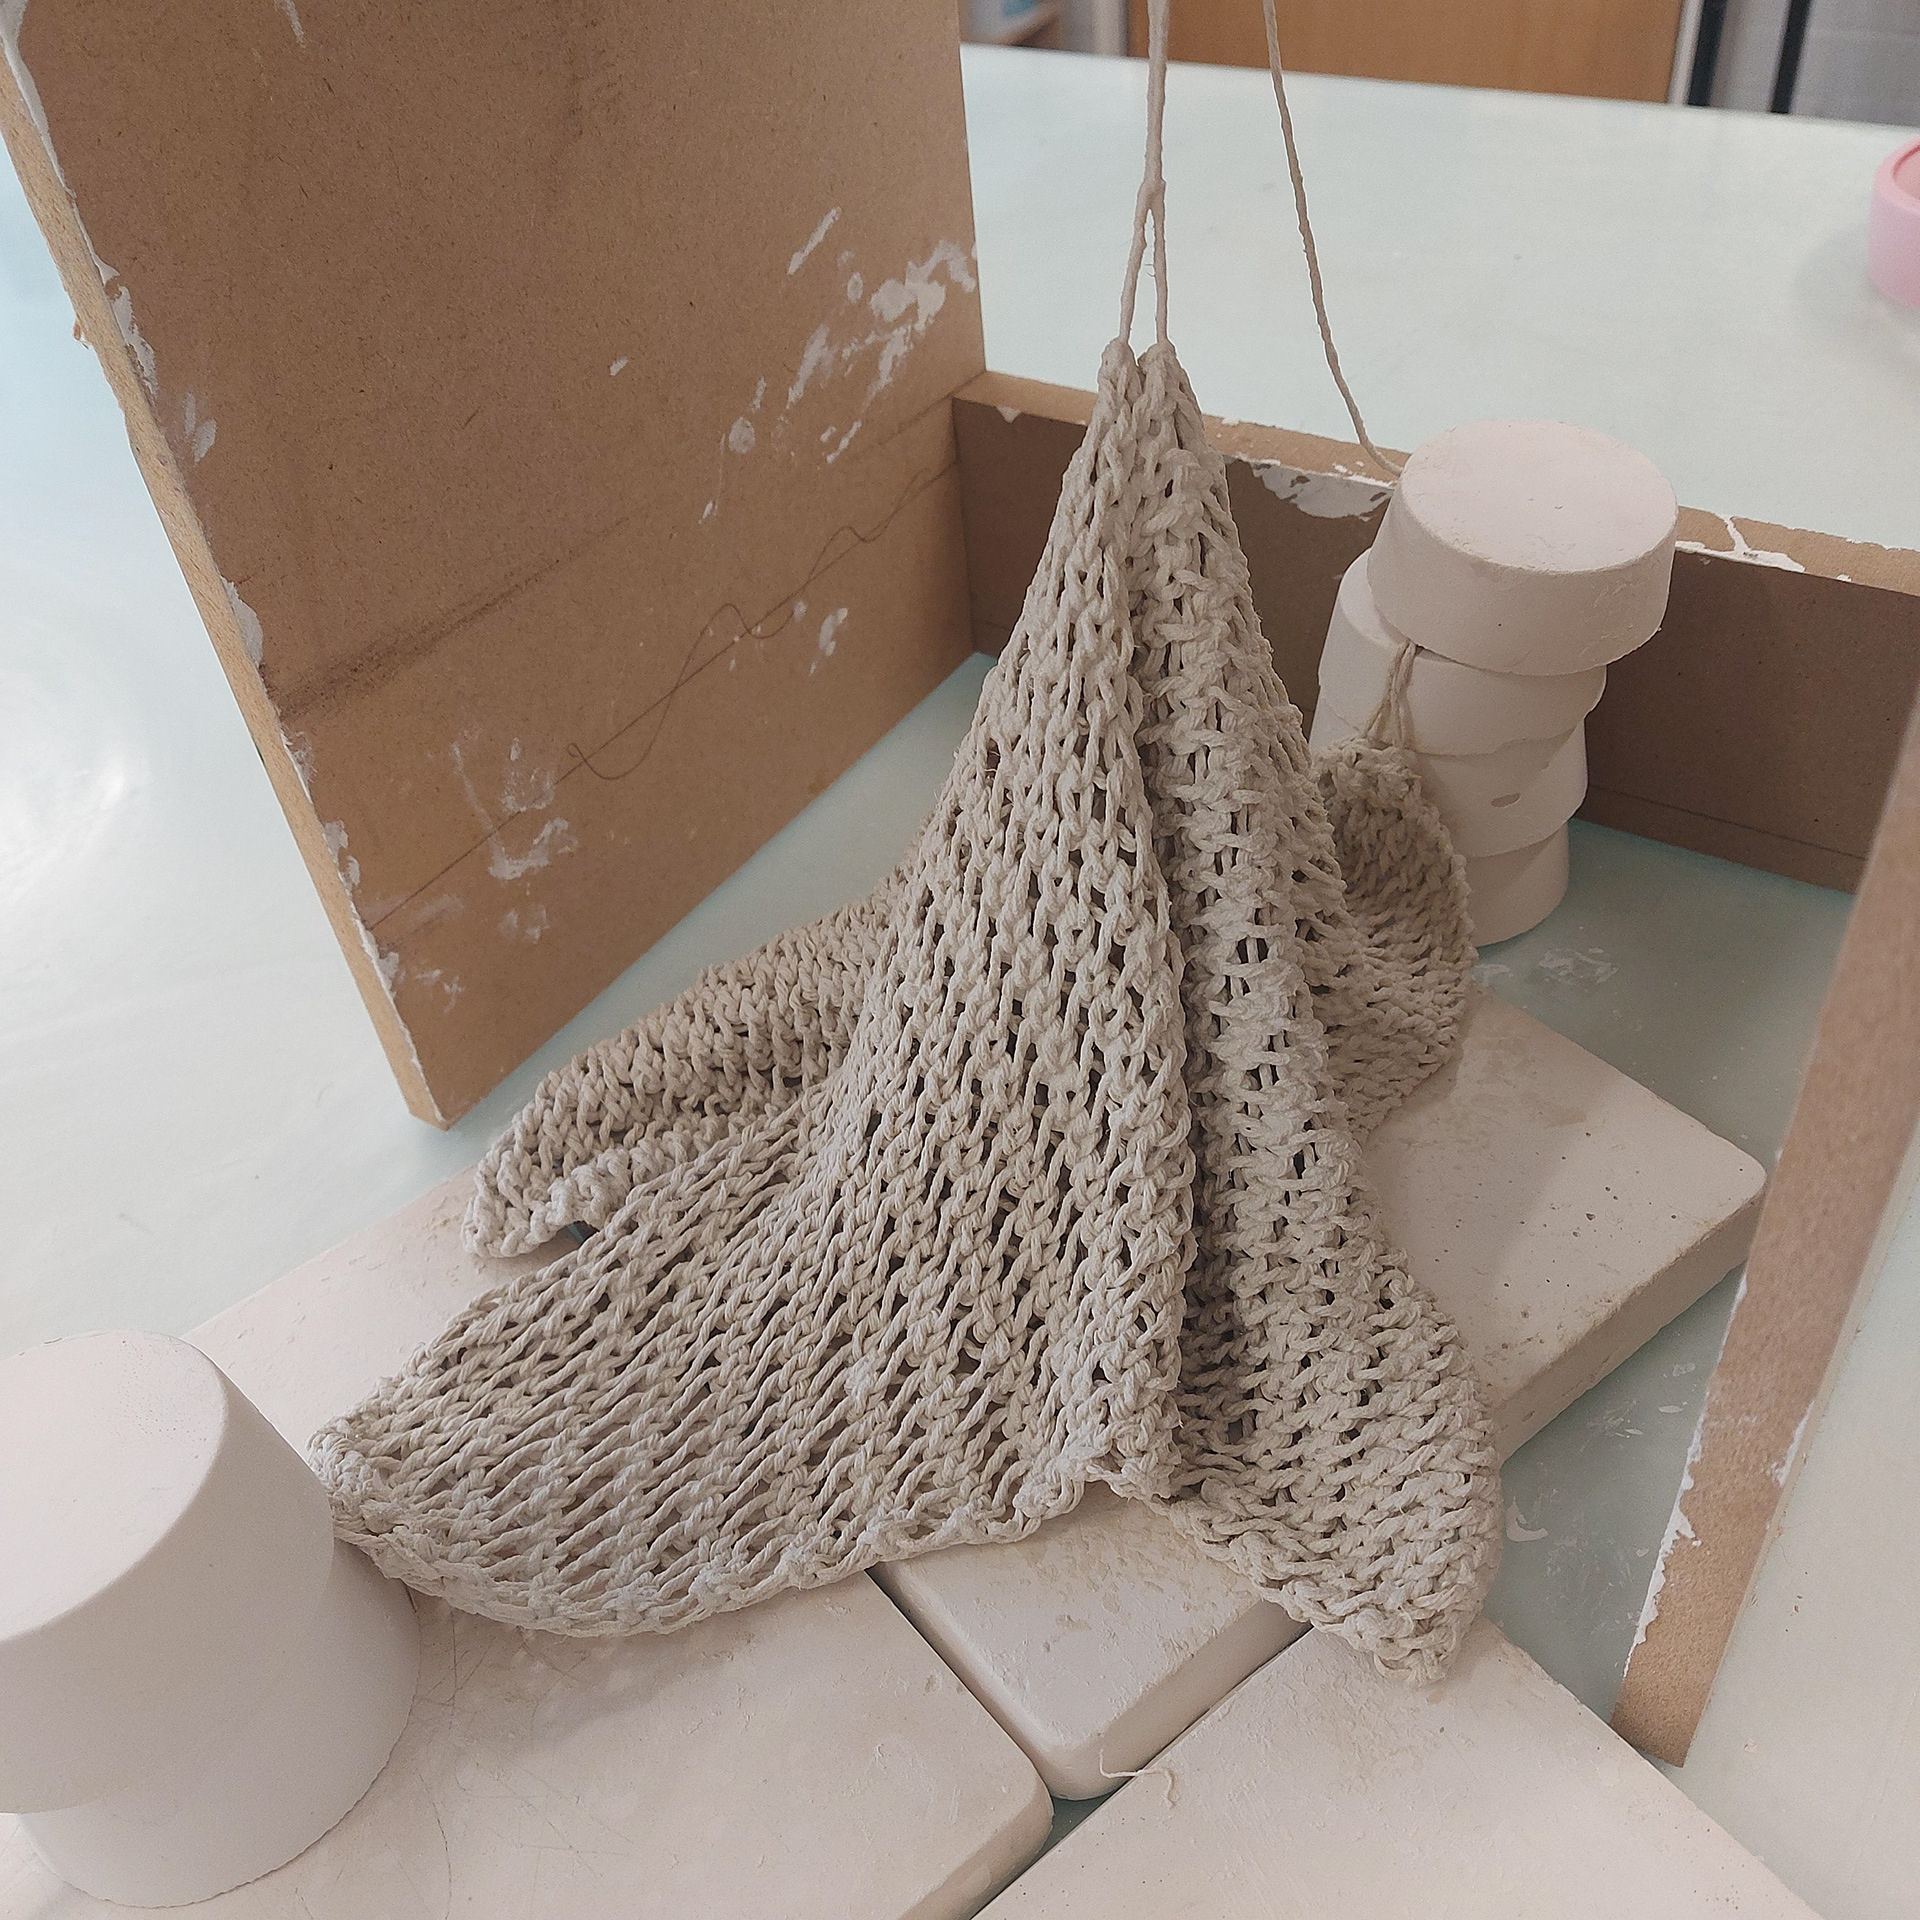
When knitting the cabled pieces to go either side of the ceramic piece, I originally used 2.5mm needles, going off of the size of the stitches that the second iteration had gone down to in the kiln, however, when I took out the third iteration of the cabled piece from the kiln, I found that the stretched out stitches had made the stitches stay slightly bigger. I then used 3mm needles to make the two knitted objects either side of the ceramic piece. Although the height isn't exactly the same, I believe that I used the right needles to create stitches that are a similar size to the ceramic ones and that if I sized up the piece could of been bigger.
Overall, although there is slight breakage within the ceramic piece, I still look at these pieces as a resolved work. If I was to continue the project, I would work towards creating holes within the pattern to hold the piece up. I think that the piece also reflects how the kiln can affect the movement of the knitting under the intense heat, almost guiding it into its own shape. I also got feedback saying that it looks almost moth eaten, the holes look like they've broken away instead of burned.
1
1
2

3


Above is my refined process of creating the slip mixture and preparing the ceramic knitting for firing. This guide shows the steps that I now take to create the more defined ceramic knitting.